How to Configure Apache Web Server in Redhat Linux
Apache is an open-source web server. A web server serves web pages, applications, and documents to clients over the Internet. It uses the HTTP and HTTPS protocols to distribute content. HTTP is the earlier implementation. HTTPS is the upgraded version of HTTP. The main difference between the two is that HTTP sends information in clear text, whereas HTTPS encrypts it before transmission. Based on the configuration, a web server can use any one or both to distribute web content. A web server is also called an HTTP server. This tutorial explains how to install, configure, and run the Apache web (HTTP) server on RHEL Linux.
Objectives:-
- Install and run the Apache server on RHEL Linux.
- Test and verify the Apache server from a client system.
- Configure a single-instance Apache HTTP server.
- Configure Apache to run multiple instances (virtual hosts).
- Configure Apache to use a non-standard webroot.
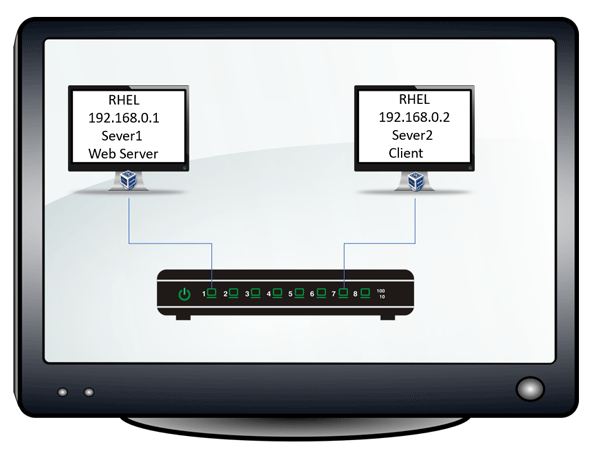
Lab setup
You need two systems for this lab. One of them must be an RHEL system. Another system can use any OS as long as it has a web browser and has connectivity with the first system. You will install and configure the Apache web server on the first system, and use the second system to test and verify it. The following tutorial explains how to set up this lab on VMware Workstation or VirtualBox.
RHCE Practice Lab Setup in VMWare and VirtualBox
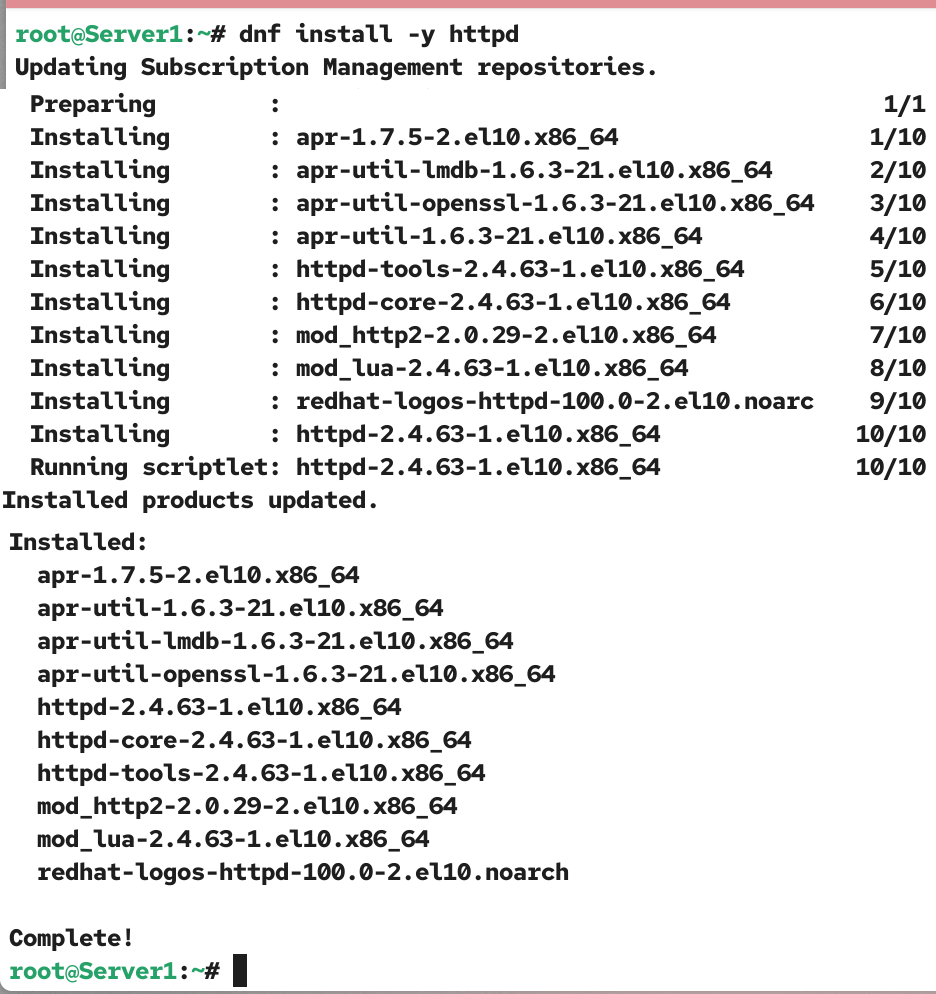
Installing Apache
The httpd package provides the Apache server. The following command installs this package and all its dependencies.
#dnf install -y httpd
If the package installation fails, check that the system is connected to the RHEL repositories. The following tutorial explains how to set up a local repository from the RHEL installation disk to install and manage software on a local system without using the Internet or connecting to the RHEL repositories.
How to Configure Local Repository in RHEL Linux
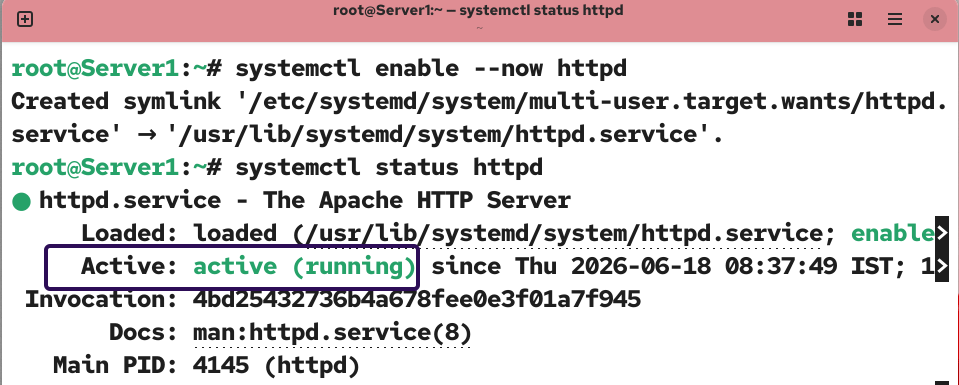
Starting and managing Apache
The httpd package provides the httpd service. The httpd service runs and controls the Apache web server. After installing the httpd package, use the following command to start and enable the httpd service at boot time.
#systemctl enable --now httpd
The following command displays the current status of this service. To use the Apache web server, this service must be active and running. Since you have not edited or updated any configuration file so far, there should be no error at this point.
#systemctl status httpd
Additional commands for managing the httpd service
The following command starts the httpd service.
#systemctl start httpd
The following command stops the httpd service.
#systemctl stop httpd
The following command restarts the httpd service.
#systemctl restart httpd
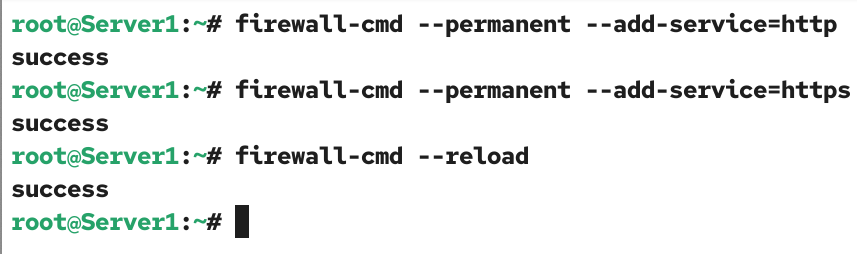
Firewall configuration for Apache
The default firewall configuration blocks incoming connections for the Apache web server. Add the httpd service to the firewall’s allowed services list. As explained earlier, Apache can distribute web content over HTTP, HTTPS, or both. Based on your setup or requirement, you can open the firewall for one or both. The following command opens the firewall for HTTP.
#firewall-cmd --permanent --add-service=http
The following command opens the firewall for HTTPS.
#firewall-cmd --permanent --add-service=https
Reload the firewall to apply the change.
#firewall-cmd --reload
Testing and verifying Apache
To test and verify that the Apache web server is active and accepting incoming connections, follow these steps.
Run the ip addr command and note down the server’s IP address.
#ip addr
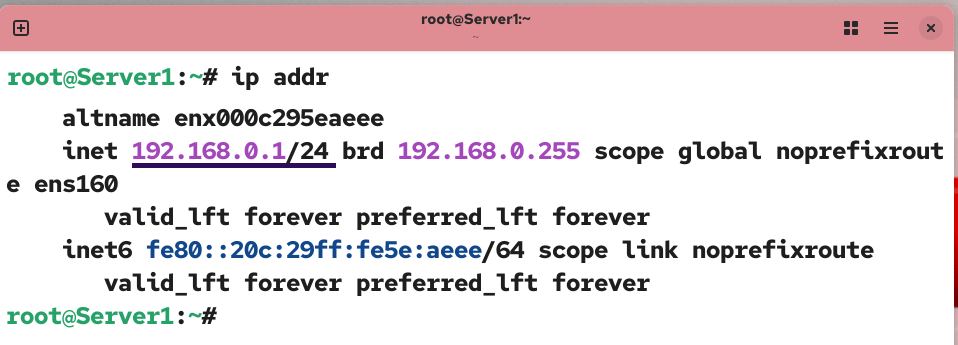
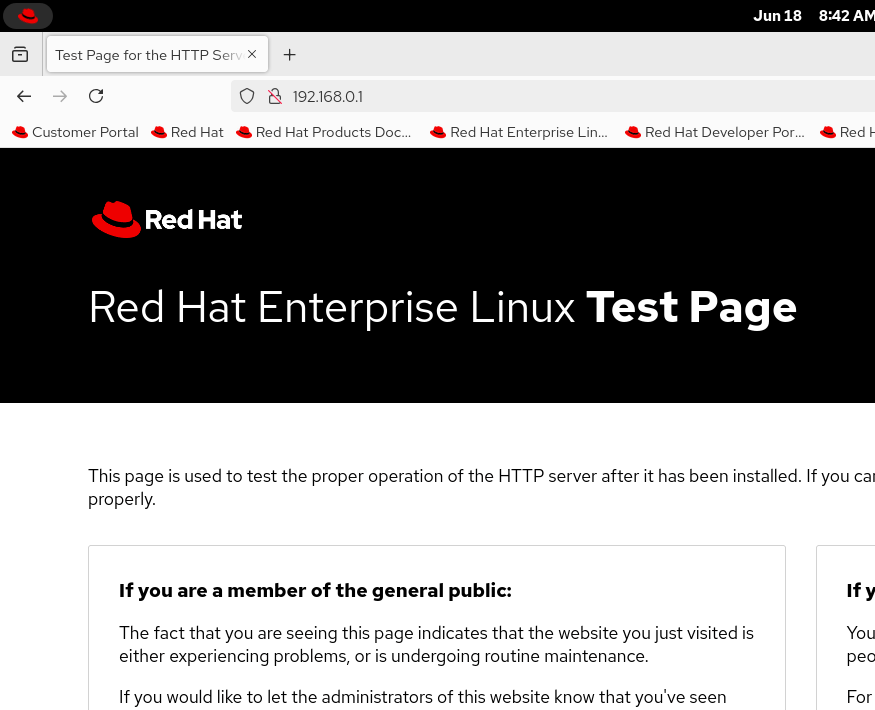
Open a web browser, type the server’s IP address in the address bar, and press Enter. If it displays the Red Hat Enterprise Linux Test Page, it verifies that the Apache web server is up and running.
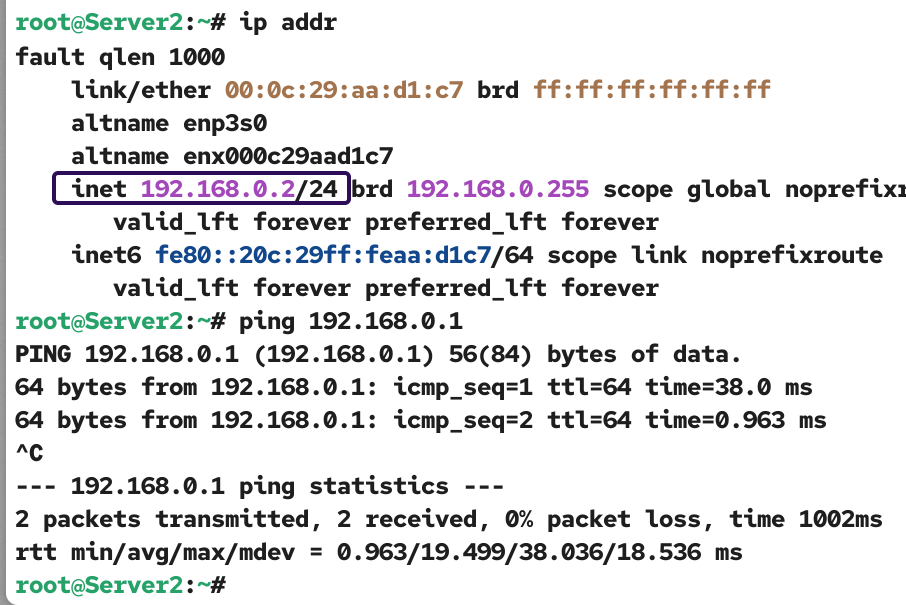
To verify that clients can access the web server, you can perform the same steps on the second or client system. On the client system, test connectivity with the server.
#ping [web server IP]
If the client is connected to the web server, open a web browser and access the following URL. If it displays the Red Hat Enterprise Linux Test Page, it verifies that the Apache web server is up and running and that the client can access it.
http://[web server IP]
Configuring a single-instance Apache HTTP server
A single-instance Apache web server setup is ideal when you want to deliver the same content to all domains hosted on it. This setup is straightforward and requires minimal or no configuration if you are comfortable with the defaults.
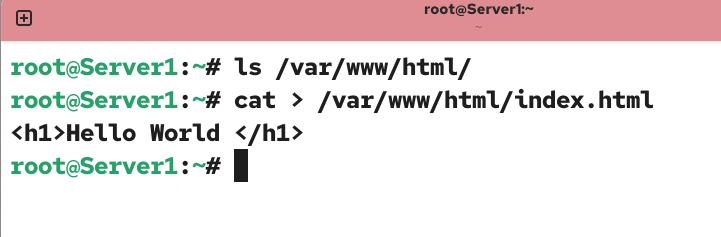
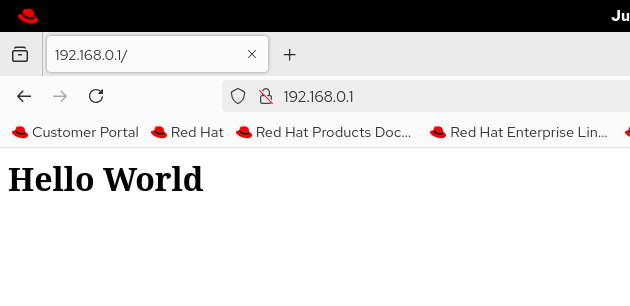
To run the Apache web server with the default configuration, put your web content in the /var/www/html directory. The /var/www/html is the default web root directory. When you access a web server running with the default configuration, it checks this directory to serve the requested document. If you access the server IP without specifying a file name, it checks for the index.htm or index.html file in this directory. If this directory contains the file, return that file. If not, it returns the default test page. By default, this directory contains nothing. Because of this, when you accessed the server’s IP address from the web browser in the previous step, it displayed the default test page. To verify this, create an index.html file in this directory.
#cat > /var/www/html/index.html
>h1>Hello World>/h1>
Ctrl+D
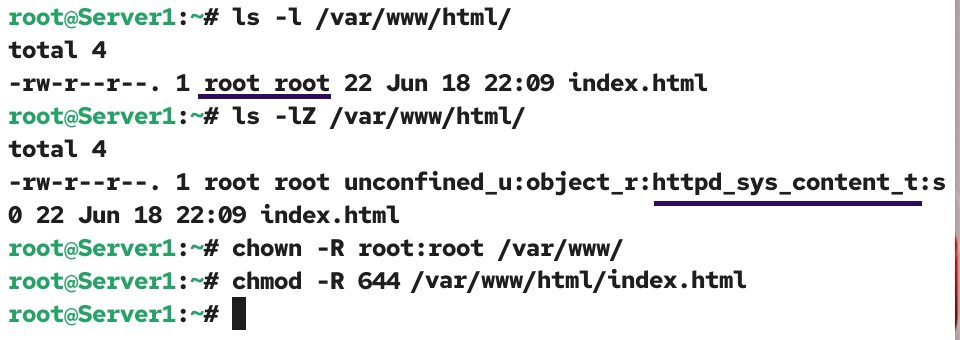
Since Apache serves content from this directory, its content must have read permission for all users. The content owner can be either the root user or any superuser. All content in this directory must have the httpd_sys_content_t SELinux context. The default file permission automatically fulfills these requirements. Any file or directory you create in this directory automatically gets read permission for all users and has the SELinux context set to httpd_sys_content_t. You can use the following commands to view and adjust these settings.
The following command displays the owner, and default file permissions, and other related settings for all content stored in the /var/www/html/ directory.
#ls -l /var/www/html/
The following command sets the ownership to the root user.
#chown -R root:root /var/www/
The following command changes the default file permissions to grant read access to all users on the index.html file.
#chmod 644 /var/www/html/index.html
The following command displays the SELinux contexts of all content stored in this directory.
#ls -lZ /var/www/html/
The following command changes the SELinux context type of all content stored in this directory.
#chcon -R -t httpd_sys_content_t /var/www/html/
Access the server’s IP address again in the client system's web browser.
http://[web server IP]
Updating / customizing configuration
The /etc/httpd/conf/httpd.conf is the main configuration file. It allows you to customize and run the Aache web server to fulfill your specific requirements. Create a backup and open it for editing.
#cp /etc/httpd/conf/httpd.conf /etc/httpd/conf/httpd.conf.bk
#vim /etc/httpd/conf/httpd.conf

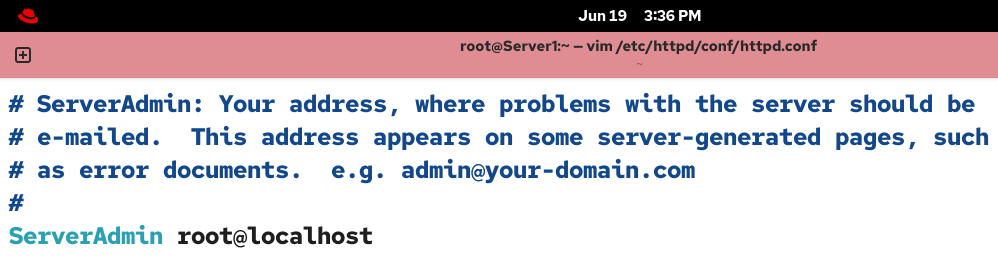
The ServerAdmin directive configures the email address Apache uses to send error messages and notifications. The default is root@localhost. If you keep the default, the local system's root account receives emails. Specify the email address of the administrator who manages it.
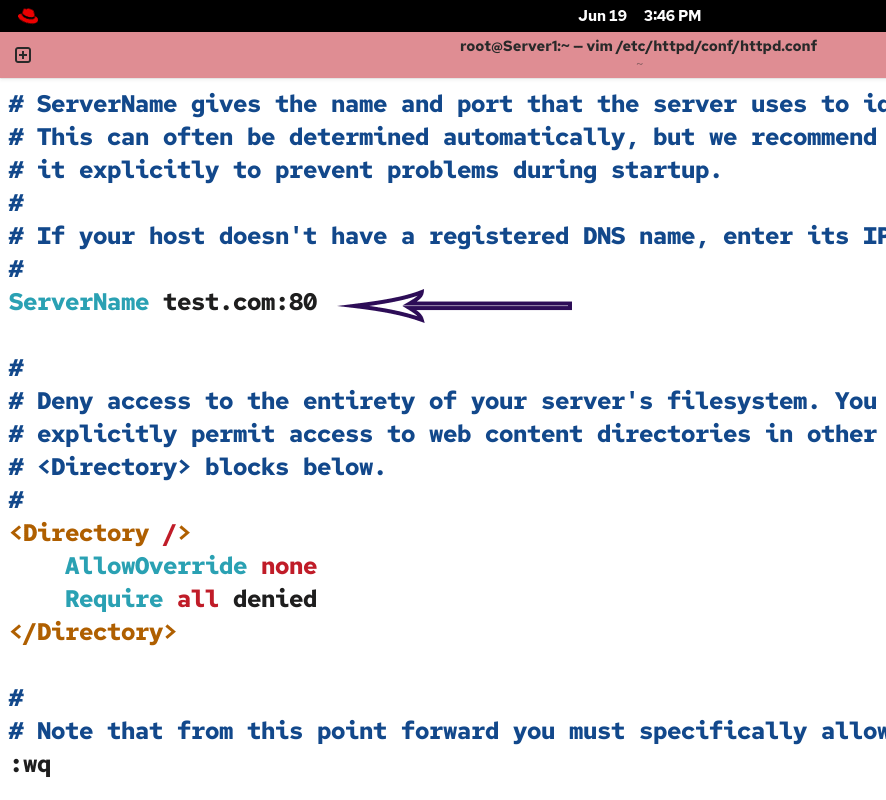
The ServerName directive defines the name and port of your web server. You have three options for this.
- Use the default
- Set a fully qualified domain name (FQDN)
- Set an IP address
Use the default
By default, this directive is commented. If you keep it commented, the server picks the hostname as the Servername and uses the default HTTP port (80). If you run a single instance of Apache, it poses no issues. However, if you configure Apache to run multiple instances (virtual hosts), you will get the following message when you check this file for errors or restart the httpd service.
AH00558: httpd: Could not reliably determine the server’s fully qualified domain name using fe80::20c:29ff:fe5e:aeee%ens160. Set the 'ServerName' directive globally to suppress this message.

Set a fully qualified domain name (FQDN)
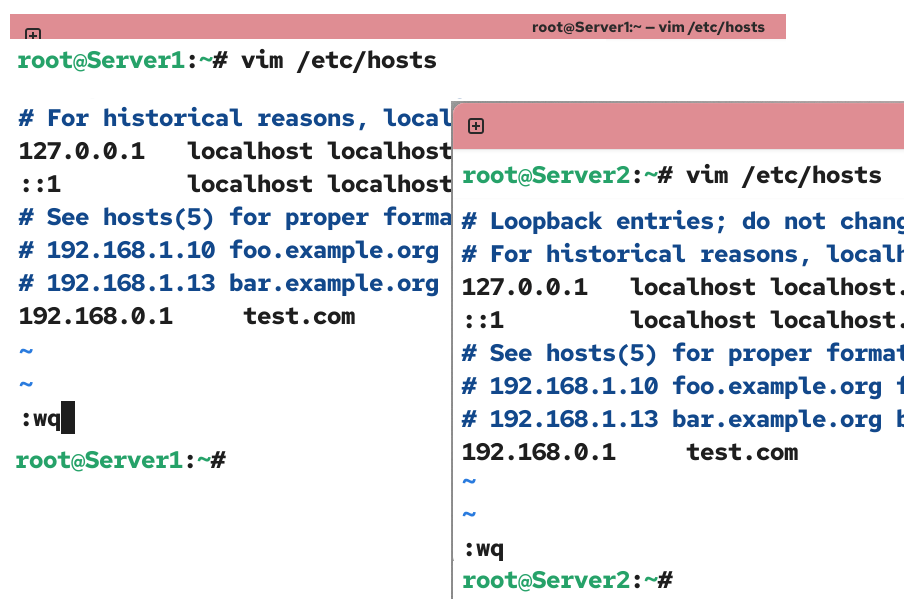
You can set the FQDN name of your web server. It is the recommended option. However, it requires DNS setup. In a real-world scenario, a web server is usually set up after DNS. If you have an FQDN name for your web server and a DNS server that resolves it to an IP address, specify it in this directive. In the lab environment, you can use the /etc/hosts file to resolve the FQDN names. The /etc/hosts file maps FQDN names to their IP addresses on the local system. The system uses this file before sending queries to the DNS. If this file has an entry for a name, the system uses that and does not send a query for that name to DNS. Set an FQDN name for your web server.
ServerName test.com:80
Replace test.com with the name you want to use for your web server. 80 is the default HTTP port. To run Apache on a different port, specify that port’s number and save the file.
You need to add an entry for this name in the /etc/hosts file on both the server and client systems.
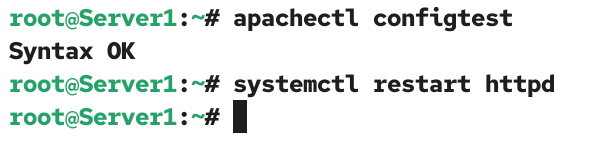
The apachectl configtest command checks the /etc/httpd/conf/httpd.conf file for syntax errors. Run this command every time you update this file. Any change you make to the /etc/httpd/conf/httpd.conf file applies the next time you start the httpd service. To apply them immediately, restart the httpd service.
#apachectl configtest
#systemctl restart httpd
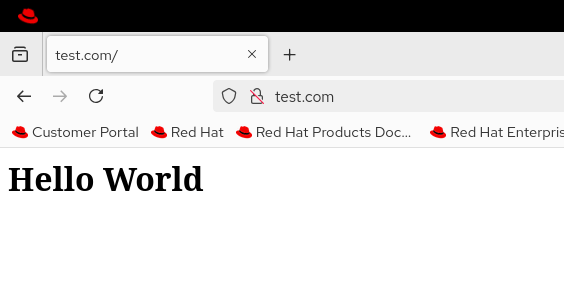
To verify the ServerName directive setting, access the web server using the name you set in this directive from the client system.
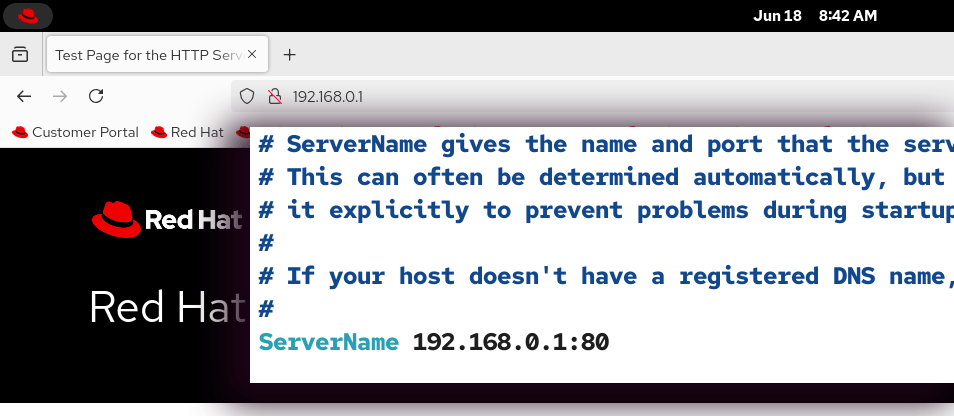
Set an IP address
Instead of an FDQN name, you can specify your server’s IP address. If you use an IP address, you do not need DNS setup or update the /etc/hosts file. The only downside of this approach is that it does not let you access the web server by its name.
Configure Apache to run multiple instances (virtual hosts)
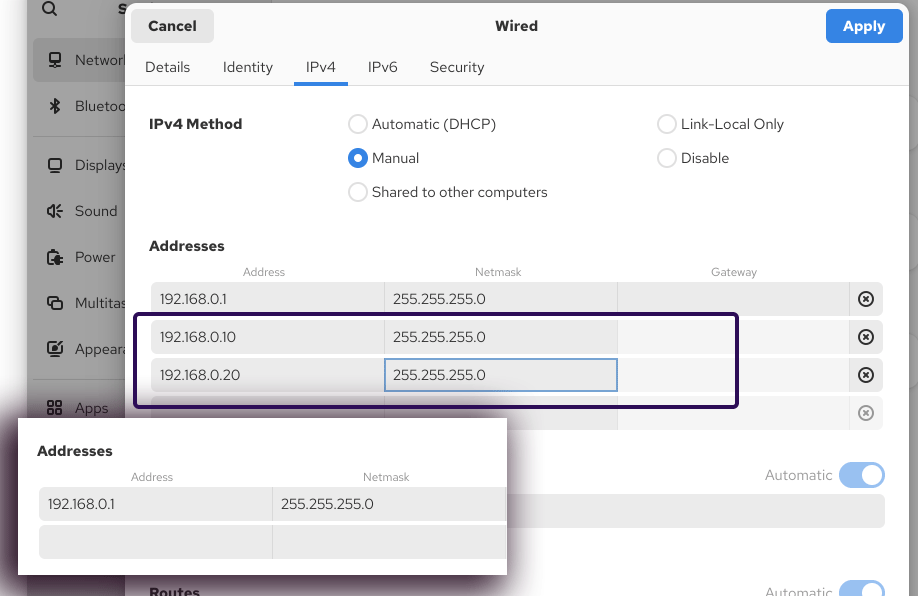
This setup is ideal for running a web server that hosts multiple websites. For each website, you configure a virtual host. Each virtual host runs a separate Apache instance and defines and controls settings for its website only. The following section configures Apache to host two websites: abc.com and xyz.com. It uses the IP address 192.168.0.10 for abc.com and 192.168.0.20 for xyz.com.
Open the IPv4 settings for the Ethernet card connected to the network. Add two new IP addresses, one for each website.
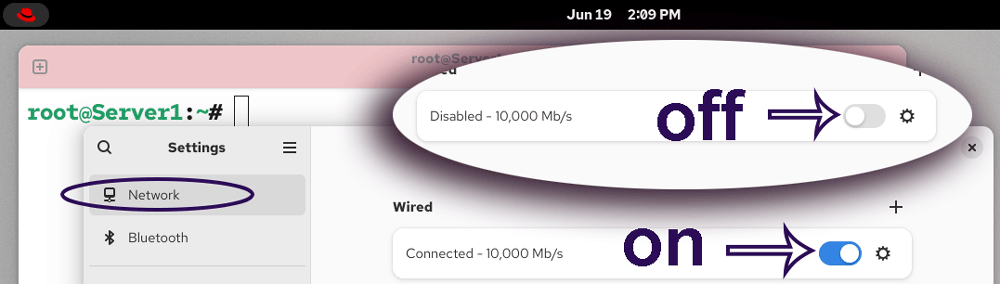
Restart the Ethernet card to apply the change.
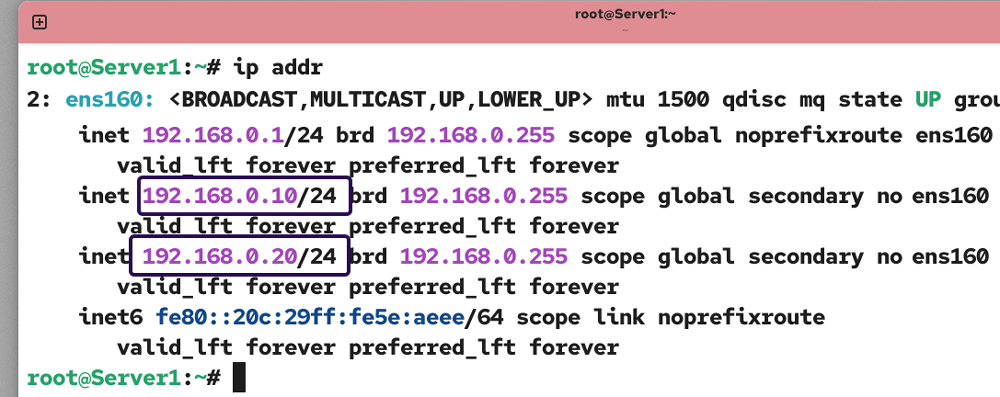
Verify the newly added IP addresses.
#ip addr
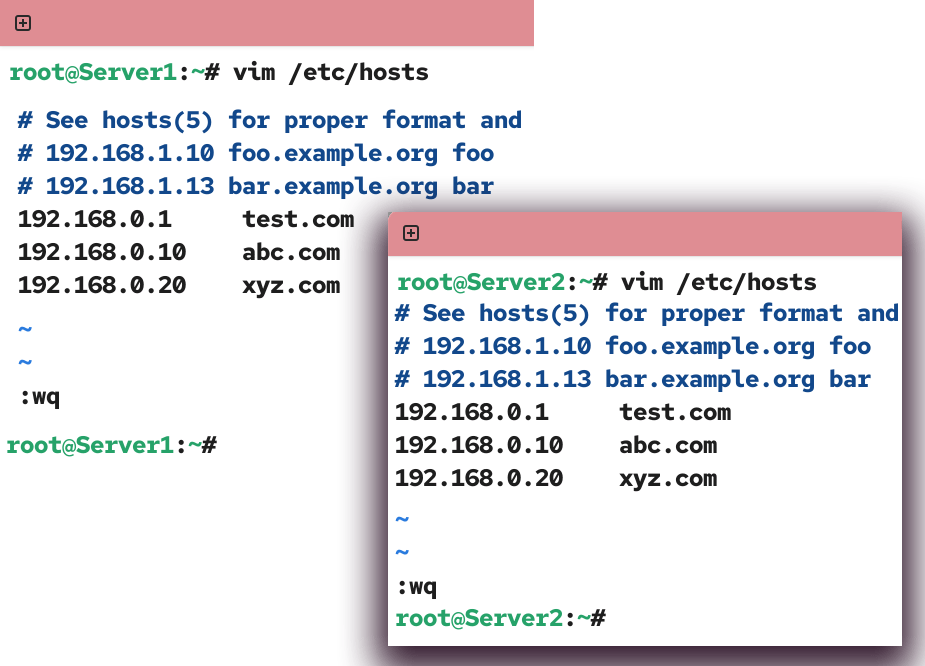
Update the /etc/hosts files on both the server and the client. Add entries for both websites.
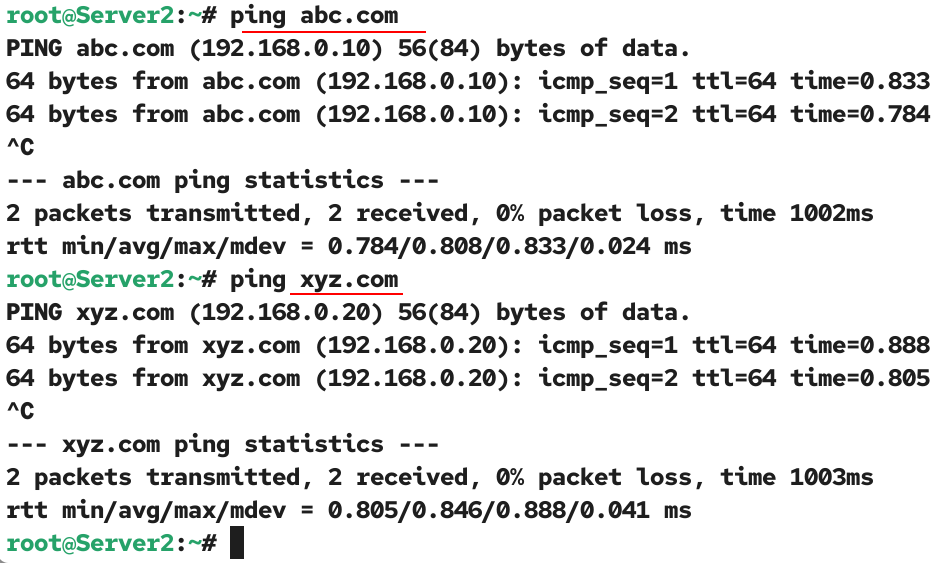
Test connectivity from the client system. Use domain names instead of IP addresses to test connectivity.
#ping abc.com
#ping xyz.com
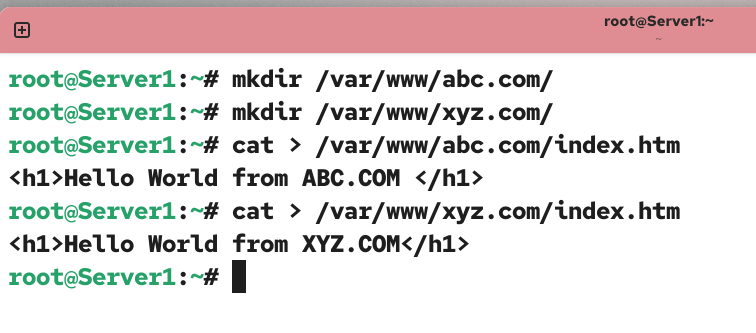
Create two web root directories in the /var/www directory, one for each website. Put an index.htm file in each web root directory for testing.
#mkdir /var/www/abc.com
#mkdir /var/www/xyz.com
#cat > /var/www/abc.com/index.htm
<h1>Hello World from ABC.COM</h1>
#cat > /var/www/xyz.com/index.htm
<h1>Hello World from XYZ.COM</h1>
Open the /etc/httpd/conf/httpd.conf and make the following changes.
#vim /etc/httpd/conf/httpd.conf

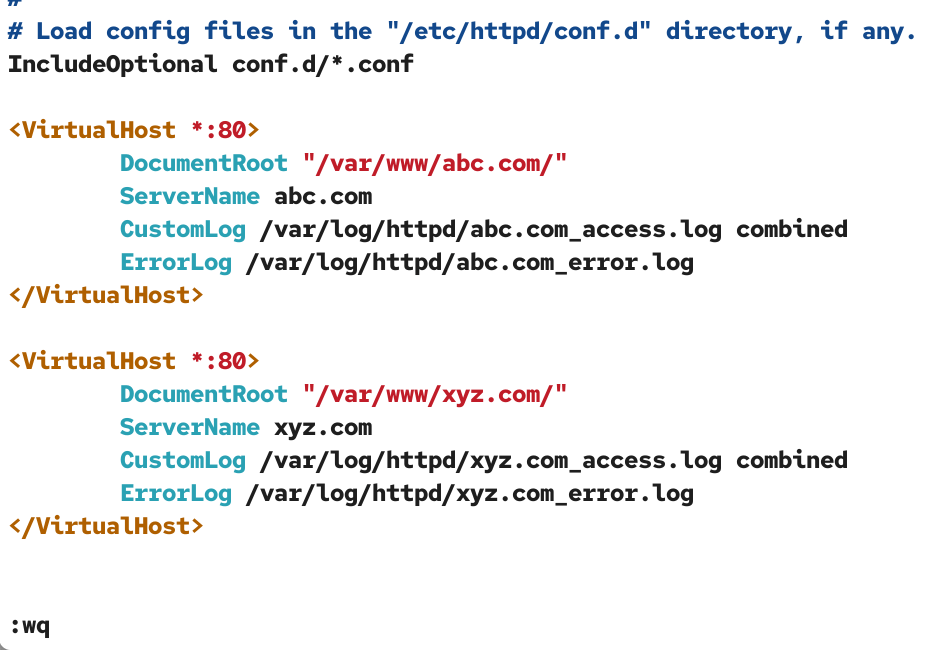
Configure the ServerName directive to use either an FQDN or an IP address, then add the following configuration at the end of the file and save it.
<VirtualHost *:80>
    DocumentRoot "/var/www/abc.com/"
    ServerName abc.com
    CustomLog /var/log/httpd/abc.com_access.log combined
    ErrorLog /var/log/httpd/abc.com_error.log
</VirtualHost>
<VirtualHost *:80>
    DocumentRoot "/var/www/xyz.com/"
    ServerName xyz.com
    CustomLog /var/log/httpd/xyz.com_access.log combined
    ErrorLog /var/log/httpd/xyz.com_error.log
</VirtualHost>
The <VirtualHost *.80> is the opening tag for the directive. The closing tag for this directive is </VirtualHost *.80>. All settings defined between these two tags apply only to this virtual host. Each virtual host or website needs this directive separately. For example, to host three websites, you need to add this directive three times, one for each website.
The DocumentRoot option defines the web root directory for the website. You upload all content related to this website to the directory. External users who access this website via their browsers cannot access any files outside this directory.
The ServerName option defines the FQDN name of the website. This name must be resolved to an IP address via DNS or the /etc/hosts file.
The CustomLog option defines the access log file for this website.
The ErrorLog option specifies the error log file for this website.
Check the file for syntax errors and restart the httpd service.
#apachectl configtest
#systemctl restart httpd
Verifying virtual hosts configurations
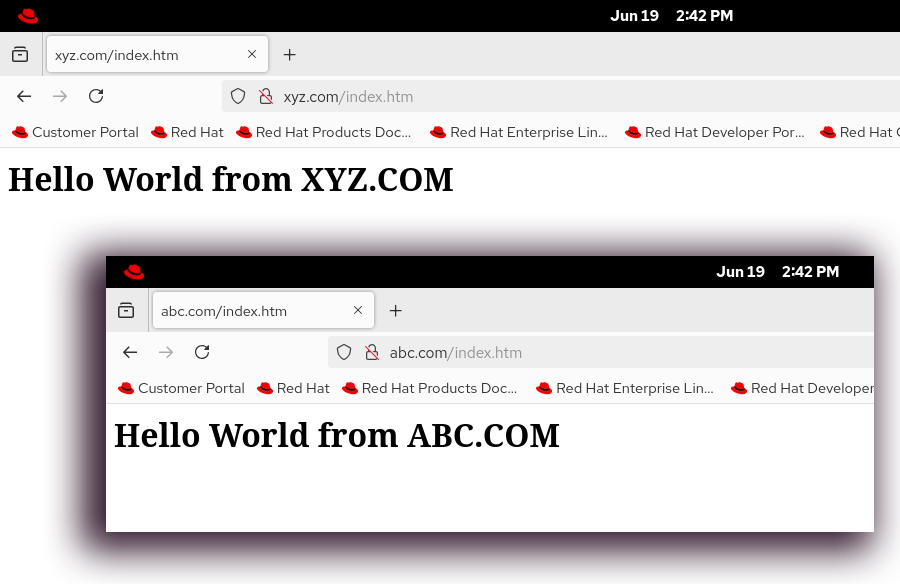
To verify virtual hosts configurations, open a web browser on the client system and access the following URL.
http://abc.com/index.htm
To verify the second website, access the following URL.
http://xyz.com/index.htm
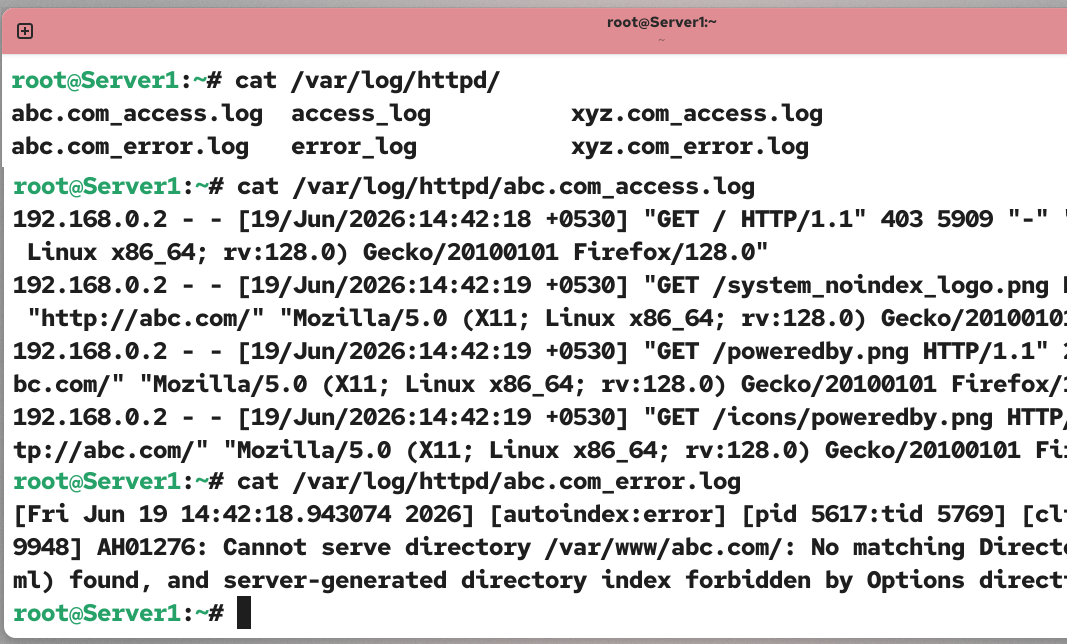
Viewing logs
To view access and error logs for websites, check their respective files in the /var/log/httpd/ directory.
Using a non-standard webroot
The /var/www/ directory is the default webroot directory for hosting websites. To use a non-standard webroot directory, follow these steps.
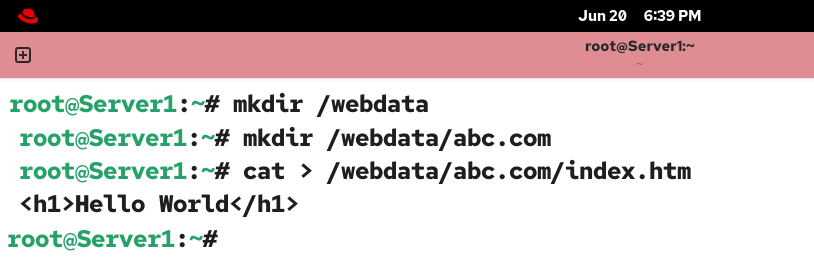
Create a webroot directory. Create a separate directory for each website in this directory. This directory will serve as the document root directory for its respective website.
#mkdir /webdata
#mkdir /webdata/abc.com
For testing, create an index.htm file inside the website directory.
#mkdir /webdata/abc.com/index.htm
<h1>Hello World</h1>
CTRL+D
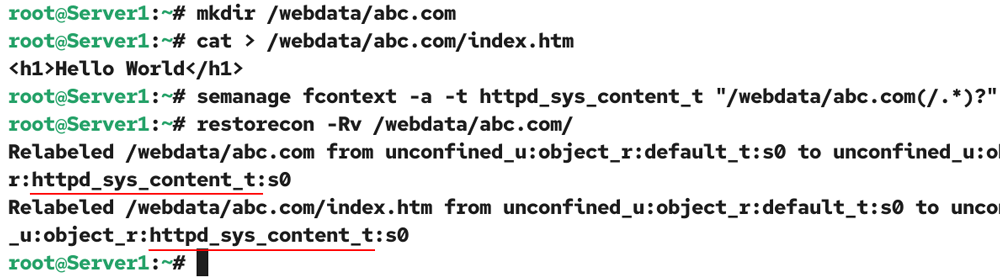
If you host a website in the standard web root directory, it automatically assigns the appropriate SELinux security context to all files. However, if you use a non-standard web root directory to host websites, you need to manually update SELinux contexts. You need the policycoreutils-python-utils package to manage SELinux contexts. This package is part of the default installation. If it is not available, use the following command to install it.
#dnf install policycoreutils-python-utils

After installing this package, run the following commands to update the SELinux contexts.
#semanage fcontext -a -t httpd_sys_content_t “/webdata/abc.com(/.*)?”
#restorecon -Rv /webdata/abc.com
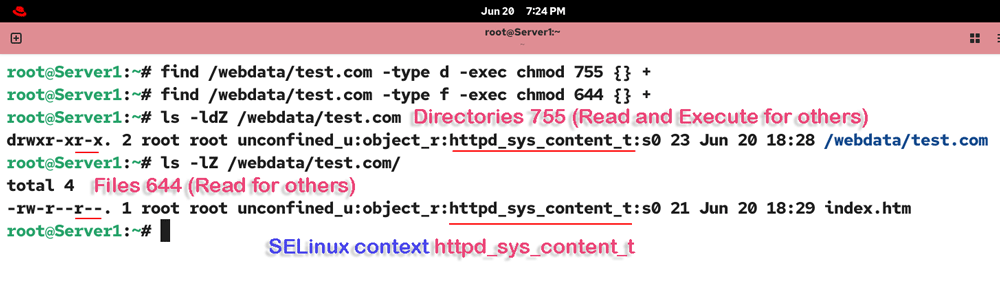
All directories inside the web root must have read and execute permissions for all users. The read permission allows them to list the directory content. The execute permission allows them to navigate the sub-directories. Similarly, all files in this directory and its subdirectories must have read permission. The read permission allows external users to view the files (webpages). Run the following commands to update the default file permissions.
#find /webdata/test.com -type d -exec chmod 755 {} +
#find /webdata/test.com -type t -exec chmod 644 {} +
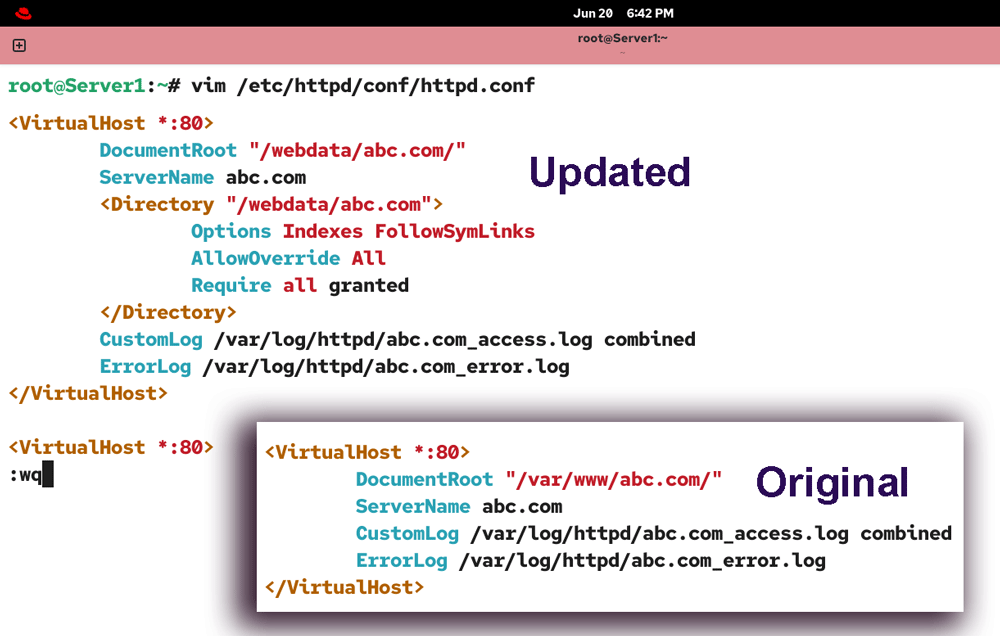
Open the /etc/httpd/conf/httpd.conf file, update the default web root option, add a directive to grant the necessary permissions to serve web content from a non-standard web root directory, and save the file.
Original
<VirtualHost *:80>
    DocumentRoot "/var/www/abc.com/"
    ServerName abc.com
    CustomLog /var/log/httpd/abc.com_access.log combined
    ErrorLog /var/log/httpd/abc.com_error.log
</VirtualHost>
Updated
<VirtualHost *:80>
    DocumentRoot "/webdata/abc.com/"
    ServerName abc.com
    <Directory "/webdata/abc.com">
        Options Indexes FollowSymLinks
        AllowOverride All
        Require all granted
    </Directory>
    CustomLog /var/log/httpd/abc.com_access.log combined
    ErrorLog /var/log/httpd/abc.com_error.log
</VirtualHost>
Check the configuration file for errors and restart the httpd service.
#apachectl configtest
#systemctl restart httpd
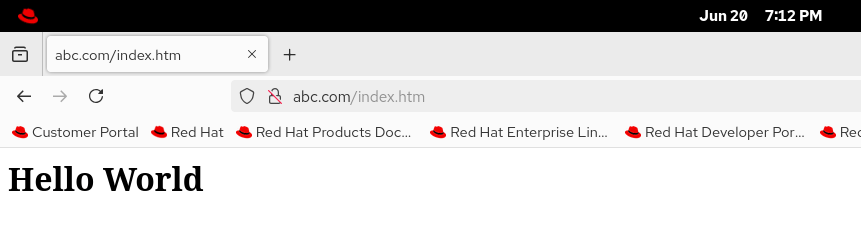
To verify the updated webroot, access the website again from the client system.
#http://abc.com/index.htm
You may get the following error message on the client system’s browser.
403 Forbidden
You don't have permission to access this resource.
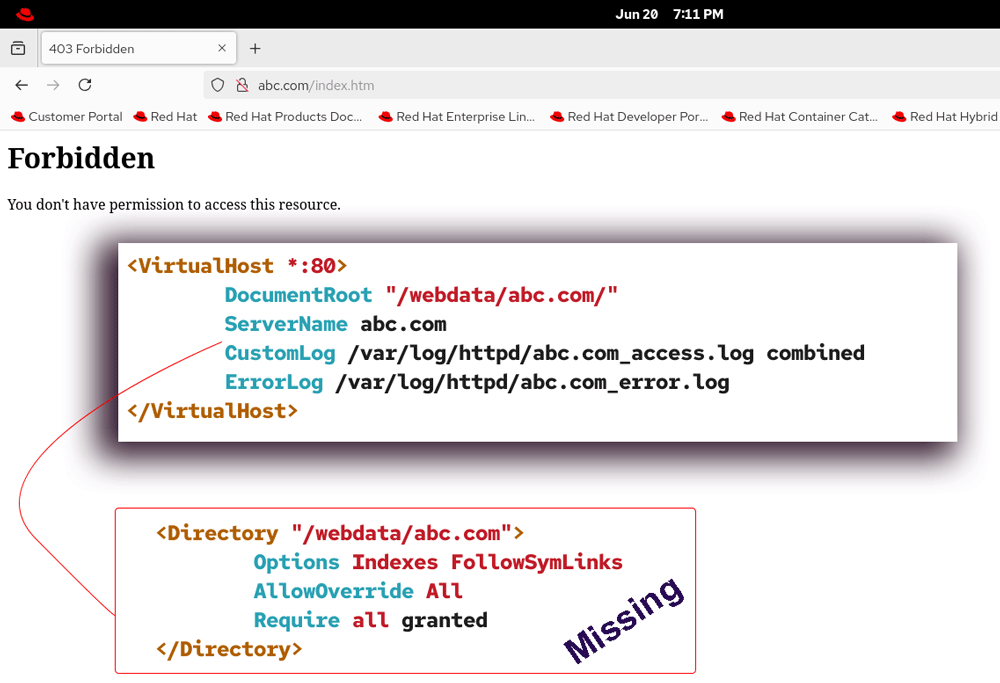
This error occurs when you miss or skip the <Directory> directive. Add this directive inside your virtual host directive and configure it as illustrated above.
Conclusion
This tutorial has presented a comprehensive guide to installing, configuring, and running the Apache HTTP Server on RHEL. By following the steps outlined in this tutorial, you can set up the Apache web server to run a single or multiple instances, manage firewall and SELinux settings, and verify your setup on both server and client systems.
Author Laxmi Goswami Updated on 2026-06-21