How to configure FTP Server in Redhat Linux
FTP (File Transfer Protocol) is a network service. It allows you to exchange files between network devices. It works in a server/client model. A server device provides the FTP server service. A client device uses an FTP client program to connect to the server. After connecting, the client can download files from the FTP server and upload local files to it. You can install and use it on any supported devices. Almost all modern operating systems (such as Windows, Linux, MAC, Cisco IOS) and network devices (such as PCs, servers, routers, and gateway devices) support this service. This tutorial explains how to configure, test, verify, and troubleshoot this service on Linux.
Objectives:-
- Configure an FTP server to provide only anonymous downloads.
- Configure an FTP server to provide anonymous downloads and uploads.
- Configure an FTP server to allow only authorized users to download and upload files.
Lab setup
You need two Linux systems for this Lab. You will install and configure the FTP server service on the first system. You will install an FTP client program on the second system and use it to test and verify the FTP server service configuration on the first system. You can set up this lab on any virtualization software (such as VMware or VirtualBox) or on real computers.
The following tutorial explains how to set up this lab on VMware Workstation.
RHCE Practice Lab Setup in VMWare and VirtualBox
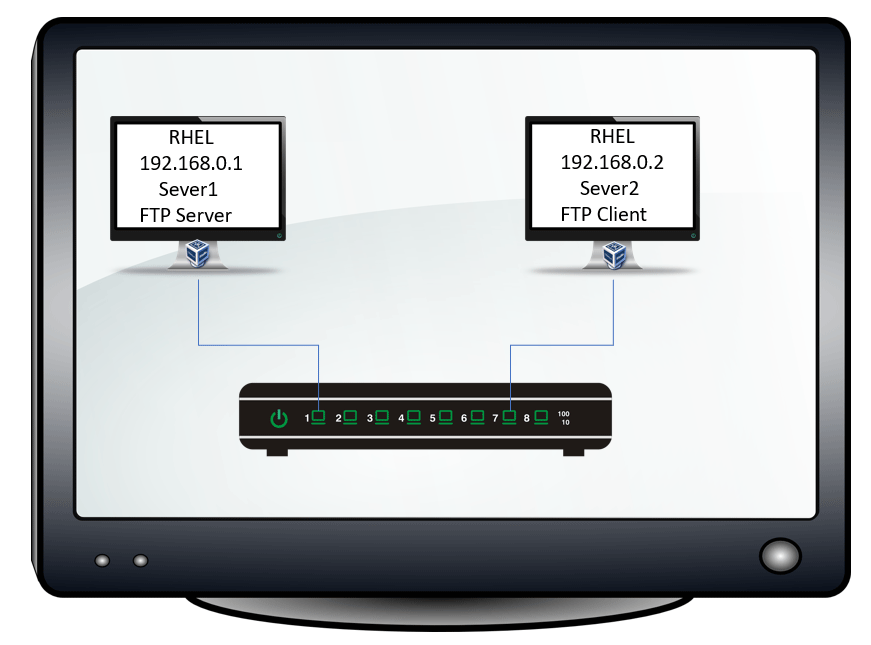
Lab configurations
- Two Linux systems running RHEL 10.
- The hostname and IP address of the first system are Server1 and 192.168.0.1/24.
- The hostname and IP address of the second system are Server2 and 192.168.0.2/24.
- Both systems are connected.
This lab is optional and required only for demonstration and practice. If you have an existing setup or need only commands and configuration steps for FTP, you do not need to set up this lab.
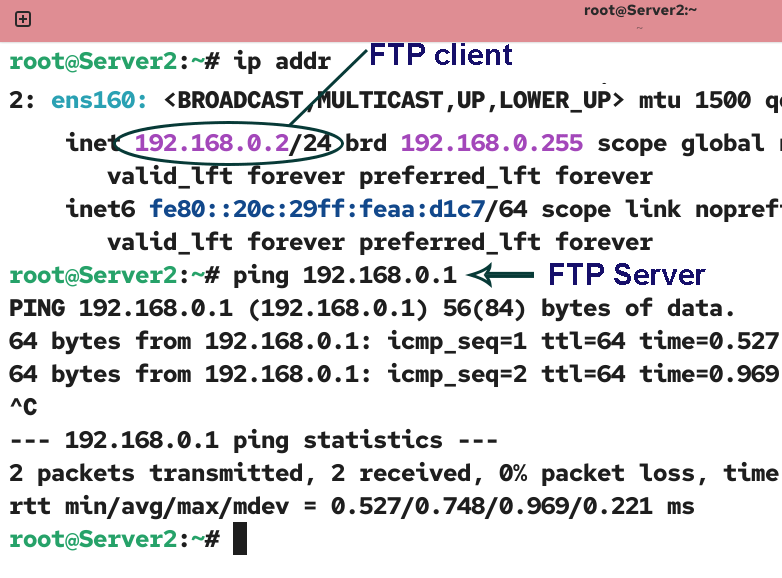
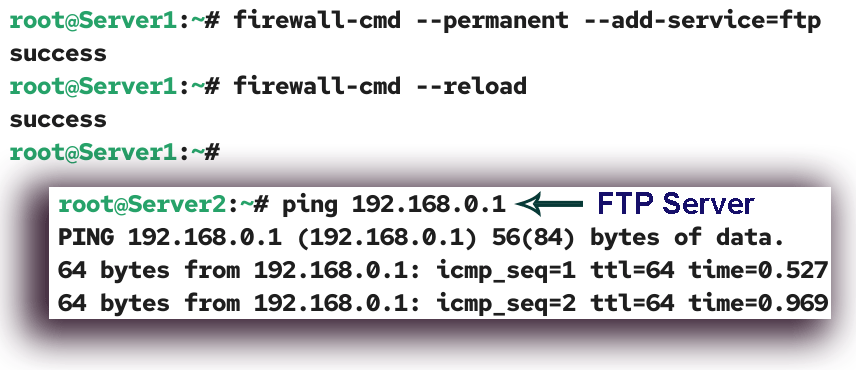
Testing connectivity
An FTP client can access an FTP server only when both have connectivity. Test and verify that the system you will use for testing can access the system you will configure as the FTP server.
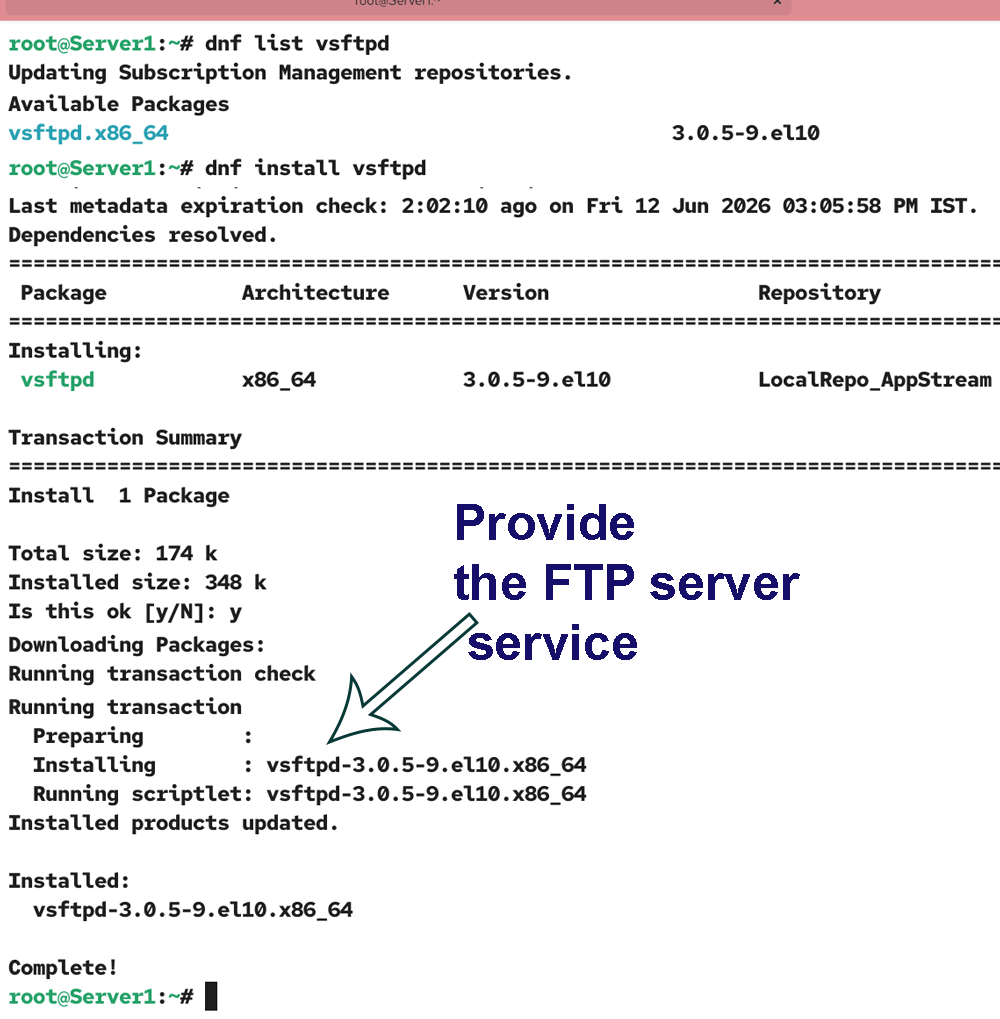
Installing the FTP server service
The vsftpd package provides the FTP server service. Install this package on the system you want to use as the FTP server. Use the following command to check whether this package is installed.
#dnf list vsftpd
If the package is not installed, use the following command to install it.
#dnf install vsftpd
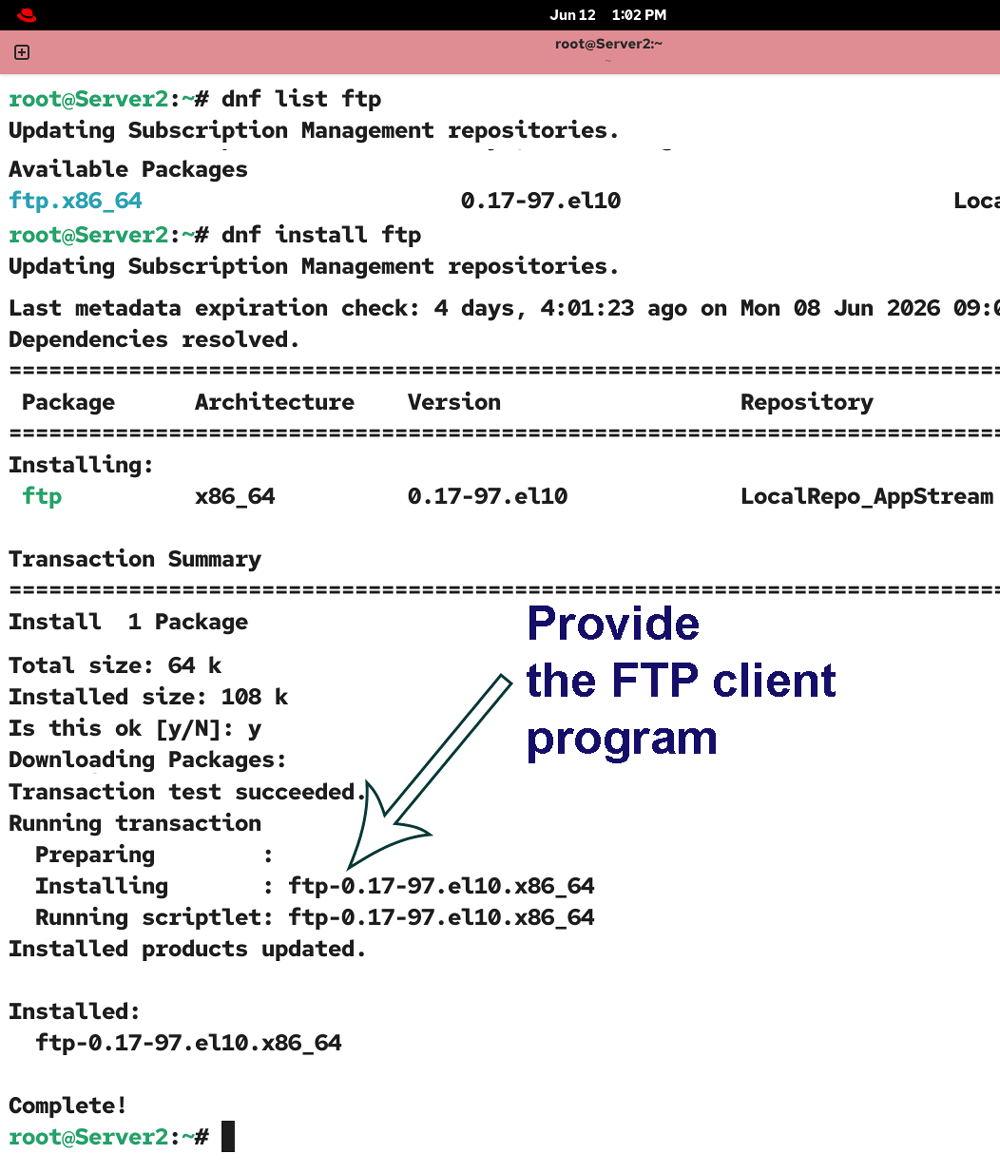
Installing the FTP client program
The ftp package provides the FTP client program. Install this package on the system you want to use as the FTP client. Use the following command to check whether this package is installed.
#dnf list ftp
If the package is not installed, use the following command to install it.
#dnf install ftp
Starting the FTP server service
After installing the vsftpd package, use the following command to start and enable the FTP server service at boot time.
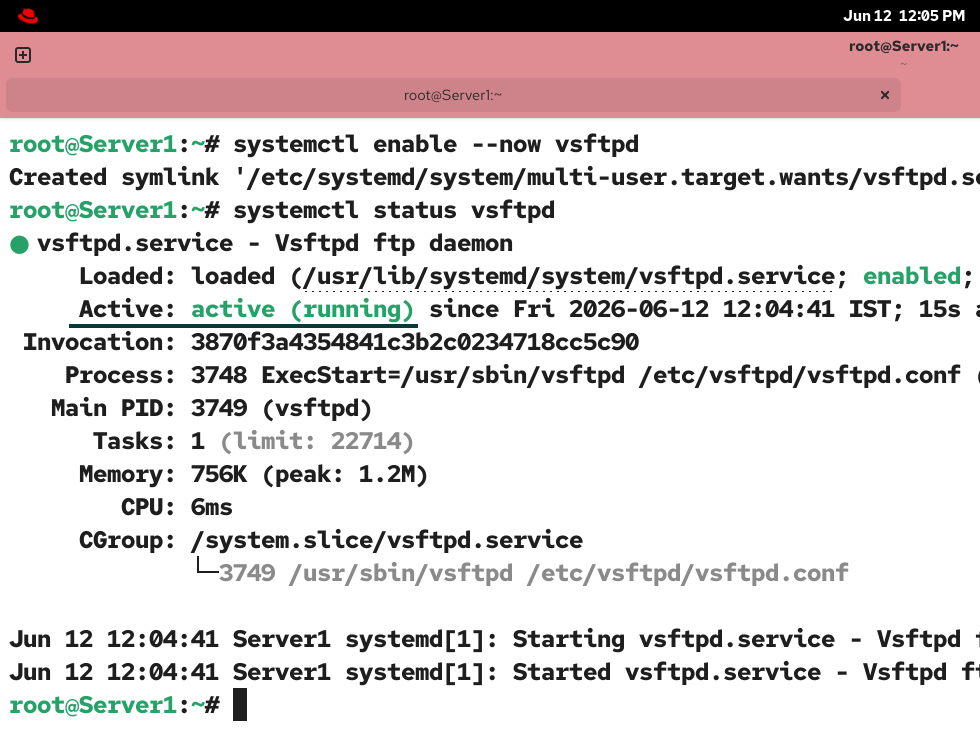
#systemctl enable --now vsftpd
Use the following command to verify that the FTP server service is active and running.
#systemctl status vsftpd
Allowing FTP traffic through the firewall
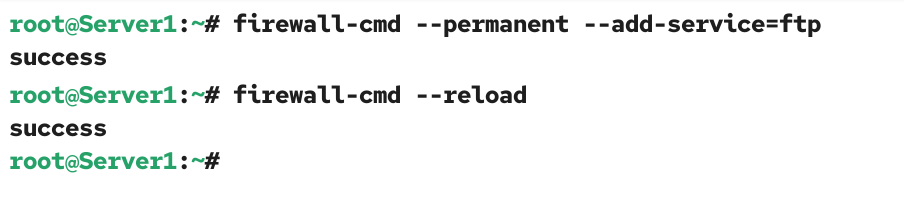
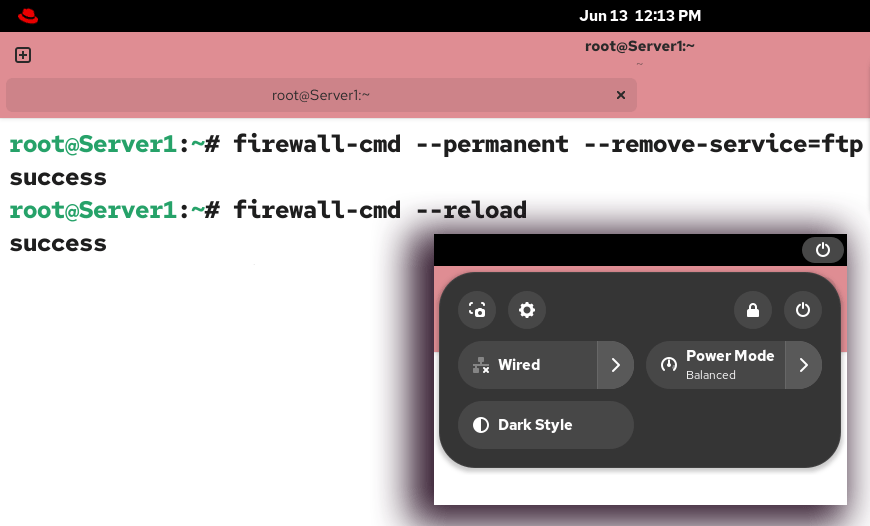
The default firewall prevents FTP traffic. To allow the FTP server service to accept incoming connections from FTP clients, add it to the firewall's allowed services list.
#firewall-cmd --permanent --add-service=ftp
Reload the firewall to apply the change.
#firewall-cmd --reload
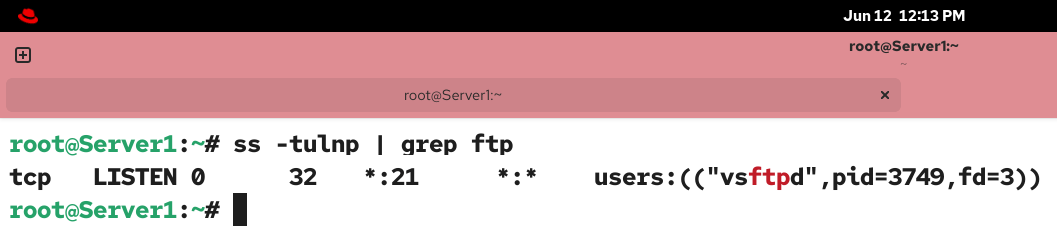
FTP uses port 21 to accept incoming connections. When you add FTP server service to the firewall, the firewall automatically opens this port. Use the following command to verify that this port is open.
#ss -tulnp | grep ftp
If the port is not open, use the following commands to open it and reload the firewall.
#firewall-cmd --permanent --add-port=21
#firewall-cmd --reload
Verifying the FTP server service
To verify the FTP server service, initiate an FTP connection from the FTP client system.
#ftp [FTP server IP]
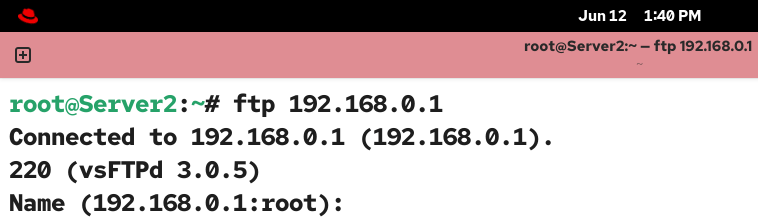
If you receive an FTP login prompt, it verifies that the FTP service is active and running on the FTP server, and it is accepting incoming connections from FTP clients.
Troubleshooting
Instead of the FTP login prompt, you may get the following error message.
ftp: connect: No route to host
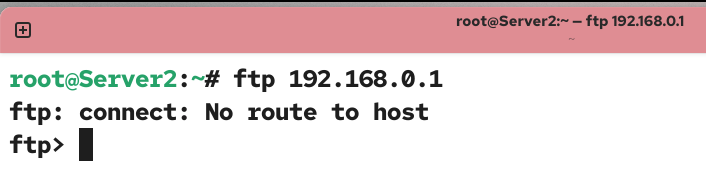
This error occurs when either the firewall on the FTP server blocks FTP traffic or the FTP client and the FTP server are not connected.
To fix this issue, check the connectivity between the FTP client and the FTP server. If both have connectivity, add the FTP server service to the firewall’s allowed services list on the FTP server.
Configure an FTP server to provide only anonymous downloads.
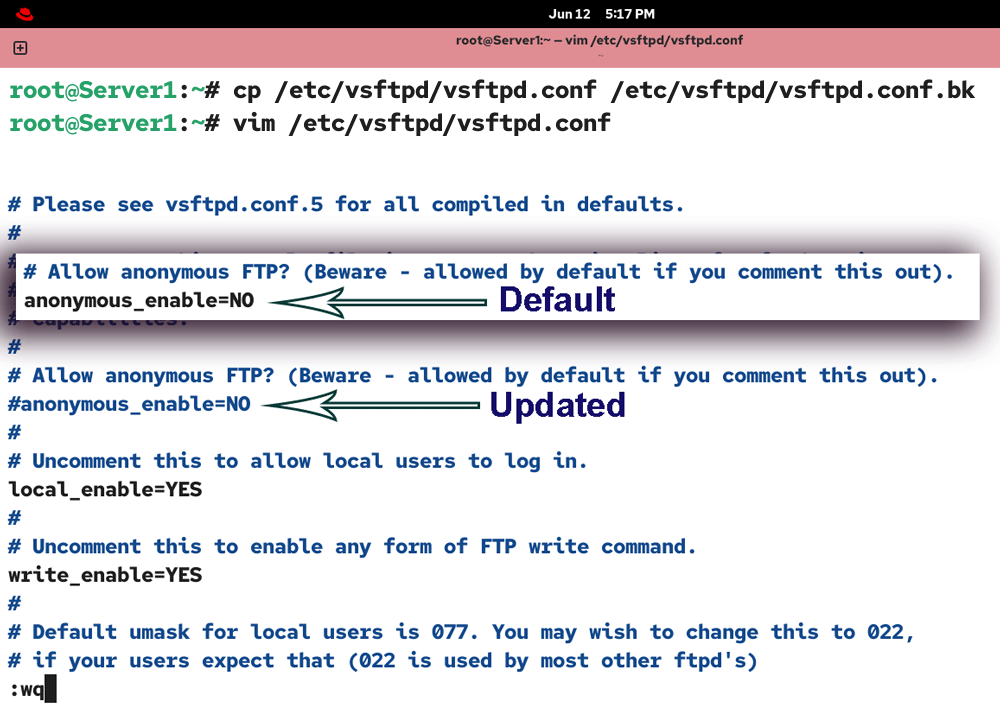
The /etc/vsftpd/vsftpd.conf is the main configuration file of FTP. It allows you to customize FTP for your specific requirements. Back up the original configuration file and open it for editing.
#cp /etc/vsftpd/vsftpd.conf /etc/vsftpd/vsftpd.conf.bk
#vim /etc/vsftpd/vsftpd.conf
The default configuration file keeps anonymous downloading disabled. To enable it, comment out the following directive and save the file.
anonymous_enable=NO
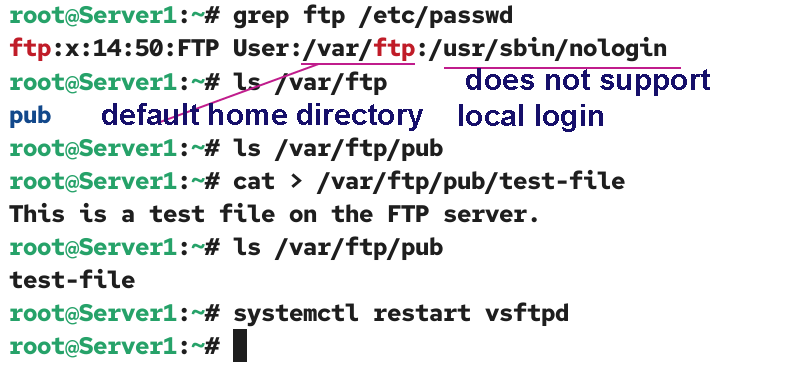
Anonymous is a special least-privileged FTP user account. FTP maps it with the default FTP user account. It does not require a password to log in. It does not support local login. You can use this user account only to connect to an FTP server on the FTP login prompt. It allows external unknown users to connect to the FTP server. It uses the /var/ftp directory as its root (home) directory. A user logged in with this user account cannot navigate to its parent directory. However, the user can navigate the child directories. FTP displays the /var/ftp directory as the / directory on the FTP prompt. By default, it supports only downloads. Unless you manually enable uploading, an anonymous user cannot upload anything to the server.
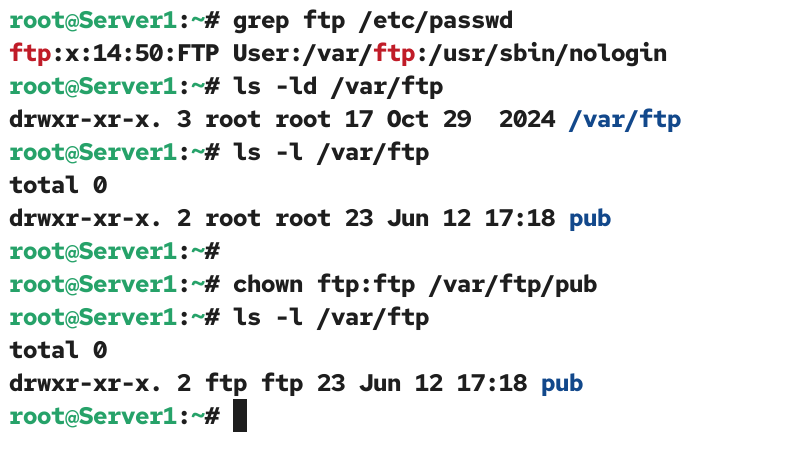
Run the following command to view the details of the built-in FTP user account that the FTP server service uses to provide the anonymous downloading/uploading feature.
#grep ftp /etc/passwd
The default home (/var/ftp) directory contains a pub (public) directory. Create a test file in it.
#cat > /var/ftp/pub/test-file
This is a test file on the FTP server.
CTRL+D
Restart the vsftpd service to apply the change.
Verifying the anonymous downloading only
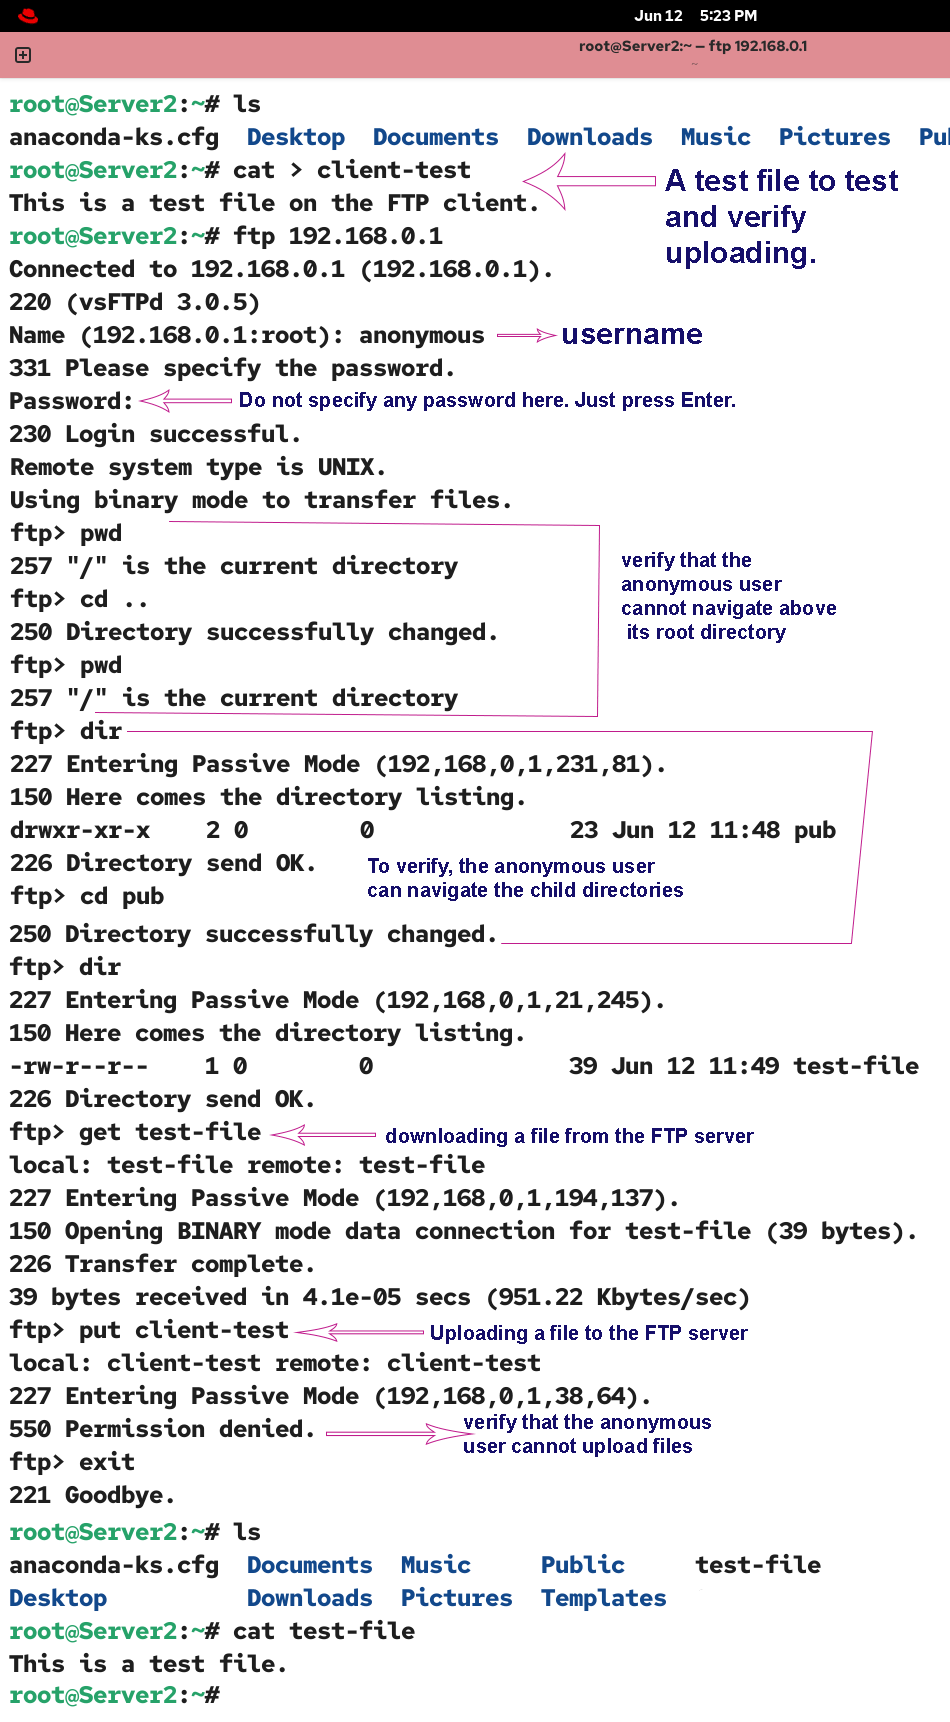
To verify anonymous downloading, create a test file on the FTP client system, initiate an FTP connection from the FTP client, use the username anonymous to log in, and press Enter when prompted for a password (enter a blank password).
#cat > client-test
This is a test file on the FTP client system.
CTRL+D
#ftp [FTP server IP]
Name: anonymous
Password:
ftp>
Use the pwd command to view the current working directory. It will display / as the current directory. This / represents the root directory at the FTP prompt. It is actually /var/ftp/ on the FTP server. To verify that the anonymous user cannot navigate above its root directory, change to the parent directory, then check the current working directory again.
ftp>pwd
/
ftp> cd ..
/
ftp>pwd
/
To verify, the anonymous user can navigate the child directories, list all directories available in the current directory, and change the current directory to any listed directory.
ftp>dir
pub
ftp>cd pub
ftp>dir
test-file
To verify that the anonymous user can download files, download a file from the FTP server.
ftp>get test-file
To verify that the anonymous user cannot upload files, upload a file to the FTP server.
ftp>put client-test
Use the exit command to terminate the FTP session.
ftp>exit
List and view the file downloaded from the FTP server.
#ls
#cat test-file
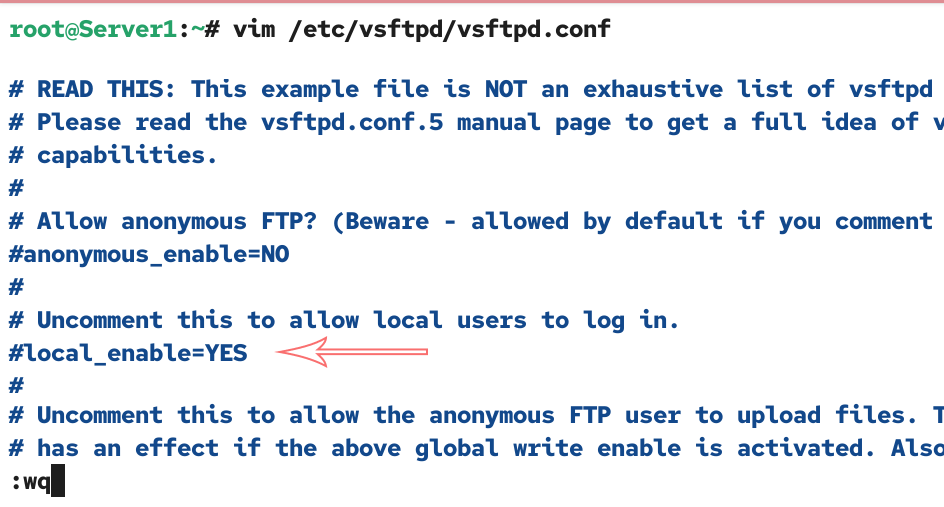
The default configuration file allows local user accounts to log in from FTP clients. To configure an FTP server for anonymous download-only, you need to disable the feature. Open the vsftpd.conf file again, comment out the following directory, and save the file.
local_enable=NO
Restart the vsftpd service and check the local user accounts on the FTP server.
#systemctl restart vsftpd
#tail -5 /etc/passwd
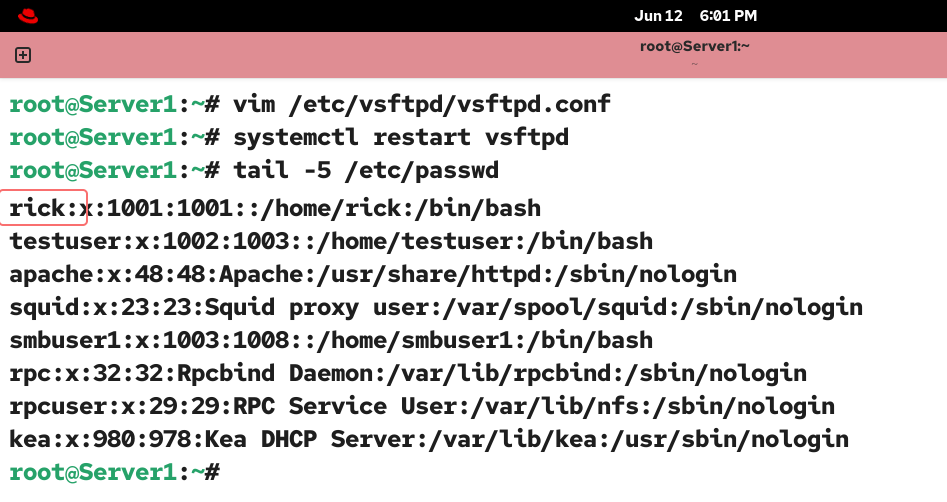
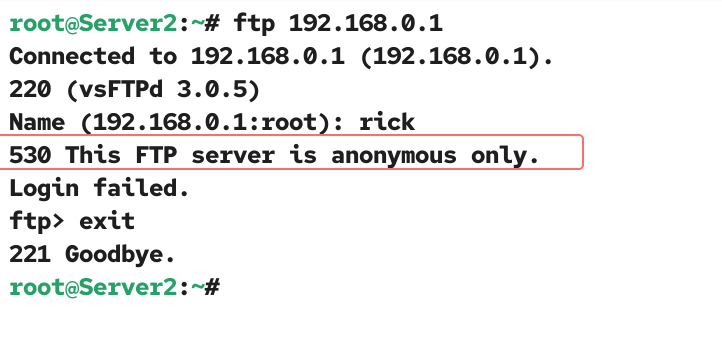
Initiate an FTP connection from the FTP client system and log in with any local user account listed in the above output.
#ftp [FTP server IP]
Name: [Username of a local user account on the FTP server]
503: This FTP server is anonymous only.
Configure an FTP server to provide anonymous downloads and uploads.
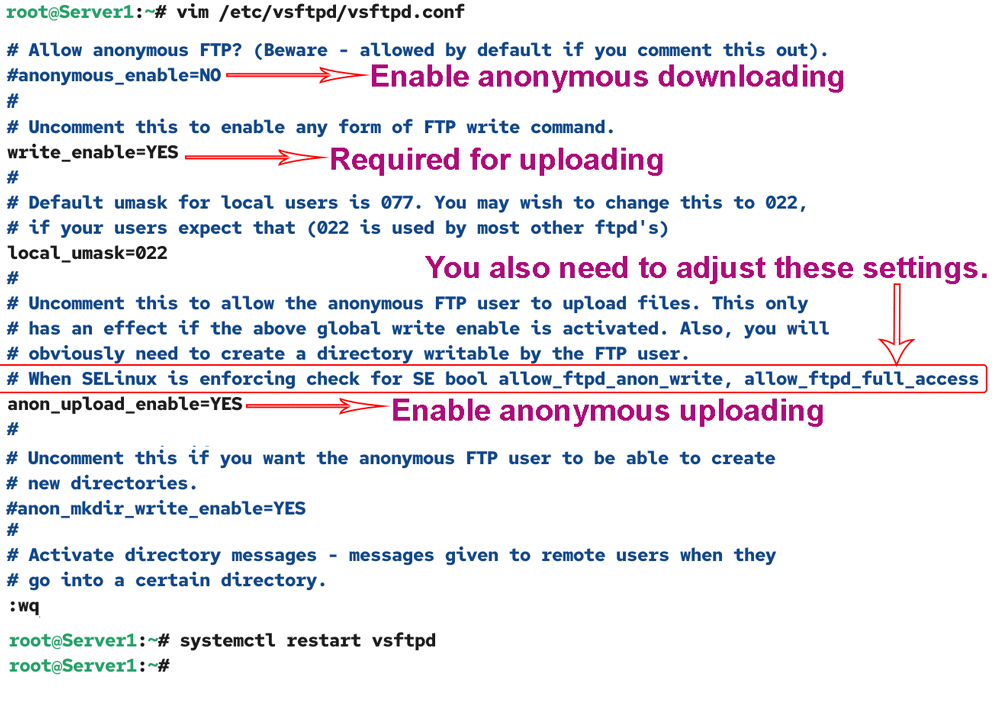
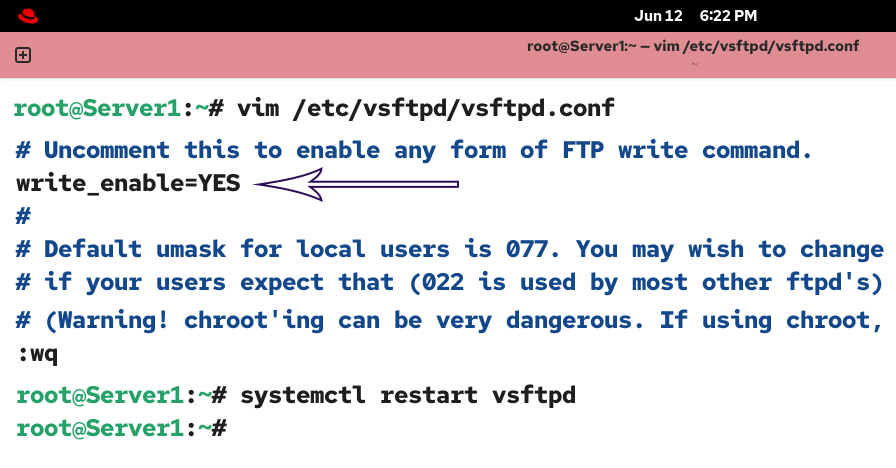
Open the vsftpd.conf file again, uncomment the following directives, save the file, and restart the vsftpd service.
write_enable=YES
anon_upload_enable=YES
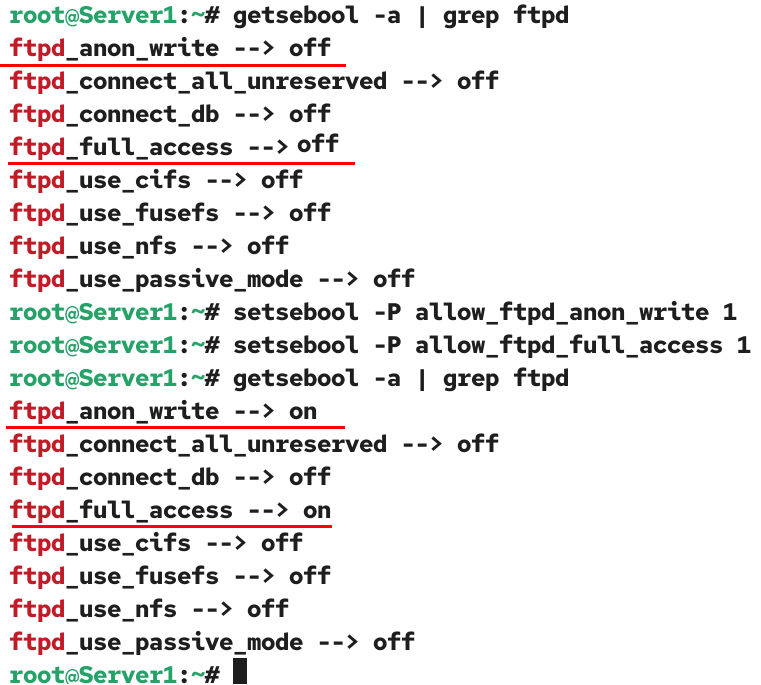
If SELinux is enabled, you need to enable two booleans: ftpd_anon_write and ftpd_full_access. Use the following commands to view the current status of these booleans.
#getsebool -a | grep ftpd
If these booleans are disabled, use the following commands to enable them.
#setsebool -P allow_ftpd_anon_write 1
#setsebool -P allow_ftpd_full_access 1
Verify both booleans are enabled.
#getsebool -a | grep ftpd
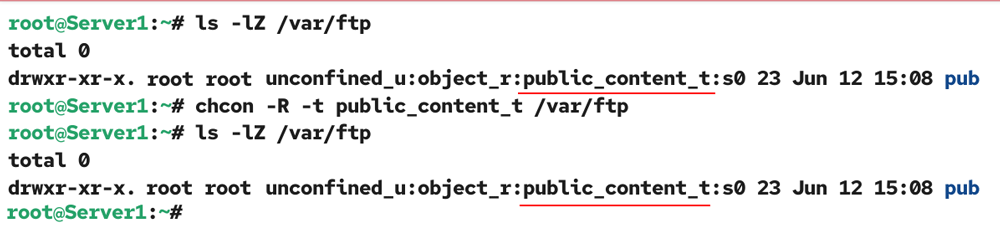
Change the file type security context to public_content_t in the /var/ftp directory.
#ls -lZ /var/ftp
#chcon -R -t public_content_t /var/ftp
You also need to adjust the file permissions and ownership of the chroot directory. The chroot directory is the directory that anonymous users see as the root. They cannot access objects outside of this directory. The directives (write_enable=YES, anon_upload_enable=YES) and SELinux booleans (ftpd_anon_write and ftpd_full_access) grant full permissions to anonymous users on all directories within the chroot directory and on directories owned by the default ftp user. The default owner of the /var/ftp directory and all its subdirectories is root. The default ownership blocks anonymous users from uploading to this directory, regardless of their permissions. To allow uploading within a directory, change its ownership to the ftp user. For example, if you want to allow uploading within the pub directory, change its ownership to the ftp user.
#chown ftp:ftp /var/ftp/pub
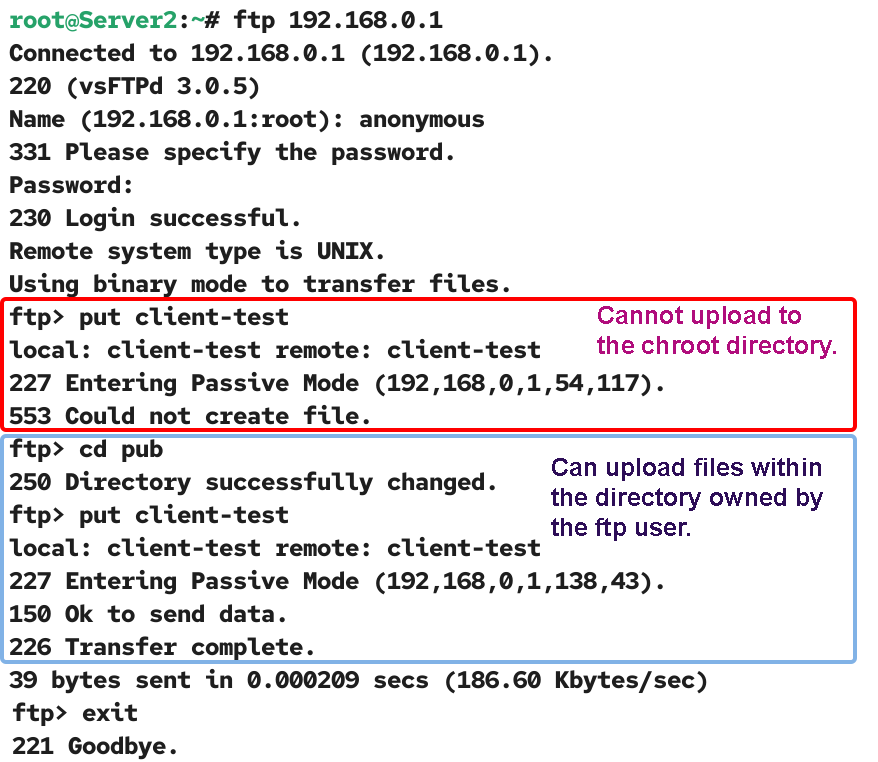
To verify anonymous uploading, initiate a new ftp session from the FTP client.
#ftp [FTP server IP]
Name: anonymous
Password:
ftp>
Upload a file to the chroot directory. Since the chroot (/var/ftp) is owned by the root user,uploading will fail.
ftp> put [test file name]
Change the current directory to the directory whose ownership you changed to the ftp user and upload the file again.
ftp>cd pub
ftp> put [test file name]
A successful file upload verifies that anonymous uploading is enabled.
Troubleshooting
The directory you set as the chroot directory for FTP users must not be writeable. For example, the default chroot directory for anonymous users is /var/ftp. It must not be writeable or owned by the ftp user. The settings you configured above make all directories owned by the ftp user writable. If you change the ownership of this directory to the ftp user and allow anonymous uploading, you will get the following error on the FTP client.
500 OOPS: vsftpd: refusing to run with writable root inside chroot() login failed.
421 Service not available, remote server has closed the connection.
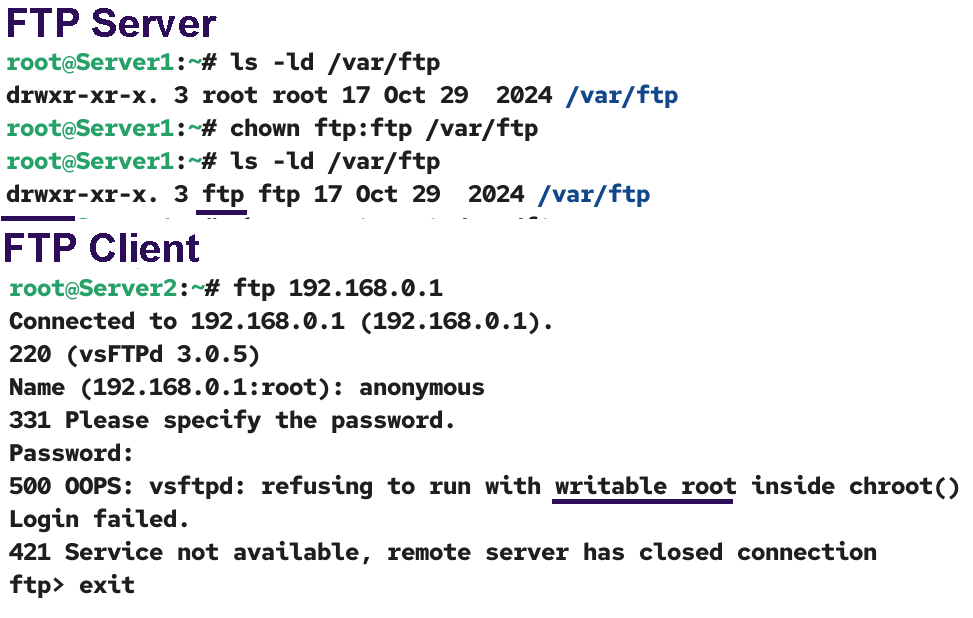
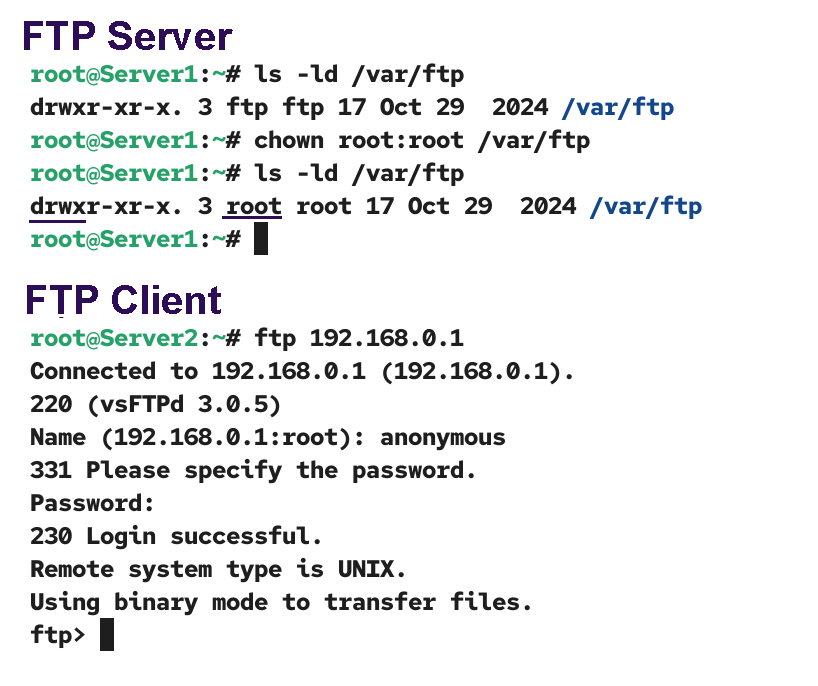
To fix this issue, restore ownership of the /var/ftp directory to the root user.
Configure an FTP server to allow only authorized users to download and upload files.
The local_enable directive controls local logins. If you disable it, local users are not allowed to log in from FTP clients. If you enable this directive, FTP allows local users to log in via FTP clients. Open the vsftpd.conf file again, enable this directive, save the file, and restart the vsftpd service.
local_enable=YES
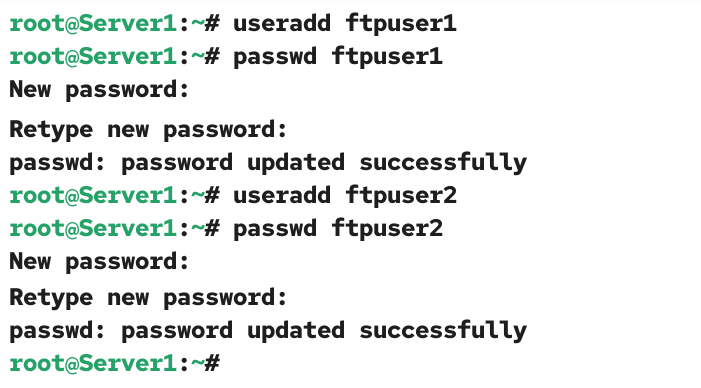
You can use existing user accounts or create new ones for testing. Create two new local user accounts on the FTP server system.
#useradd ftpuser1
#passwd ftpuser1
#useradd ftpuser2
#passwd ftpuser2
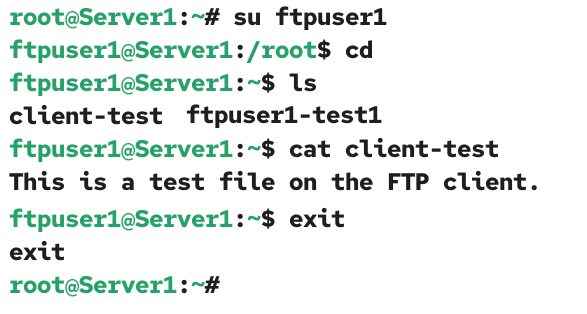
Change the user account to the first user account and create a test file in the user’s home directory.
#su ftpuser1
$cd
$cat > ftpuser1-test1
This is a test file in the home directory of the ftpuser1.
CTRL+D
$

To verify the local user login, initiate a new FTP session from the FTP client and use the first user account you added on the FTP server to log in.
#ftp [FTP server IP]
Name: ftpuser1
Password: [Enter the password you set for the user]
ftp>
FTP puts the user in their home directory. Download the test file you created to the user's home directory.
ftp>get ftpuser1-test1
Upload a file to verify the upload.
ftp>put client-test
Terminate the FTP session and verify the download.
#ls
#cat ftpuser1-test1

To verify that the upload succeeded, check the uploaded file in the user’s home directory on the FTP server.
$cat client-test
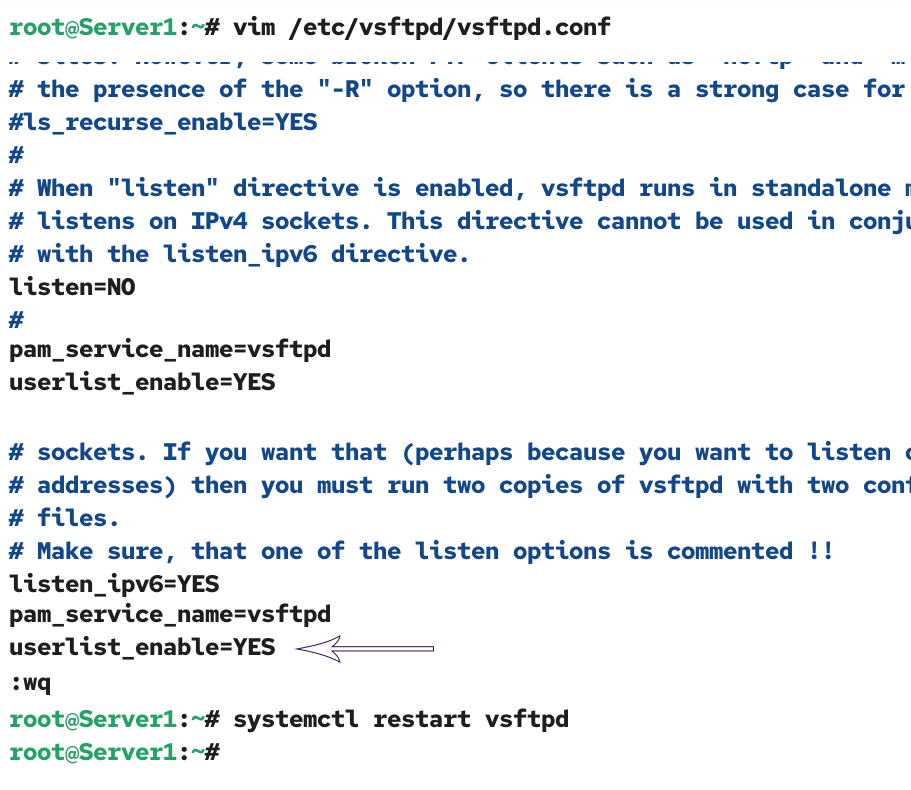
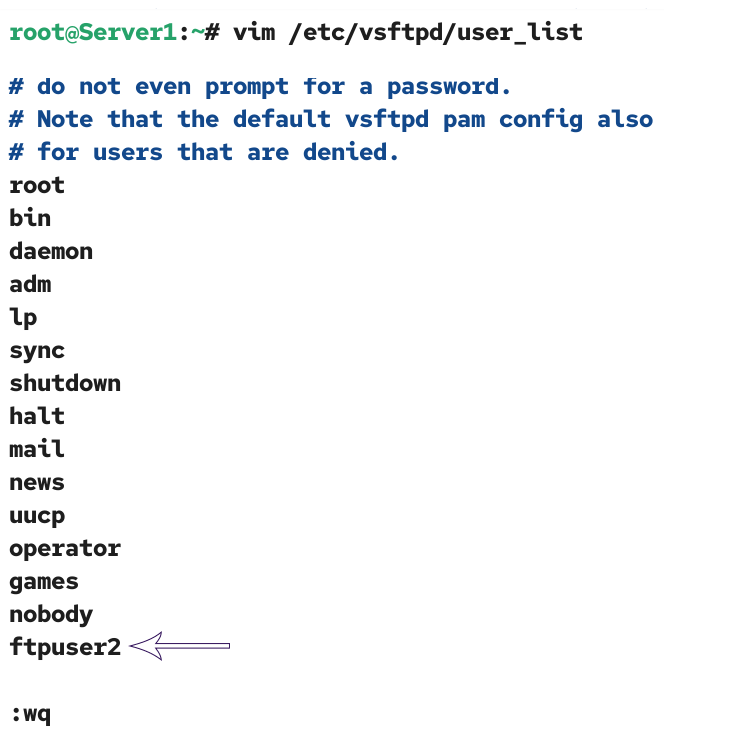
The userlist_deny directive controls which local user accounts can be logged in to by FTP clients. If you set its value to NO, only users listed in the /etc/vsftpd/user_list file can log in. If you set its value to YES, only users listed in this file are denied. All other users are allowed. Open the vsftpd.conf file again, add the following directive, save the file, and restart the vftpd service.
userlist_deny=YES
Open the /etc/vsfptd/user_list file, add the username of the user you want to deny, and save the file.
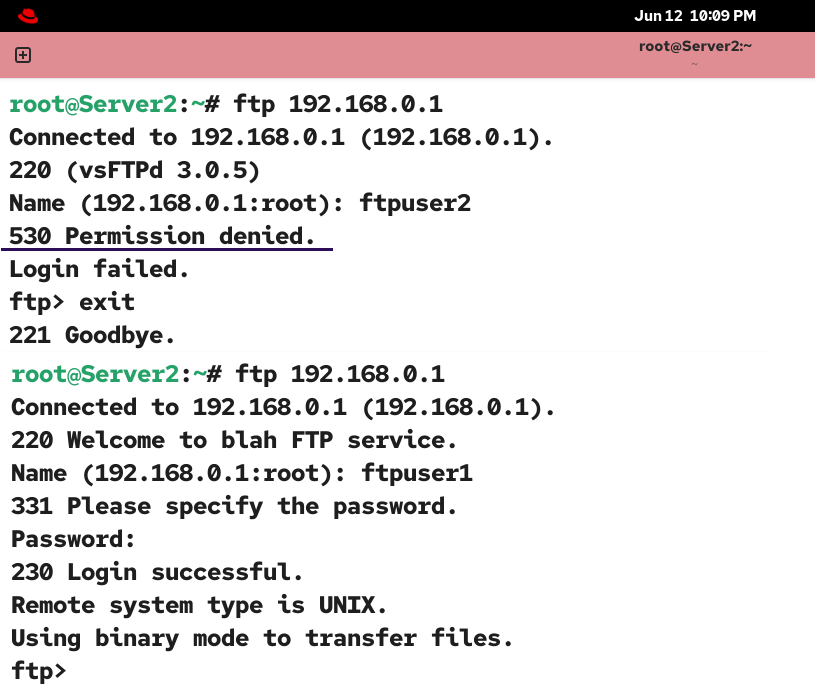
To verify that only authorized users can log in via an FTP client, initiate an FTP session from the FTP client and log in from an unauthorized account. Observe the error message. Initiate another FTP session and log in from an authorized user account.
Conclusion
FTP is an essential network service for file transfer. This tutorial explains how to configure, test, and verify it for anonymous access, restrict uploads and downloads, and allow only authorized users as required. By following the steps explained in this tutorial, you can efficiently implement and manage it in your network.
Author Laxmi Goswami Updated on 2026-06-17