How to configure DNS Server in Linux
There are four types of DNS name servers: caching-only, forwarding, primary or master, and secondary or slave.
- A caching-only server performs recursive queries on behalf of end devices and saves the results in a cache file.
- A forwarding server forwards all queries to the caching-only name server and saves the result in a cache file.
- A primary or master server resolves queries for the domain. It reads zone files to resolve queries. It does not accept recursive queries.
- A secondary or slave server resolves queries when the primary or master name server fails. It also reads zone files to resolve DNS queries and does not accept recursive queries.
To explain how to configure, test, and verify these name servers, I will use a pre-built RHCE practice lab. In this lab, I have three RHEL Linux systems. I will configure name servers on two systems and use the reaming system for testing.
The following image shows this lab.
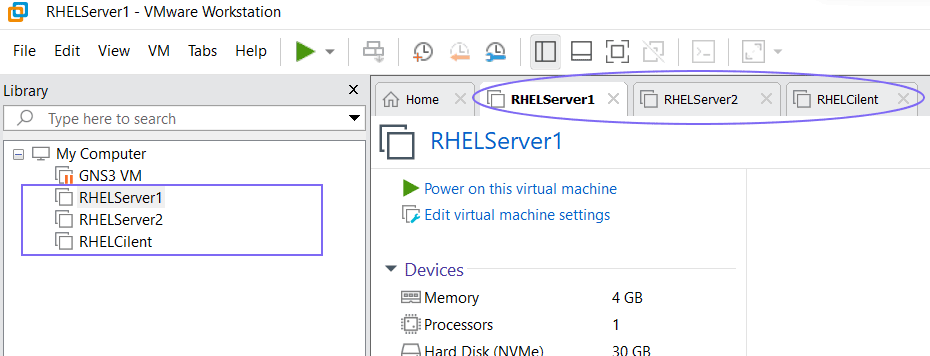
I used VMware Workstation to set up this lab. It doesn't matter whether you use physical or virtual systems to set up this practice lab. Instructions and configuration steps for DNS name servers are the same on all platforms. If you want to replicate this lab on physical systems, you need three systems.
The following image shows this lab's layout with physical systems.

To learn how to set up this lab, you can use the following tutorials. These tutorials explain the steps to set up this lab on VMware Workstation and VirtualBox.
I prepared this LAB exclusively to explain RHCE exam topics. The RHCE exam does not allow candidates to use the Internet. Therefore, I did not configure the Internet connection in this LAB. However, the exercises in this tutorial series need an Internet connection. Hence, first, we will configure an internet connection in this lab.
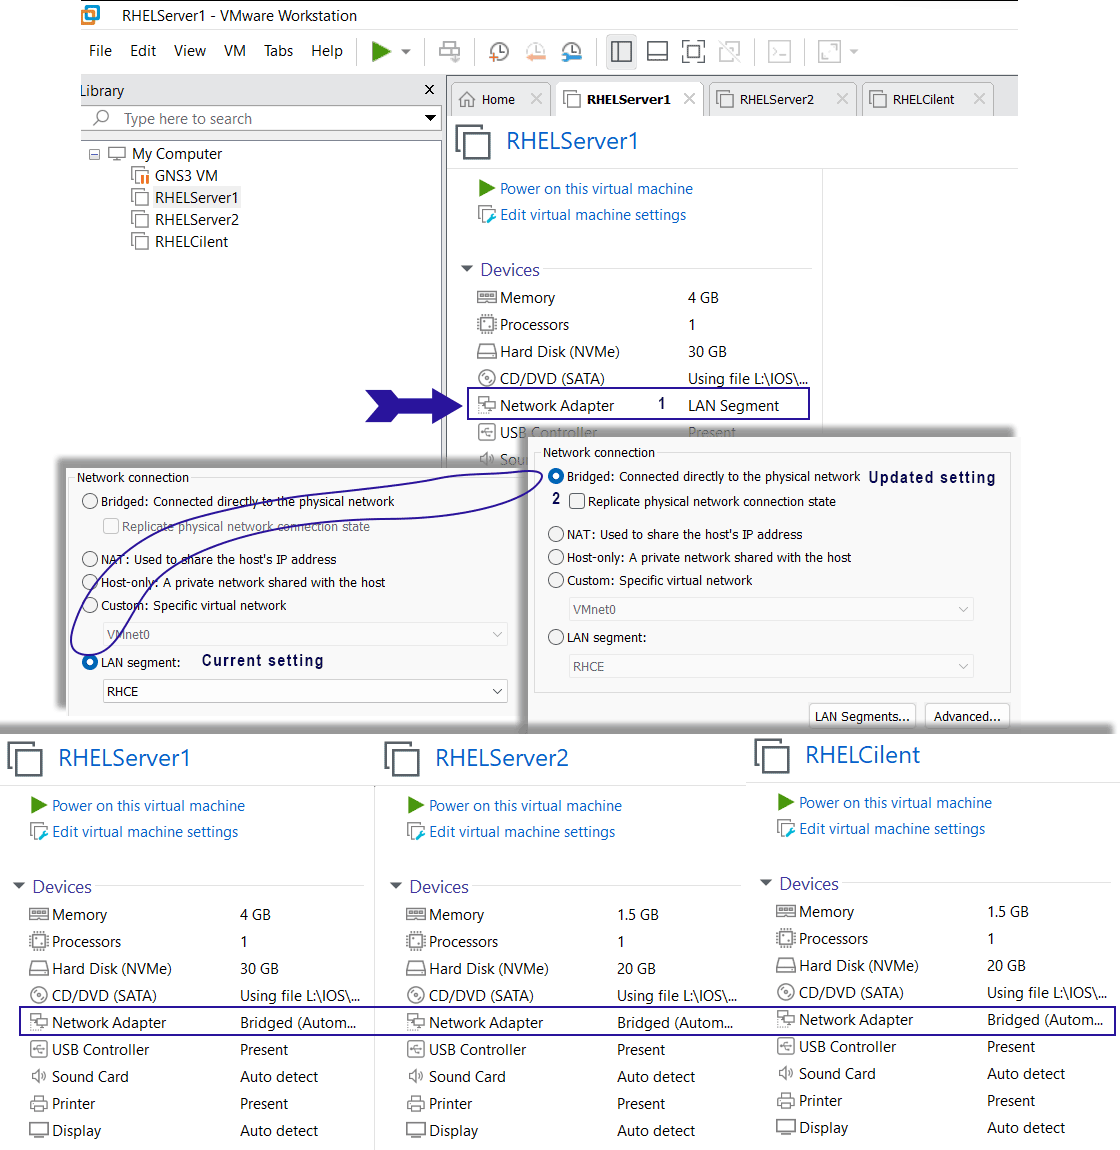
To do this, we need to change the network connection type. Currently, the network connection type of all three systems is NAT. We need to change it to Bridged. A Bridged connection allows the virtual system to access the host's internet connection.
To change the network connection type, power off the virtual machine, open its settings and click the Network Adaptor option. Select the network connection type to Bridged and click OK. Repeat this process on all three virtual machines.
The following image shows this process.
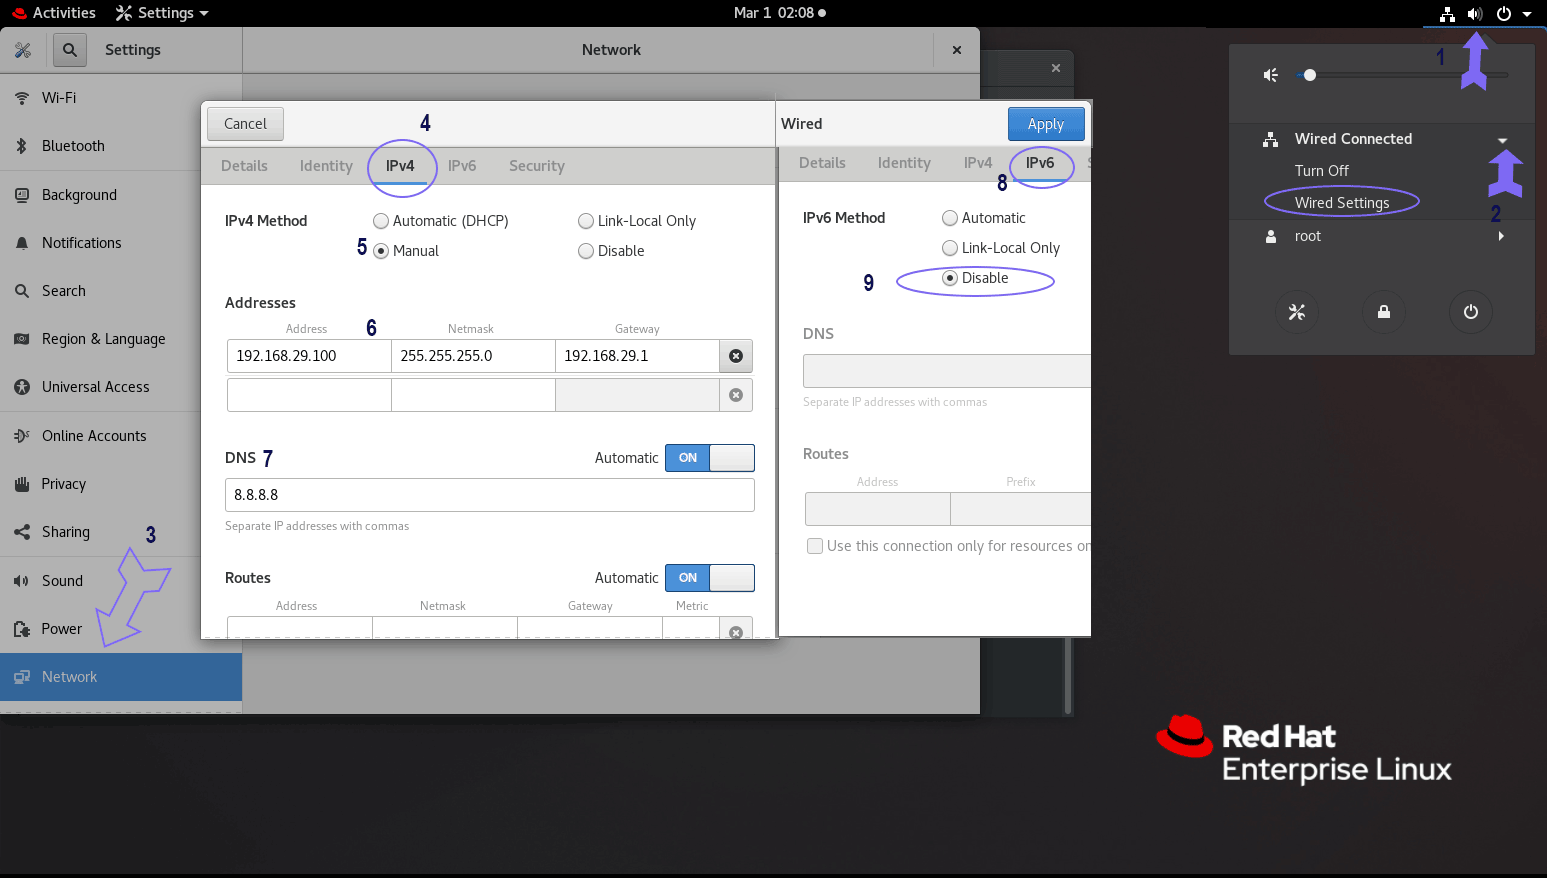
We also need to update IP configurations on all systems. Turn on the virtual machine, log in with the root account and update the IP configuration as follows.
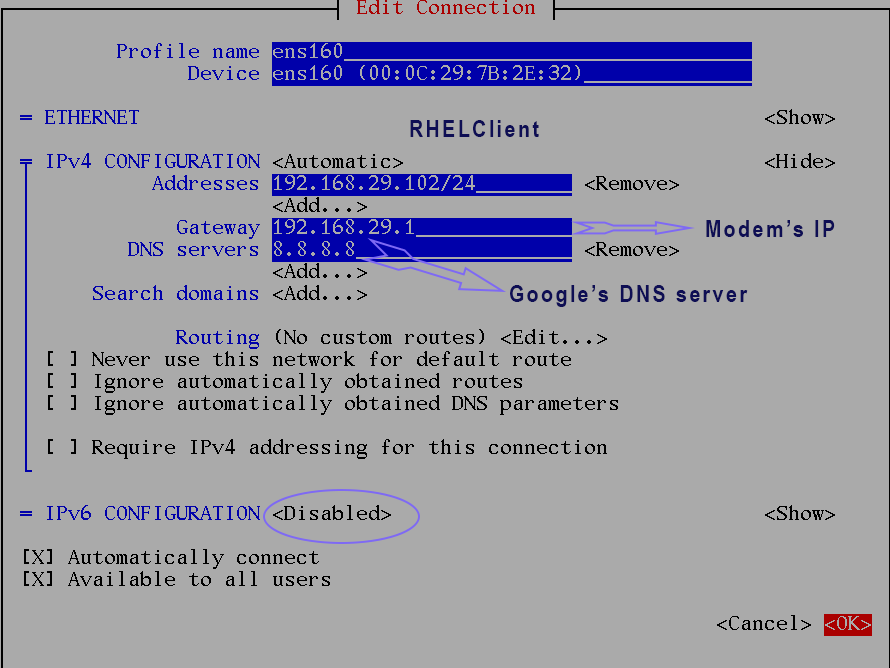
- Configure Modem's IP address as the default gateway IP address. My modem's IP address is 192.168.29.1. So, I will use this IP address as the gateway IP address on all virtual machines.
- Use an IP address from the gateway IP address's network for each system. I will use the IP addresses 192.168.29.100/24, 192.168.29.101/24, and 192.168.29.102/24 for RHELServer1, RHELServer2, and RHELClient.
- Configure the IP address 8.8.8.8 as the DNS server's IP address. If you know your ISP's DNS server's IP address, you can use it. If you do not know that, you can this address. This IP address belongs to Google's public DNS server.
- Disable IPv6 configuration. To keep this tutorial series simple, I will use only IPv4 addresses. The configuration steps for both IPv4 and IPv6 are the same.
- Activate the connection and access any website to verify the system can access the Internet.
There are many ways to configure IP addresses on Linux. I have already explained them in the following tutorials.
On RHELServer1, I installed the GUI environment. If the GUI environment is installed, you can use its tool to configure and verify the IP address.
The following image shows this process on RHELServer1.
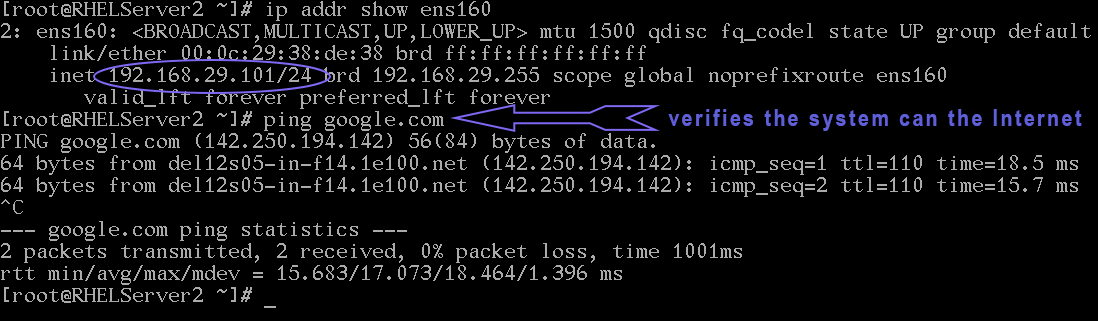
The following image verifies the system can access the Internet.

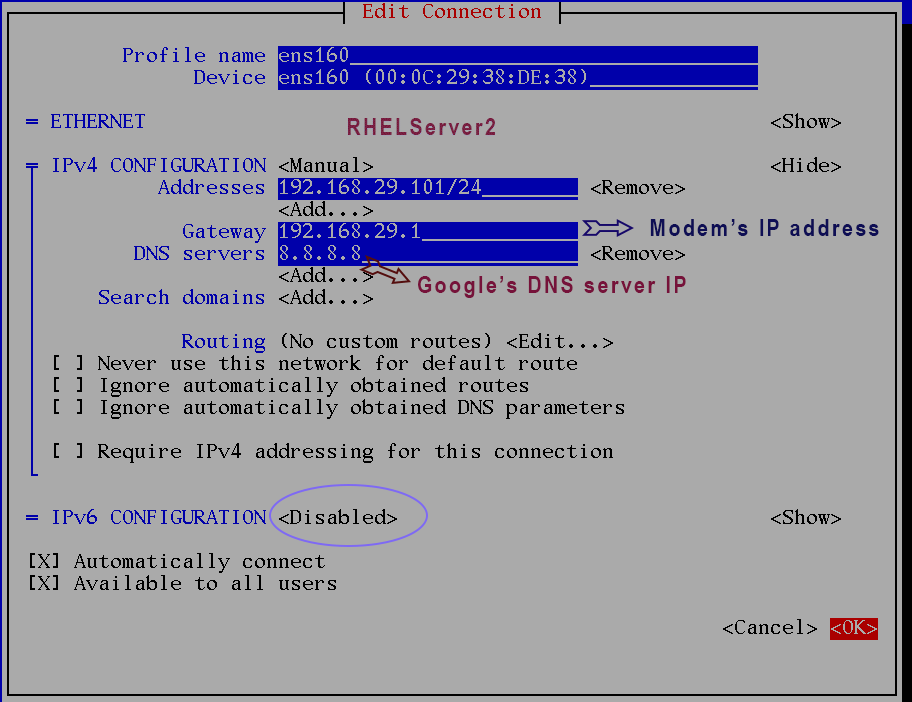
If the GUI environment is not installed, you can use the nmtui command to configure IP addresses and activate connections.
The following image shows the IP configuration on RHELServer2.
The following image shows the IP configuration on RHELClient.
To test and verify the system can access the Internet, you can use the ip addr show and ping command.
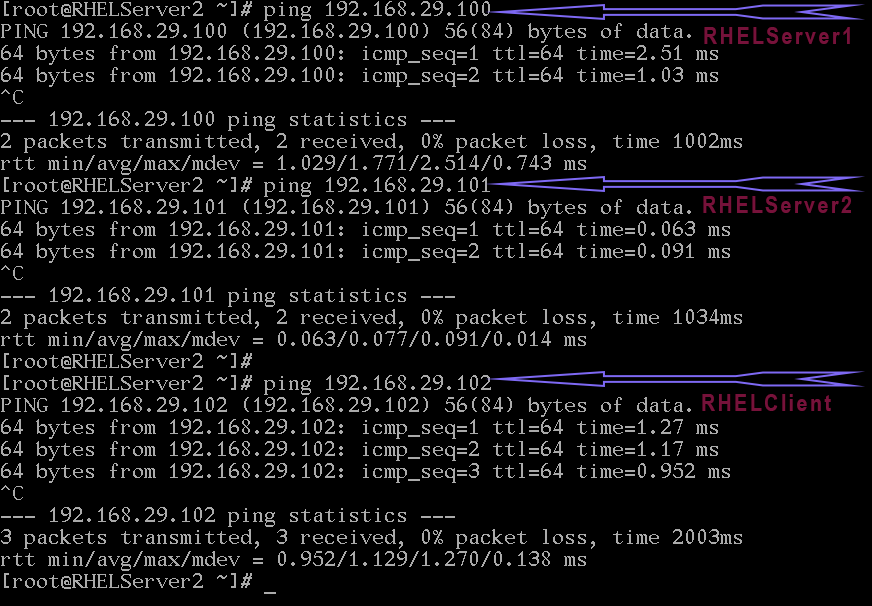
We also need to make sure that all systems have proper connectivity. To verify it, we can send ping requests from any one computer to two remaining computers. If we get replies, it verifies that all systems have proper connectivity.
Checkpoints
- All systems can access the Internet.
- IP addresses of all systems must belong to the gateway IP address's network.
- All systems must have proper connectivity. Use the ping command to test connectivity between systems.
If your lab meets the above criteria, it is ready for the DNS name server configuration.
DNS server concepts and configurations
DNS is one of the most complex topics. It uses many confusing terms and naming conventions. Explaining all these in a single tutorial with configuration makes it complex. So, instead of explaining everything in a single article, I will explain each in a separate tutorial.
This tutorial is part of the following tutorial series on DNS server concepts and configurations.
Chapter 01 How to configure DNS Server in Linux
Chapter 02 DNS Basic Concepts, Fundamentals, and Terminology
Chapter 03 DNS Server and Query Types Explained
Chapter 04 The /etc/hosts, /etc/resolv.conf, and /etc/nsswitch.conf files
Chapter 05 The dig command on Linux
Chapter 06 The nslookup command on Linux
Chapter 07 Change or specify the DNS server to the nslookup command
Chapter 08 DNS zone File Format
Chapter 09 The TTL and ORIGIN directives in the zone file
Chapter 10 Types of resources records in zone files
Chapter 11 The SOA Record Explained in the DNS zone file
Chapter 12 The NS Record, Glue record, and Lame Delegation
Chapter 13 The MX record in a zone file explained
Chapter 14 The a, aaaa, and cname DNS record types
Chapter 15 The pointer (PTR) record and Reverse mapping Explained
Chapter 16 How to configure a caching-only name server
Chapter 17 How to configure DNS Forwarding and a forwarder name server
Chapter 18 How to configure a primary or master authoritative name server
Chapter 19 How to configure a secondary or slave authoritative name server
Chapter 20 How to configure reverse mapping on DNS name servers
Author Laxmi Goswami Updated on 2026-06-05