How to Configure NFS Server in Redhat Linux
NFS (Network File System) allows you to share local directories on the network and access them from remote systems. It works in a server/client architecture. The nfs server shares directories. The nfs client mounts and uses them as local directories. This tutorial explains how to install, configure, test, and verify it on RHEL/CentOS Linux.
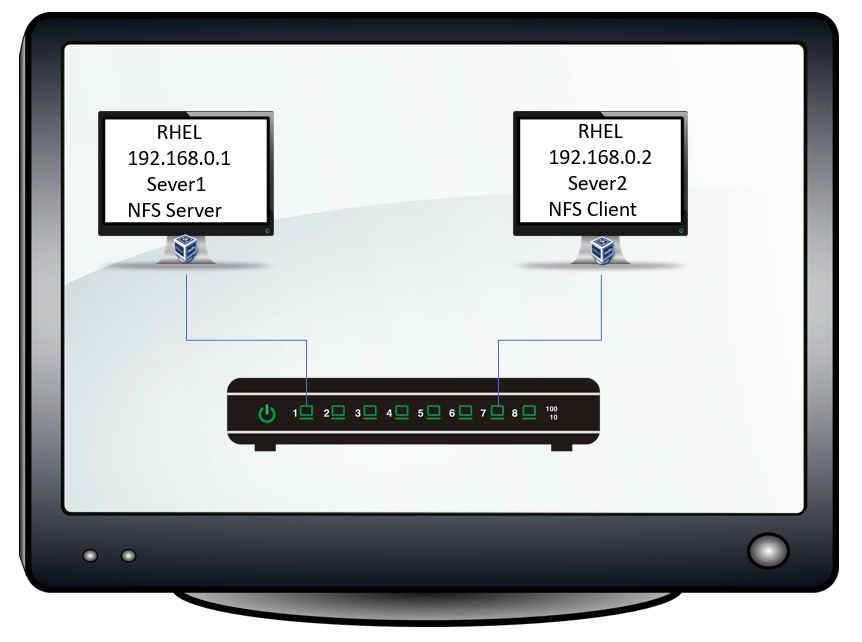
Lab setup
You need two Linux systems for this lab. Both systems must have connectivity. You will configure and use the first system as the nfs server and the second system as the nfs client. To learn how to set up this lab, you can check the following tutorial.
RHCE Practice Lab Setup in VMWare and VirtualBox
Installing NFS
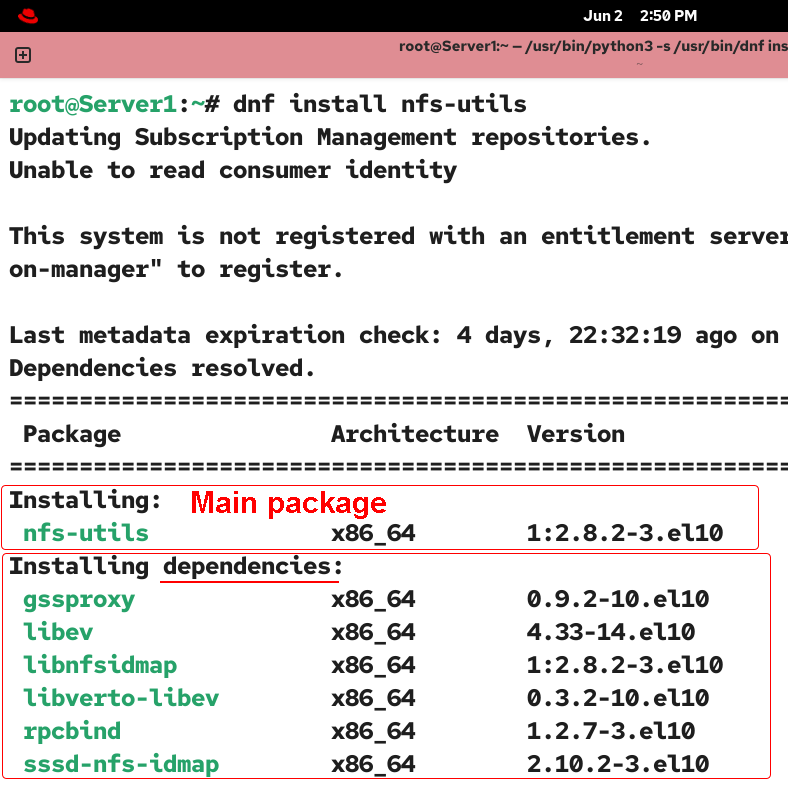
The nfs-utils package provides the nfs service. The nfs service requires a few additional packages to function. The following command installs this package and all its dependencies. You need to run this command on both the nfs server and the client systems.
#dnf install nfs-utils
Configuring the NFS server
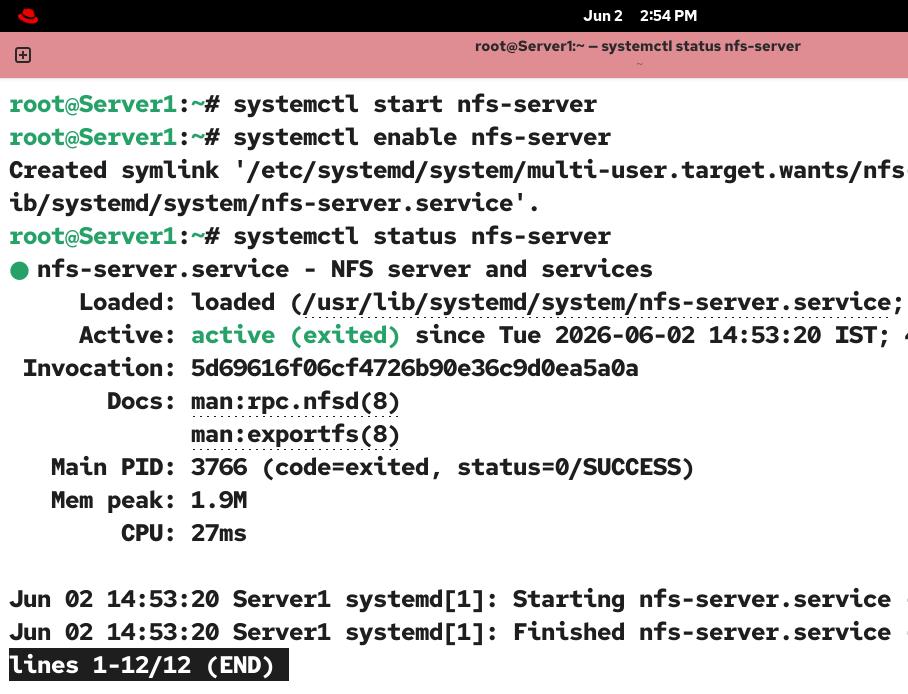
After installing the necessary packages, use the following command to start the NFS server service on the nfs server.
#systemctl start nfs-server
Run the following command to start it automatically at boot time.
#systemctl enable nfs-server
The following command shows the current status of this service. This service must be active and running on the nfs server.
#systemctl status nfs-server
The nfs service relies on the rpcbind service for port mapping. You also need to start and enable this service at boot time.
#systemctl start rpcbind
#systemctl enable rpcbind
#systemctl status rpcbind

The default firewall prevents the nfs server from accepting incoming connections from nfs clients. To allow the nfs server to accept incoming connections and enable data transfer between the nfs server and clients, you need to add the nfs, rpc-bind, and mountd services to the allowed services list. Use the following commands to add these services to the trusted services.
#firewall-cmd --permanent --add-service=nfs
#firewall-cmd --permanent --add-service=rpc-bind
#firewall-cmd --permanent --add-service=mountd
The default rpc port is 111. The default nfs port is 2049. These ports are not opened by default. Use the following commands to open these ports.
#firewall-cmd --permanent --add-port=111/tcp
#firewall-cmd --permanent --add-port=2049/tcp
#firewall-cmd --permanent --add-port=2049/udp
Reload the firewall to apply the change.
#firewall-cmd --reload

Sharing directories from the nfs server
You can share any existing directory or create a new directory for sharing. The user who creates a directory becomes its owner. The default file permissions allow only the owner and the group owner to read and write the directory.
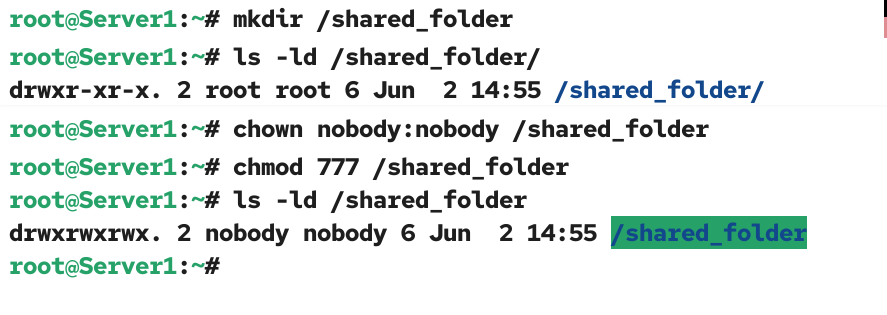
Change the owner and group owner of the directory you want to share via nfs to nobody. Nobody is a special, built-in, low-privilege user account. It is mainly used to run network services that accept remote connections from external unknown users. It does not allow external users to access other files or services available outside the directory.
Adjust the default file permissions based on your requirements and setup. In a lab environment or on a home network, you can change permissions to allow all network users to have read and write access to the shared directory.
#mkdir /shared_folder
#chown nobody:nobody /shared_folder
#chmod 777 /shared_folder
The /etc/exports file stores entries for all shared resources. The NFS service broadcasts entries of this file. Each entry in this file denotes an individual shared resource. It uses the following syntax.
[the path of the directory which you want to share] [IP addresses of allowed nfs clients][permissions/options]
There is no space between the nfs client’s IP and options. Options are specified in parentheses. The following table lists the available options.
| rw | NFS clients can read and write to the shared directory. |
| ro | The shared directory is read-only. NFS clients cannot modify existing files or add new ones. |
| sync | Specifies that all changes must be written to disk before the command completes. |
| root_squash | Prevents root users on remote systems from accessing the shared directory. |
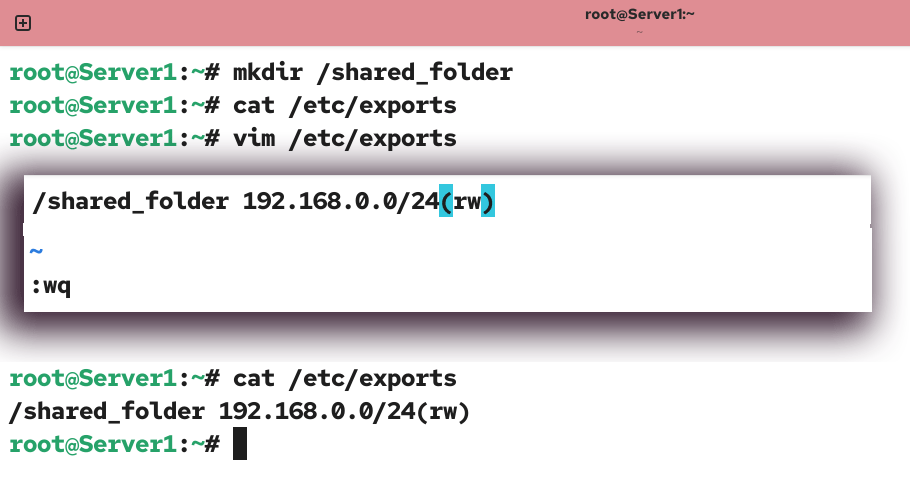
Add an entry for the directory you want to share in this file.
#vim /etc/exports
/shared_folder      192.168.0.0/24(rw)
:wq
#cat /etc/exports
Replace 192.168.0.0/24 with your network address.
When you start the nfs service, it reads this file, broadcasts its entries, and makes them available for nfs clients to mount. The following command lists all shared directories from the nfs server.
#showmount -e [nfs server IP]
Since the nfs service reads this file at startup, any new entries you add after starting this service will be available to nfs clients only when you restart this service. The exportfs -r command allows you to refresh the shared directories list without restarting the nfs service. Use this command each time you edit or update the /etc/exports file.
#exportfs -r
#showmount -e [nfs server IP]

Configuring the NFS clients
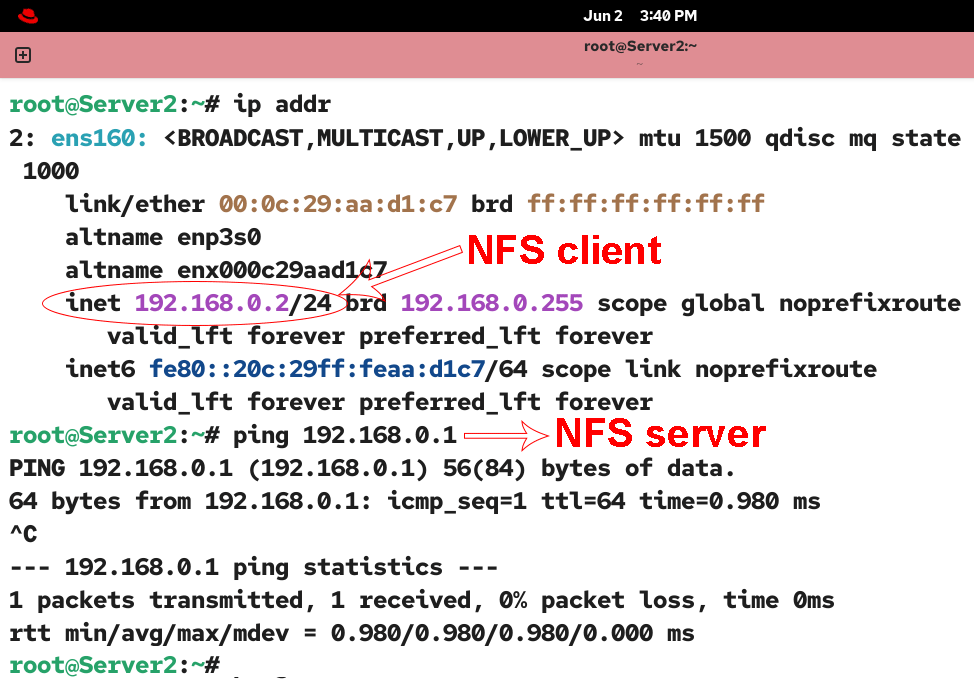
On a nfs client, install the nfs-utils package and test its connectivity to the nfs server.
#ping [nfs server IP]
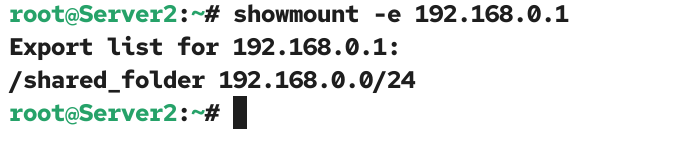
List all shared directories from the nfs server.
#showmount -e 192.168.0.1
Replace 192.168.0.1 with your nfs server IP.
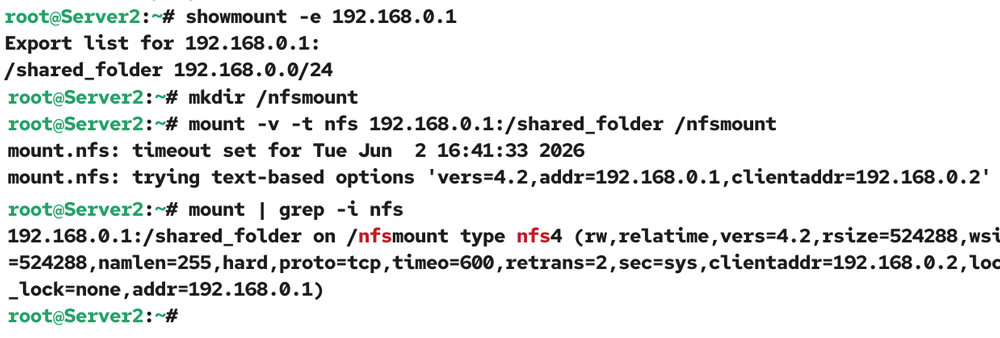
To use a shared directory, you need to mount it on the nfs client. Create a mountpoint directory.
#mkdir /nfsmount
You can mount a nfs share temporarily or permanently. To mount it temporarily, use the following command.
#mount -t nfs [nfs server IP]:/[share] [local mount point]
Mount the directory you shared from the nfs server to the mount point directory you created on the nfs client.
#mount -t nfs 192.168.0.1:/shared_folder /nfsmount
The -v option displays information about the mount process. You can use this option to view the options used to mount the shared directory.
To verify the nfs share, create a test file and a directory in the mount point directory on the nfs clinet and check them on the nfs server.
#touch /nfsmount/testfile_server2
#mkdir /nfsmount/testdir_server2
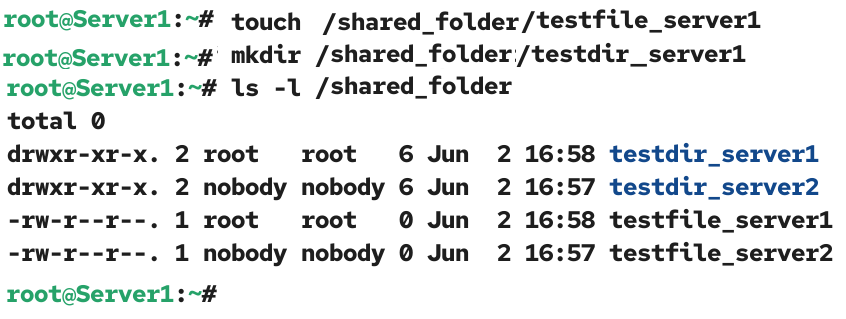
Reverse this process on the nfs server. Create a file and a directory in the mount point, then check them on the nfs client.
#touch /nfsmount/testfile_server1
#mkdir /nfsmount/testdir_server1

To remove the mounted directory, use the following command.
#umount  /nfsmount
#ls /nfsmount
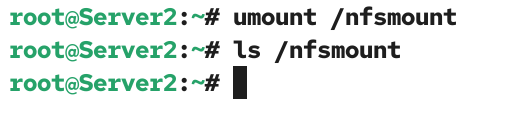
Replace nfsmount with your mount point directory.
To mount a shared directory permanently, add its entry in the /etc/fstab file. Use the following syntax to create an entry for the nfs share.
[nfs server IP]:/[shared directory on the nfs server] [mount point directory on the nfs client] nfs defaults 0 0
Add an entry for your nfs share in this file.
192.168.0.1:/shared_folder /nfsmount nfs defaults 0 0
Restart the nfs client system.
#reboot -f

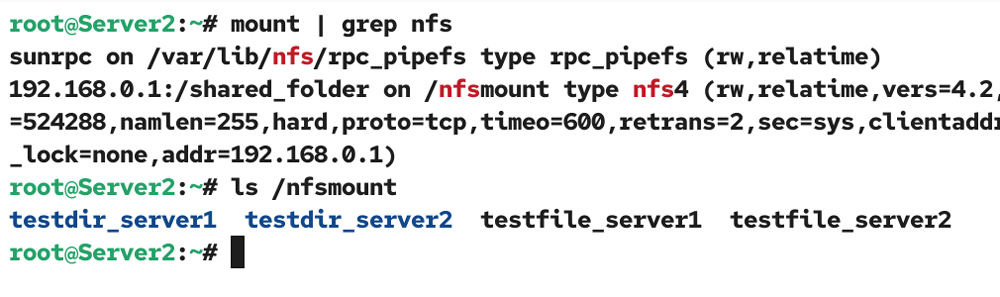
The boot process will mount all NFS shares listed in the /etc/fstab file at their mount points. To verify it, check the mount point directory.
#ls /nfsmount
To stop a nfs share from automatically mounting at boot time, remove its entry from the /etc/fstab file.
Troubleshooting
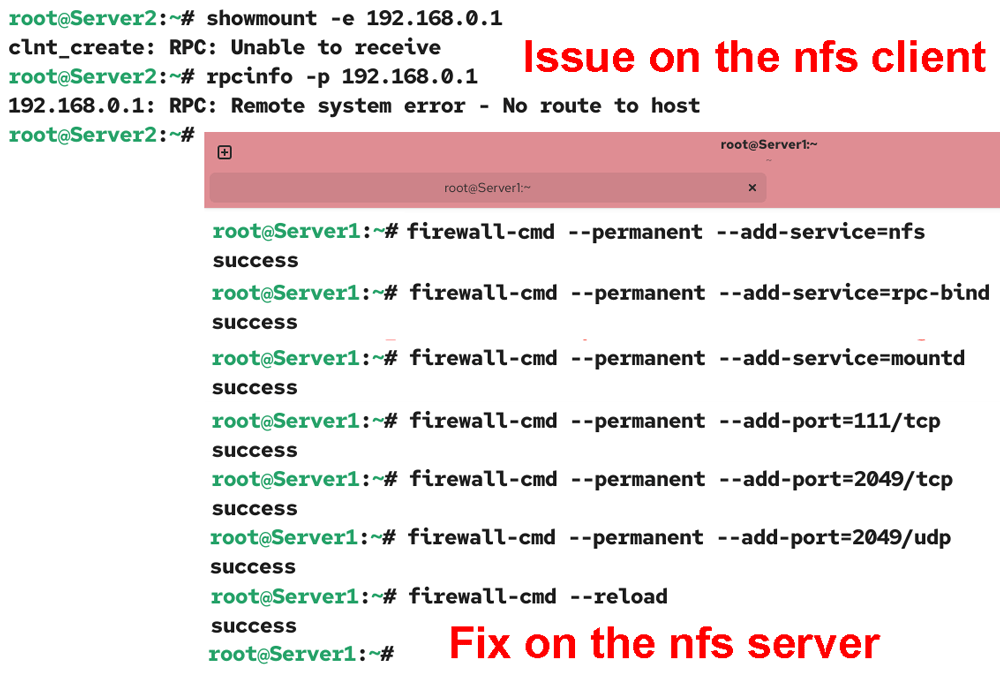
On a nfs client, you may receive the following error message while listing the shared directories from the nfs server.
#showmount -e [nfs server IP]
clnt_create: RPC: Unable to receive
This issue is related to the firewall configuration on the nfs server. It occurs when the firewall on the nfs server blocks nfs traffic. Use the following command to verify it.
#rpcinfo -p [nfs server IP]
[nfs server IP]: RPC: Remote system error - No route to host
To fix this issue, configure the firewall on the nfs server to allow nfs traffic. Run the following commands on the nfs server.
#firewall-cmd --permanent --add-service=nfs
#firewall-cmd --permanent --add-service=rpc-bind
#firewall-cmd --permanent --add-service=mountd
#firewall-cmd --permanent --add-port=111/tcp
#firewall-cmd --permanent --add-port=2049/tcp
#firewall-cmd --permanent --add-port=2049/udp
#firewall-cmd --reload
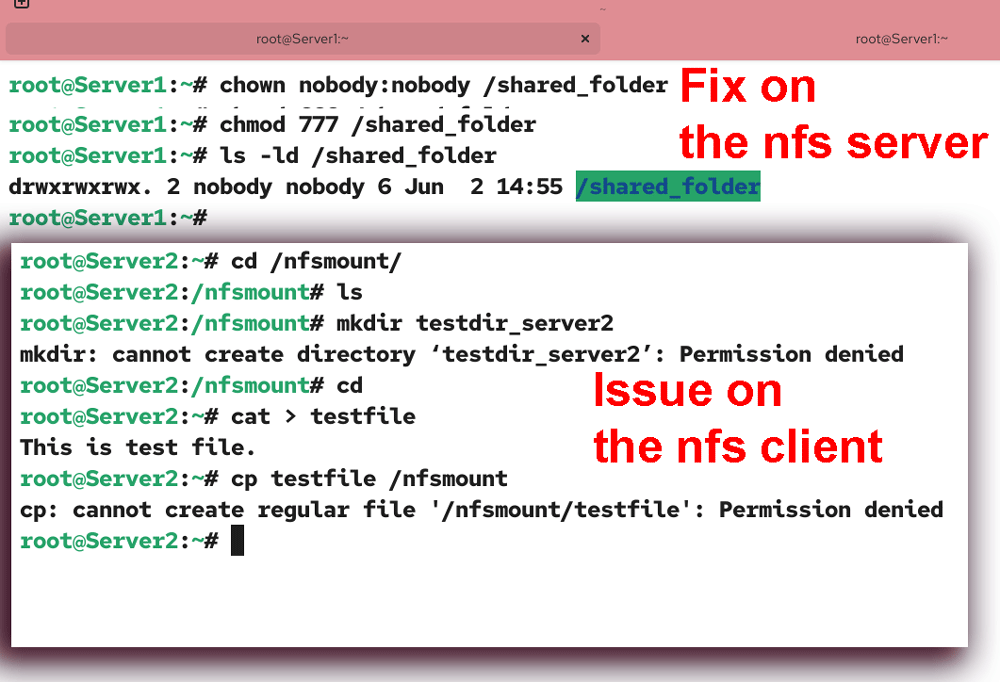
If you receive a Permission denied error while creating new files or editing existing files in a locally mounted nfs share directory, change the ownership of it to a least privileged user account and then update the default file permission to allow external users to read and write in it on the nfs server.
#chowm nobody:nobody [share directory]
#chmod 777 [share directory]
Conclusion
NFS provides a reliable and straightforward solution for sharing directories or partitions across a network. You can use it to store data in a centralized location or share files between systems on a network. This tutorial explained the steps and commands you need to set up, configure, test, and verify it on RHEL/CentOS Linux systems.
Author Laxmi Goswami Updated on 2026-06-05