How to Configure Samba Server in Redhat Linux
Samba is a network sharing service. It allows you to share data between Linux and Windows systems. Windows offers a feature called Workgroup. It allows you to set up an essential network for data and hardware sharing with minimum effort. In most cases, you can use this feature out of the box. In some cases, you may need to adjust IP configurations and a few basic settings. This feature works only with Windows systems. If you have a Linux system on your network and want to join it to the Windows workgroup or enable data sharing between Windows and Linux systems, you need to enable and configure the Samba service on the Linux system. This tutorial explains how to configure Samba on Linux, allow its traffic through the firewall, and share data between Linux and Windows systems.
Lab setup
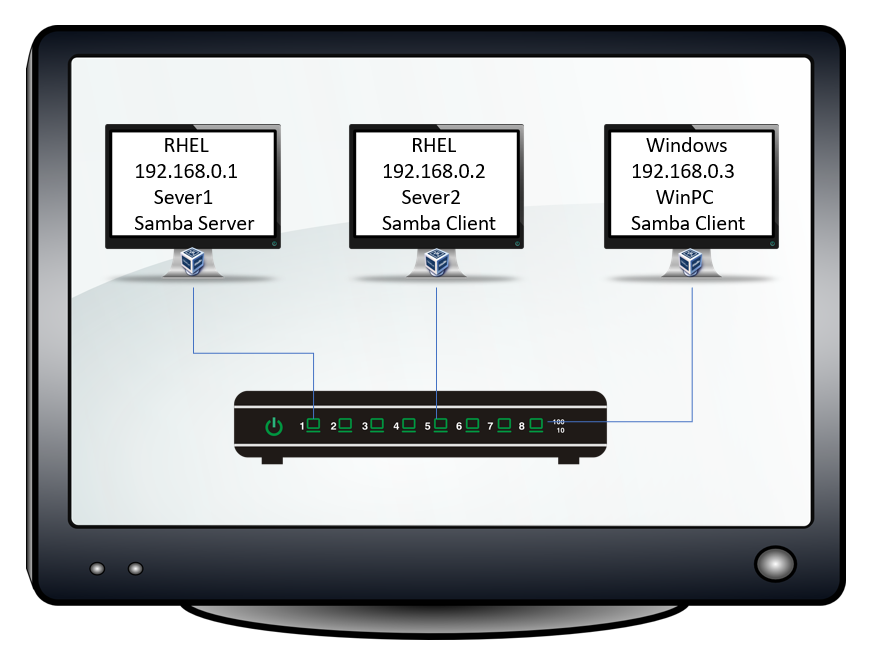
You need two Linux systems and one Windows system for this Lab. You will configure Samba on one Linux system. You will use another Linux system and the Windows system for testing. The lab used in this tutorial consists of two RHEL 10 systems and one Windows 11 system. The IP addresses of these systems are 192.168.0.1, 192.168.0.2, and 192.168.0.3. All three systems are on the same LAN and have connectivity. The following tutorial explains how to set up this lab on VMware or VirtualBox.
This lab is optional and required only if you want to practice this topic for any networking certification program, such as RHCE. To learn only the commands and configuration steps to implement Samba in your network, you can skip this section and move directly to the configuration section.
Installing Samba
Samba works in Server/client architecture. You install packages that provide the Samba server service on the Linux system you want to add to the Workgroup network. No installation is required on the Windows system. Samba is primarily used to share data between Linux and Windows systems. However, you can also use it to share files between two Linux systems. To use it for sharing between two Linux systems, install the Samba client on the other Linux system.
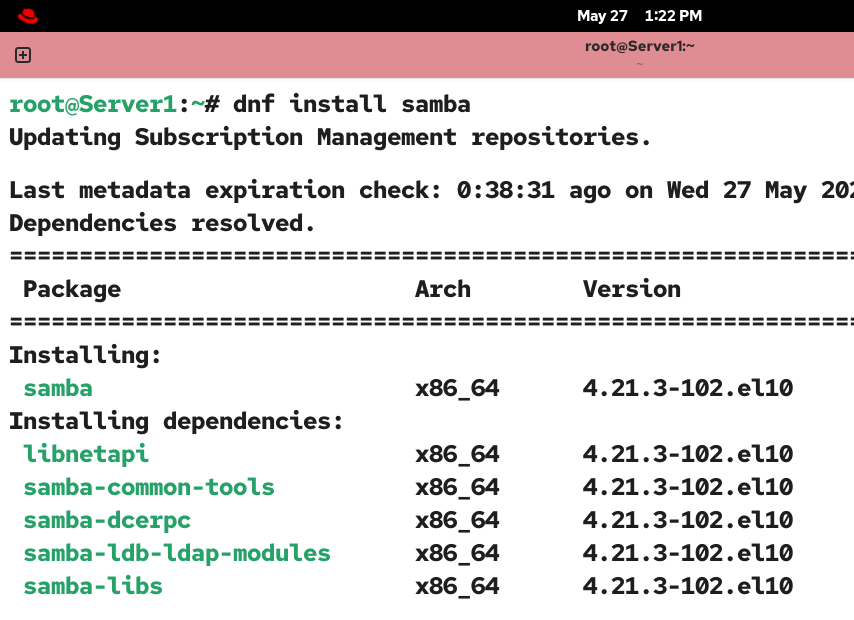
The following command installs the Samba server. Run this command on the Linux system you want to use as the Samba server.
#dnf install samba
The following command installs the Samba client. Run this command on the Linux system you want to use as the Samba client.
#dnf install samba-client

The dnf command automatically resolves the dependencies and installs them with the main package.
| RPM | Description |
| Samba | Base RPM for Samba Server. |
| samba-client | Base RPM for Samba Client. |
| samba-common | Include commands required by the Samba Server and client. |
| samba-doc | provides documentation for Samba. |
| samba-swat | GUI interface for Samba configuration. |
| samba-winbind | Allow interoperability between Linux and Windows. |
| samba-domainjoin-gui | Allows Linux users to connect with Windows workgroups and domains. |
Samba server configuration
The /etc/samba/smb.conf is the main configuration file of Samba. The default configuration file includes many directives. You can use the default configuration file or create your own. You can use the default configuration file as a reference to create your own.
Back up the original configuration file, then open it for editing.
#cp /etc/samba/smb.conf /etc/samba/smb.conf.bk
#vim /etc/samba/smb.conf

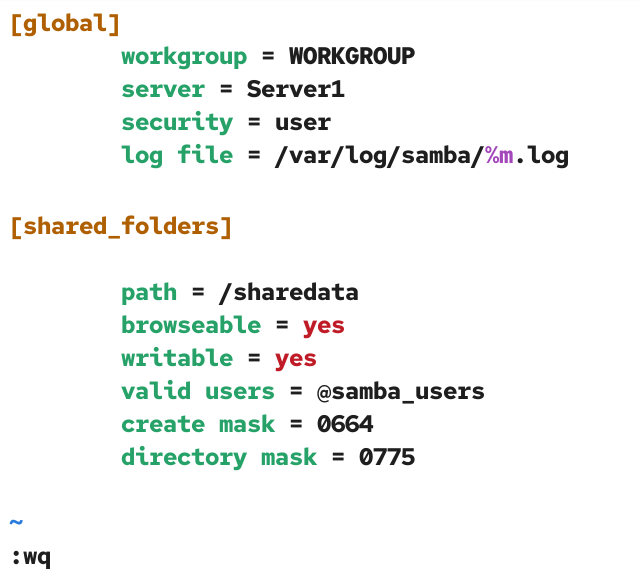
Keep any settings your network requires and remove all others. The following are the essential settings. It defines only two directives: global and shared_folder. The global directive includes settings you need to run a standalone Samba server. The shared_folder directive defines the shared resources.
[global]
    workgroup = WORKGROUP
    server = Server1
    security = user
    log file = /var/log/samba/%m.log
[shared_folder]
    path = /sharedata
    browseable = yes
    writable = yes
    valid users = @samba_users
    create mask = 0664
    directory mask = 0775
The following are the parameters in the global directive.
| workgroup | It is the name of the workgroup. You can check it on your Windows system. |
| server | It is the name of the Linux system. |
| security | This parameter instructs Samba to use a local database to authenticate connecting users. |
| log file | It is the file where logs are saved. |
The following are the parameters in the shared_folder directive.
| path | It is the path of the directory you want to share from the Linux system. |
| browseable | If you set this parameter to yes, a connecting user can browse this directory. |
| writabl | If you set this parameter to yes, a connecting user can create files and new directories in this directory. |
| valid users | This parameter defines the group of allowed users. If you set this parameter, only users who belong to this group can access this directory. |
| create mask | This parameter sets the default file permissions for newly created files in this directory. |
| directory mask | This parameter sets the default file permissions for newly created directories in this directory. |
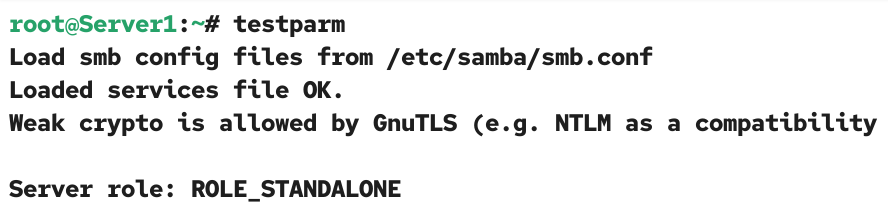
Save the configuration file, then run the following command to check it for errors.
#testparm
Creating shared directories
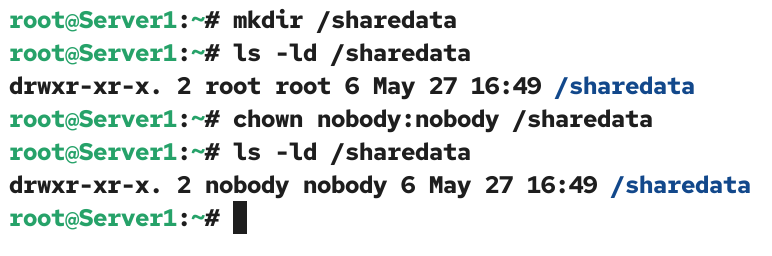
Make a directory whose path you defined in the configuration file. By default, the user who creates a file or directory becomes its owner. The default file permission does not allow anyone other than the owner to modify the file or directory.
If you use the root user to create the directory, the root user becomes its owner. Apart from the root user, other users cannot create files or directories in it. You must change the ownership of this directory. You have two options to change the ownership. You can change ownership to a default user account called nobody or a custom group.
The nobody user is a special low-privileged user account. It is used to run tasks that require no special permissions. It has no home directory. It is not associated with a login shell. It is not a member of any privileged group. If you make this user an owner and group owner of a directory, a remote user who accesses it via a network service can not access other users' files or system settings because the account lacks the permissions to do so. Use this option to provide limited or restricted access to the shared folder.
To grant full permissions, create a custom group, add local user accounts to it, specify the group name in the valid user parameter of the shared folder directive in the configuration file, and set the directory's ownership to the group.
You can create new local user accounts or use existing ones. If you create new user accounts based on your requirements, you can create fully functional or limited-privilege user accounts. Samba uses its own database to authenticate users. So, if you add a user account entirely for Samba, you do not need to create a home directory for it. You also do not need to assign a login shell to it, as it will never be used for local logins.
Use the following command to add a regular user account.
#useradd /sbin/nologin smbuser1
Use the following command to add a limited-privilege user account. The -M stops it from creating the home directory. The nologin shell is a special shell. It restricts the user from logging in locally.
#useradd -M -s /sbin/nologin smbuser1
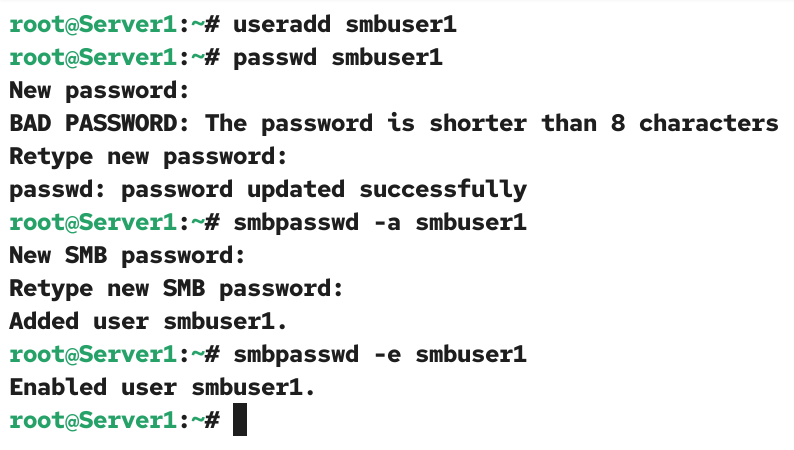
No matter what type of user account you create, you must set a password for it. Samba does not need this password for login. Unless you set a password for a user account, it remains disabled. To enable it, you need to set a password. Use the following command to set a password.
#passwd smbuser1
Samba uses its own database to authenticate users. Use the following command to add a user account to its database. This command sets a password for the user account and adds it to its database. You need this password to access the shared resources via the Samba service.
#smbpasswd -a smbuser1
After adding a user account to its database, run the following command to enable it for Samba login.
#smbpasswd -e smbuser1
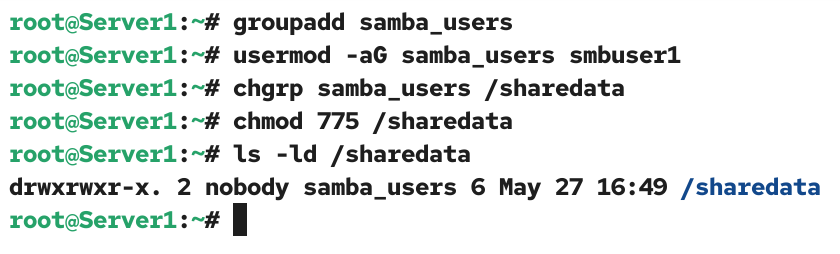
Create a new group. Use the same group name you used in the valid user parameter of the shared _folder directive in the configuration file.
#groupadd samba_users
Add the user you want to allow via Samba.
#usermod -aG samba_users smbuser1
Change the group ownership to the group you have created.
#chgrp samba_users /sharedata
Change the default file to allow group owners to read, write, and execute files in the shared directory.
#chmod 775 /sharedata
#ls -ld /sharedata
Allowing traffic through the firewall
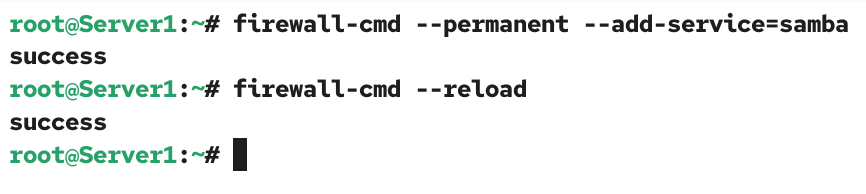
The default firewall configuration prevents the Samba service from accepting incoming connections. Use the following command to allow it.
#firewall-cmd --permanent --add-service=samba
Restart the firewall to apply the change.
#firewall-cmd --reload
Configuring SELinux
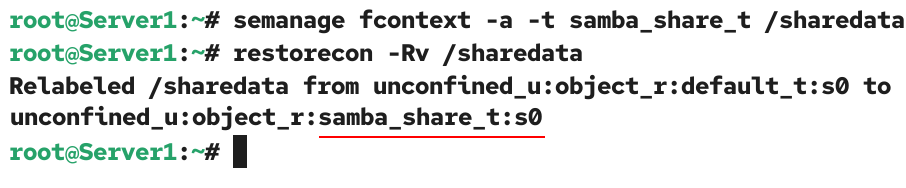
If SELinux is enabled, run the following commands to allow users to create and access files in this directory.
#semanage fcontext -a -t samba_share_t /sharedata
#restorecon -Rv /sharedata
Managing the Samba service
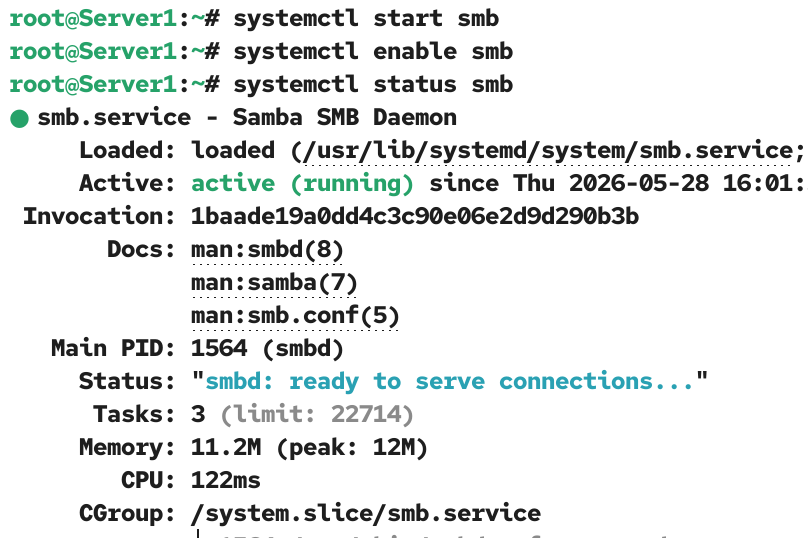
After completing all necessary configurations, run the following command to start the Samba service.
#systemctl start smb
Use the following command to enable and start it at boot time.
#systemctl enable smb
The following command shows the current status of this service.
#systemctl status smb
Testing from a Linux client
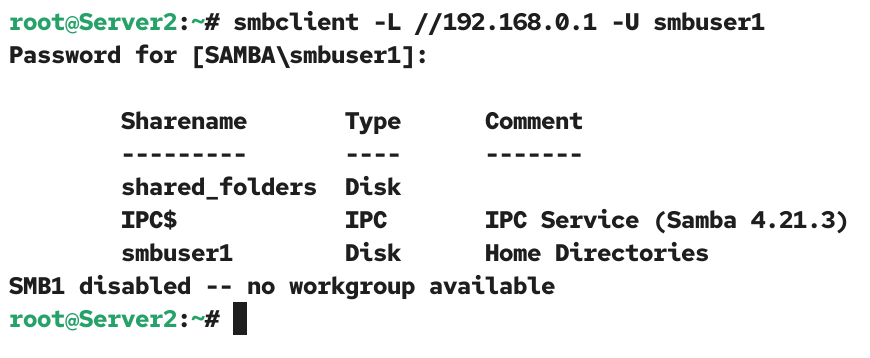
To use a Linux system as a Samba client, install the samba-client package and test connectivity with the Samba server. If both systems are connected, run the following command to list all shared directories on the Samba server.
#smbclient -L //[Samba Server IP] -U [User on the Samba Server]
To authenticate this action, enter the password you set for the user while adding it to the Samba user database.
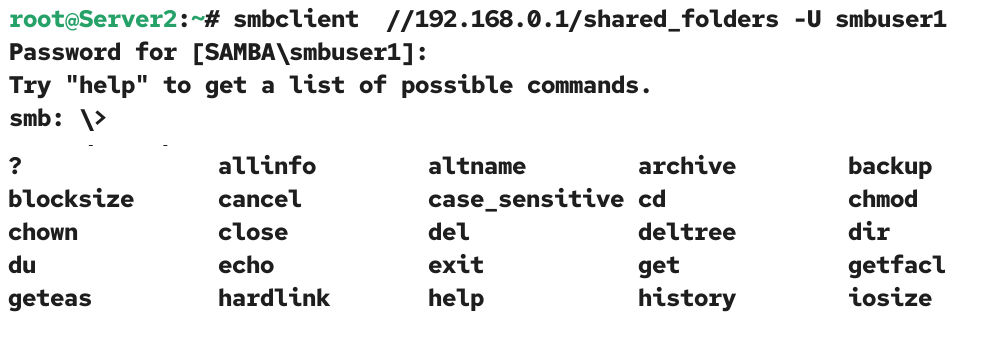
To access a shared folder for editing, run the following command.
#smbclient //[Samba Server IP]/[Shared folder] -U [User on the Samba Server]
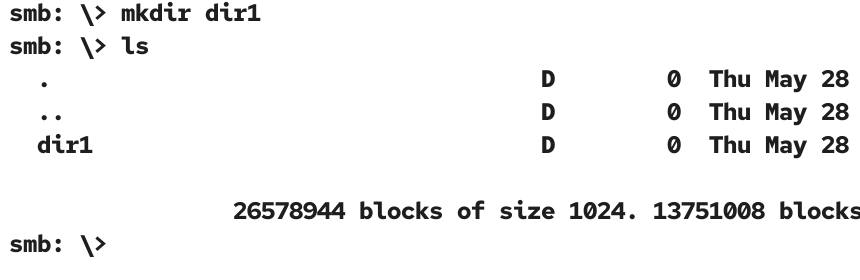
This command connects you with the Samba server and drops you in the shared folder. Based on how you shared this folder on the Server, you can perform tasks within it. For example, if you set the browseable option to yes, you can navigate the subdirectories within this directory. If you set the writeable option to yes, you can create new files in this directory. The command prompt changes to the one provided by the Samba server. To view all available commands at the smb command prompt, use the help command.
#smb: \>help
Create a test directory.
#smb: \>mkdir test
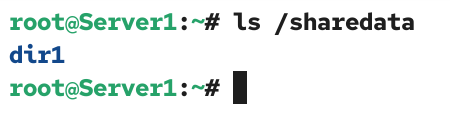
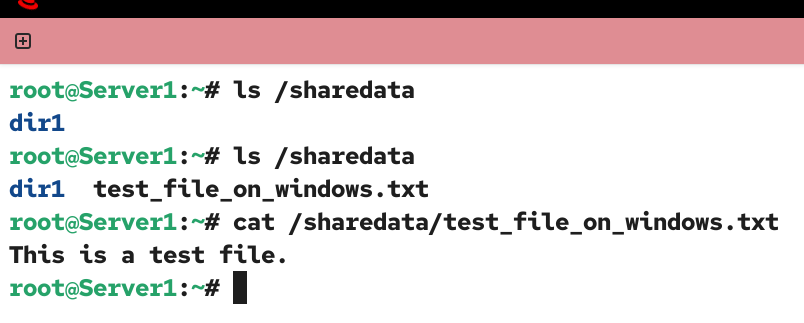
Verify it on the server system.
#ls [shared_folder]
Testing from a Windows client
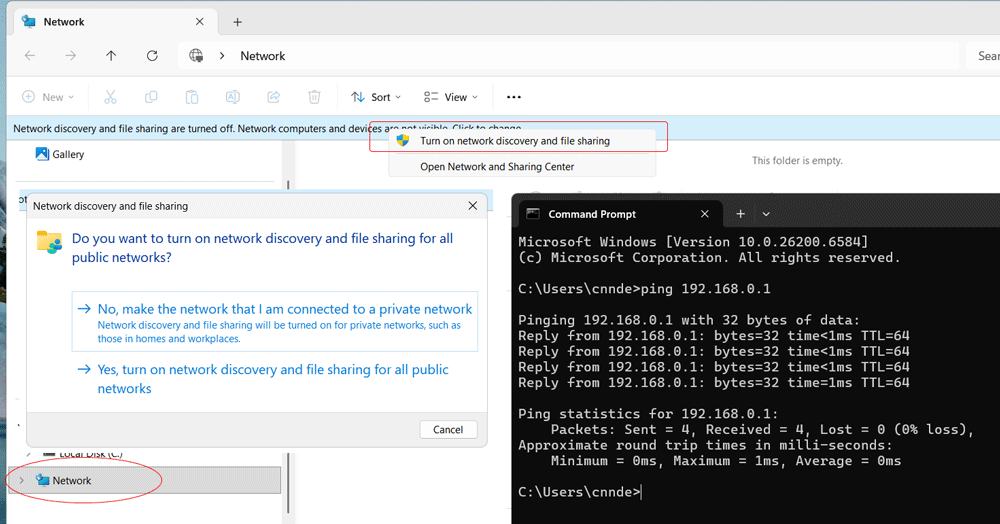
Samba is primarily developed for enabling sharing between Linux and Windows. To use a Windows system as a Samba client, enable Network discovery and file sharing, and test connectivity with the Samba server.
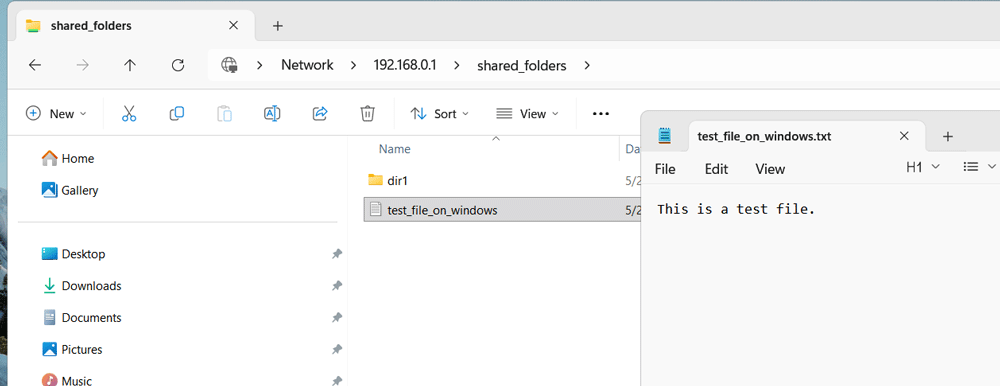
To access the Samba server, enter the Samba server’s IP address in the address bar of the Network. Authenticate the access with the user account you added on the Samba server. Use the password you added to the Samba user database for the user account.
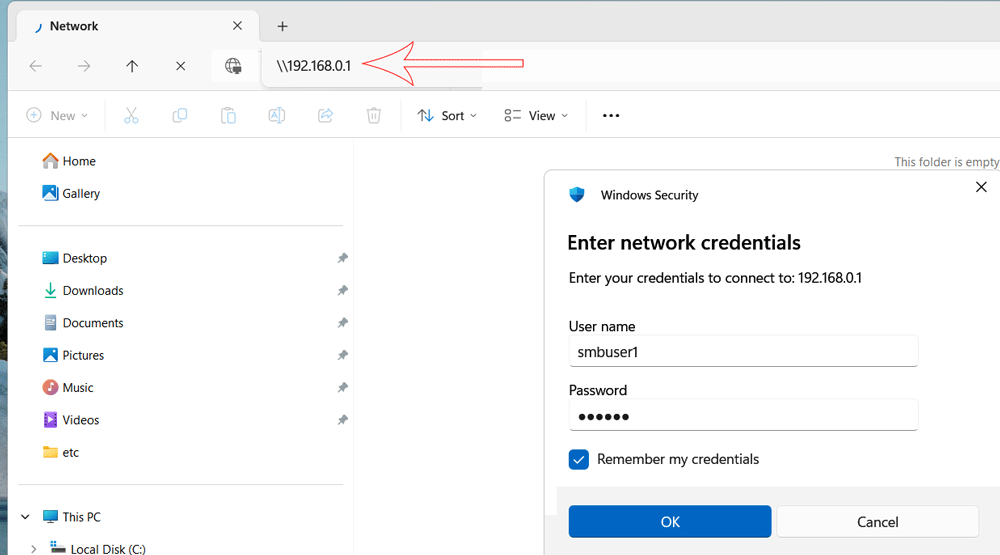
Upon successful authentication, the Network will display all shared folders from the Samba server.Create a test file in the shared folder.
To verify it, check the shared folder on the server.
Sharing multiple folders and controlling the sharing
To share a folder from the Samba server, you need to add a directive for it in the configuration file. In the directive, you can use parameters to control the sharing. There are four essential parameters: path, browseable, writeable, and user.
The path parameter specifies the folder you want to share.
The browseable parameter lets you control the browsing within the shared directory. Set it to yes to allow browsing and no to deny. The writeable parameter controls the editing feature. If you set it to yes, users can create new files and edit existing ones. The user parameter defines the users who can access the shared folder.
To share a folder for a limited number of users, add them to a group, and specify the group name as follows.
valid users = @[group_name]
To share a folder for all users, use the following parameter.
guest ok = yes
To share a folder for a single user, use the following parameter.
valid users = [user_name]
Key points:-
- Microsoft Windows uses the CIFS (Common Internet File System) protocol, which is derived from the SMB (Server Message Block) protocol, for networking. CIFS is based on the Server Message Block (SMB) protocol.
- Samba is an open-source Linux implementation of the SMB/CIFS protocols. It uses TCP/IP protocol. It enables interoperability between Linux and Windows. It provides file and print sharing service between Linux and Windows systems.
- Samba allows Linux to interact with Windows clients, servers, Active Directory members, Primary domain controllers, and member servers. It also supports Microsoft Access Control Lists.
- The main configuration file of Samba is the /etc/samba/smb.conf. Samba Web Administration tool (SWAT) is a GUI-based configuration tool for the Samba Server.
- In Linux, Samba provides User Authentication and Authorization, File and printer sharing, Name resolution, and Browsing services.
Conclusion
Samba is a network service that allows you to share files between Linux and Windows. This tutorial explained how to configure, test, and verify it in a LAN network. By implementing the steps explained in this tutorial, you can ensure interoperability and efficient data exchange in mixed network environments.
Author Laxmi Goswami Updated on 2026-05-29