Install and Run Chrome as root in Ubuntu Linux
Google Chrome is one of the most popular web browsers. This tutorial explains how to install, start, manage, update, and remove it on Ubuntu. It also provides solutions to common Chrome installation errors you may face during the installation.
You have the following two options to install Chrome on Ubuntu.
- Using the Chrome repository
- Using the Chrome package
Using the Chrome repository
The apt tool is the default CLI software management tool on Ubuntu. It works with Software repositories. If the package you want to install or update is available in any of the software repositories of Ubuntu, it is the best choice. It automatically resolves, downloads, and installs dependencies during the package installation. Ubuntu Software repositories store and distribute only open-source packages available under the GPL license. Sadly, Google Chrome does not fit in this category. Hence, it is not available in Ubuntu Software repositories.
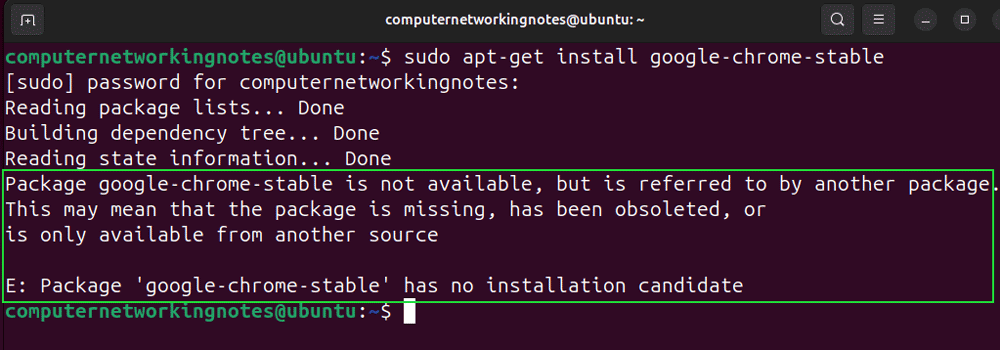
If you use the apt tool to install Chrome, it will return the following error message.
$sudo apt-get install google-chrome-stable
Package google-chrome-stable is not available, but is referred to by another package. This may mean that the package is missing, has been obsoleted, or is only available from another source.
E: Package 'google-chrome-stable' has no intsallation cadidate.
Google maintains an in-house repository to store and distribute Chrome. If you want to use the apt tool to install or update Google Chrome, you must add and configure that repository.
Adding the Google Chrome repository on Ubuntu
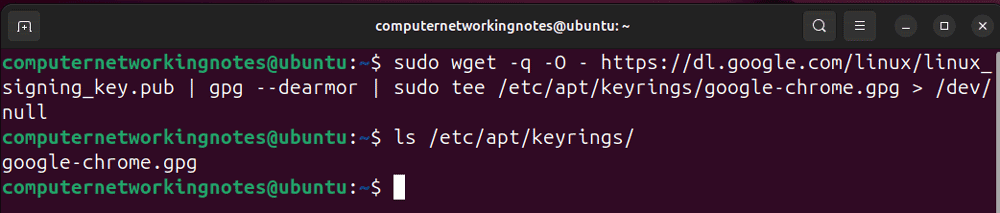
Adding the Chrome repository is a two-step process. In the first step, you download and install the public key the apt tool uses to check the integrity of the downloaded packages. In the second step, you configure the source URL (repository's URL) and map it with the public key downloaded in the first step. The following command downloads and installs the public key for Chrome's repository.
$wget -q -O - https://dl.google.com/linux/linux_signing_key.pub | gpg --dearmor | sudo tee /etc/apt/keyrings/google-chrome.gpg >/dev/null
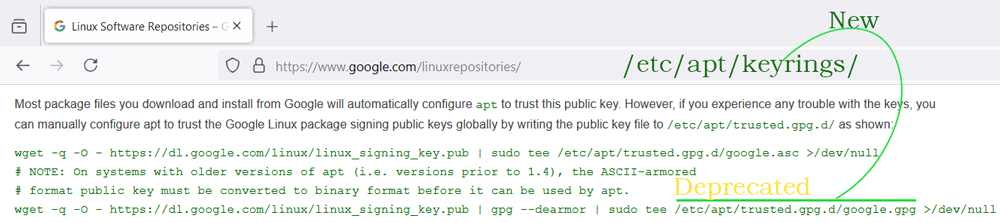
The following webpage provides the latest information about this key and the command you need for manual installation.
https://www.google.com/linuxrepositories/
Key point:-
The above page suggests saving the key in the /etc/apt/trusted.gpg.d/ directory. Ubuntu has depreciated the use of this directory to save public keys in the recent version. The new path to save public keys is the /etc/apt/keyrings/.
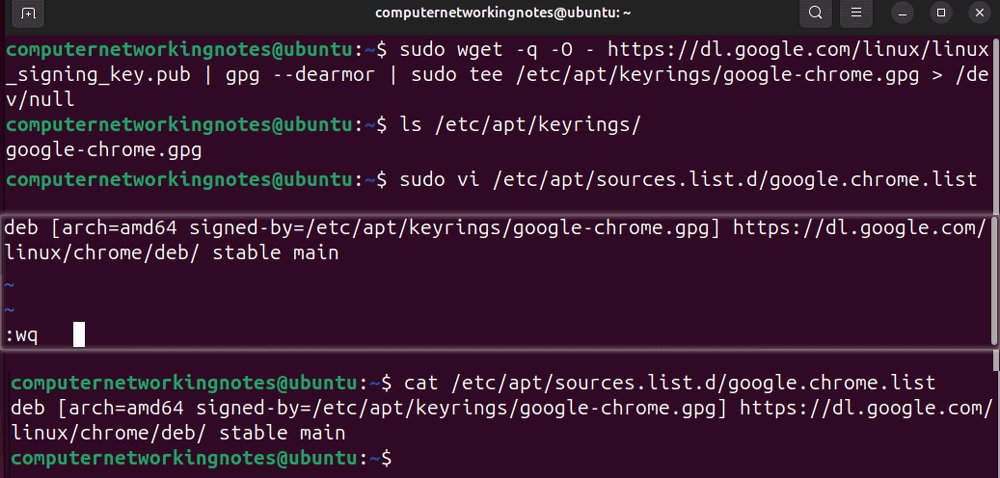
After adding the public key, you must create a source list file containing the URL of the Chrome repository and related parameters. The Chrome package includes the information the source list file needs. The installation process automatically creates the source list file and adds this information. Ubuntu uses this file to update Chrome when you perform a system update. If you have previously installed Chrome using any method, the system already has the sources list file. If not, you must create this file to use the apt tool to install and update Chrome. If the source list file exists, update it to add the path of the Chrome key. If not, create a source list file and add the following entry.
$sudo vi /etc/apt/sources.list.d/google.chrome.list
    deb [arch=amd64 signed-by=/etc/apt/keyrings/google-chrome.gpg] https://dl.google.com/linux/chrome/deb/ stable main
Ubuntu caches the repository data at the system boot. It uses the cached data til the system is up. It does not actively monitor the repositories list. Any change to it will not work until you reboot the system or run the following command. Run this command every time you create or update a source list file.
$sudo apt update
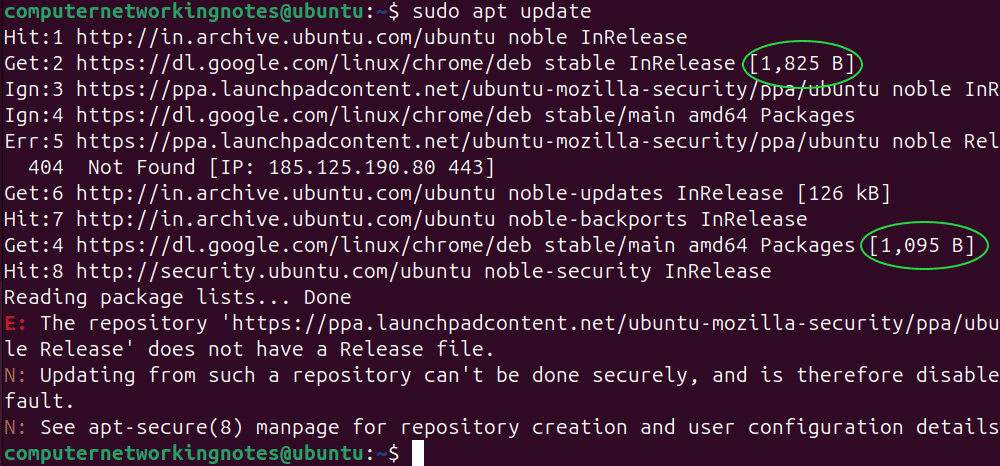
Observe the output of this command. If the system connects to the Chrome repository, you can use the apt tool to manage Chrome.
Using the apt tool to manage Chrome
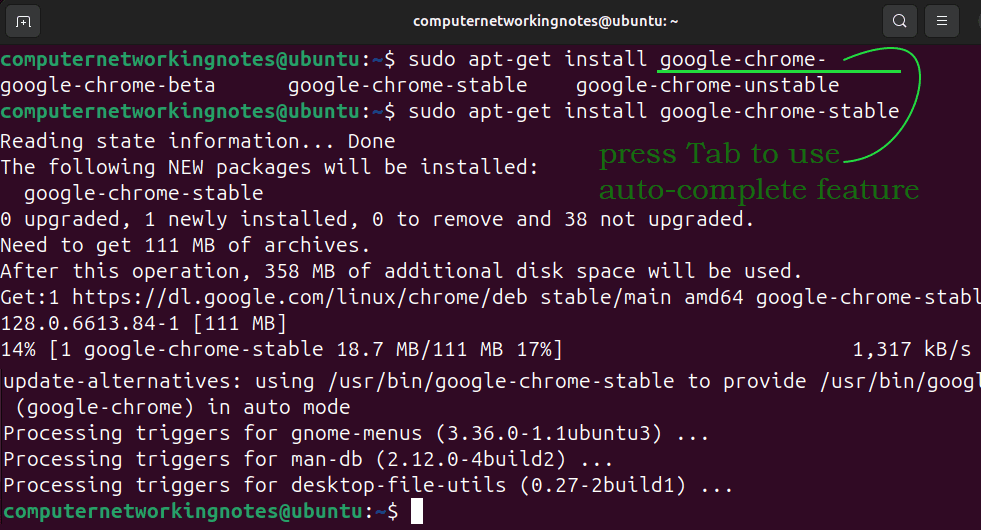
The apt tool requires a package name as an argument and an action such as install, update, and remove. If you specify the install option, it finds the package in all configured repositories. If it finds the package, it installs the package. It supports the auto-completion feature. To use this feature, type a few letters of the package name and press the tab key. It lists all matching packages from all repositories. It repeats the same thing with the update option. It compares the locally installed package's version with the version of the package available in the repository. If the repository contains the updated version, it updates the locally installed package. If you use the remove option, it deletes the given package.
Chrome variations
The Chrome repository contains three variations of Chrome: unstable, beta, and stable.
Unstable is an under-development version of Chrome. Chrome releases this version with newly developed and updated features. Features of this version may or may not work. This version is for developers.
Beta is a testing version of unstable Chrome. Chrome releases this version for testers who want to test the finalized features added to the unstable version.
Stable is the final version of Chrome. Chrome releases it for end users. It includes all finalized and tested features of the beta version.
Installing Chrome using the apt tool
The following command installs the latest stable version of Chrome.
$ sudo apt-get install google-chrome-stable
The following command installs the latest beta version of Chrome.
$ sudo apt-get install google-chrome-beta
The following command installs the latest unstable version of Chrome.
$ sudo apt-get install google-chrome-unstable
Starting Chrome from the command line
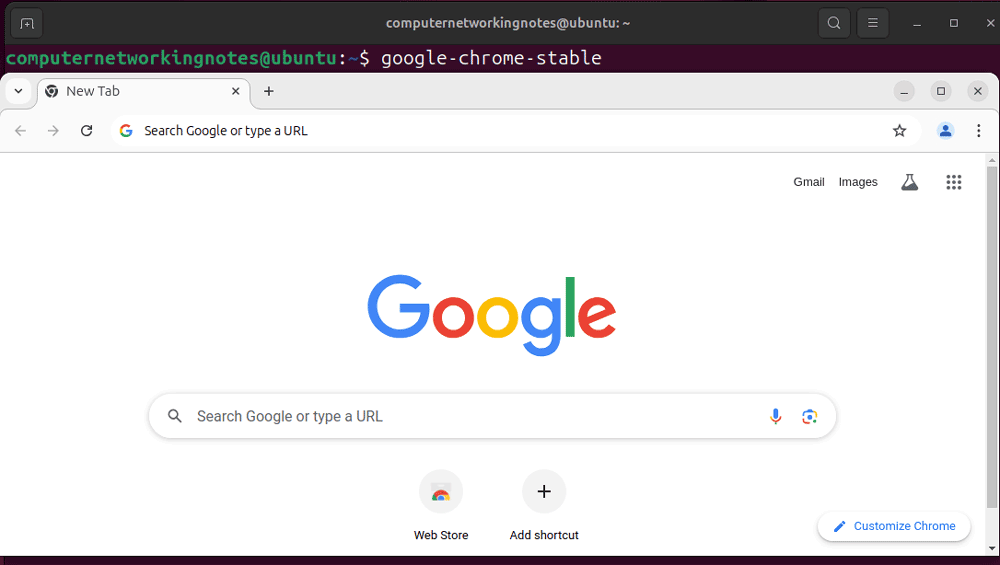
The following command starts Chrome on CLI.
$google-chrome-stable
Updating Chrome on CLI
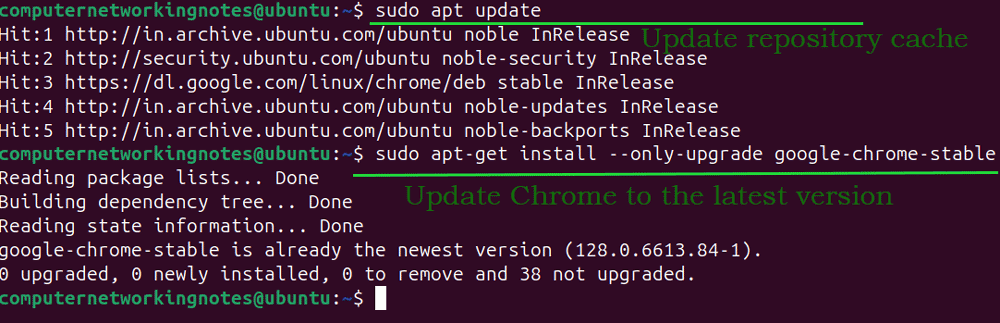
The following commands update Chrome to its latest version.
$sudo apt update
$sudo apt-get install --only-upgrade google-chrome-stable
- The first command updates repository cache data.
- The second command updates Google Chrome.
Removing Chrome
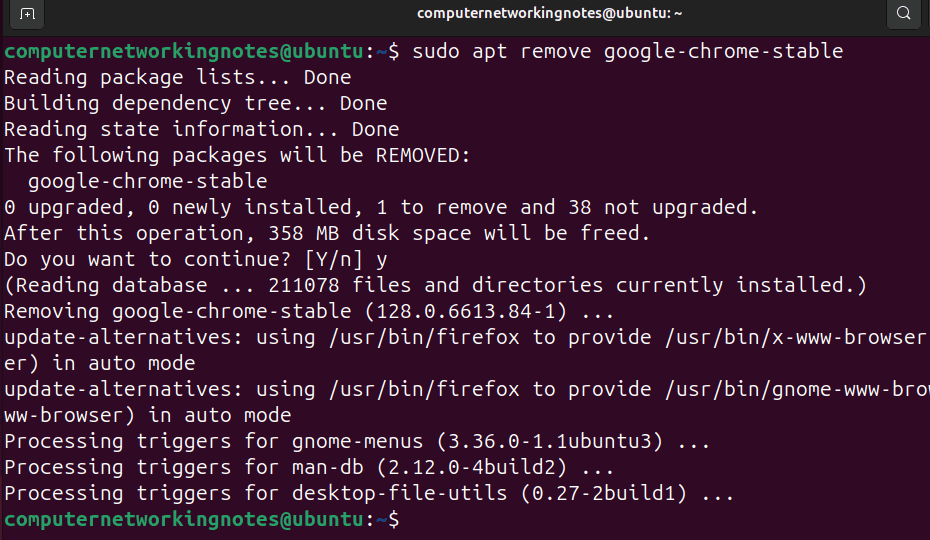
The following command removes Chrome.
$sudo apt remove google-chrome-stable
Using the Chrome package
Google also offers a standalone Chrome package for direct installation. You can use any of the following package manager tools to install the Chrome package.
- The dpkg command
- The GDebi command
- The GDebi GUI tool
- The Software Center
The dpkg command
The dpkg is the default package manager on Ubuntu. It allows you to install, manage, and remove packages. Unlike the apt command that automatically selects and downloads the correct packages from repositories, it does not automate anything. You must manually select and download the package you want to install. After downloading the package, you can install it using the dpkg command.
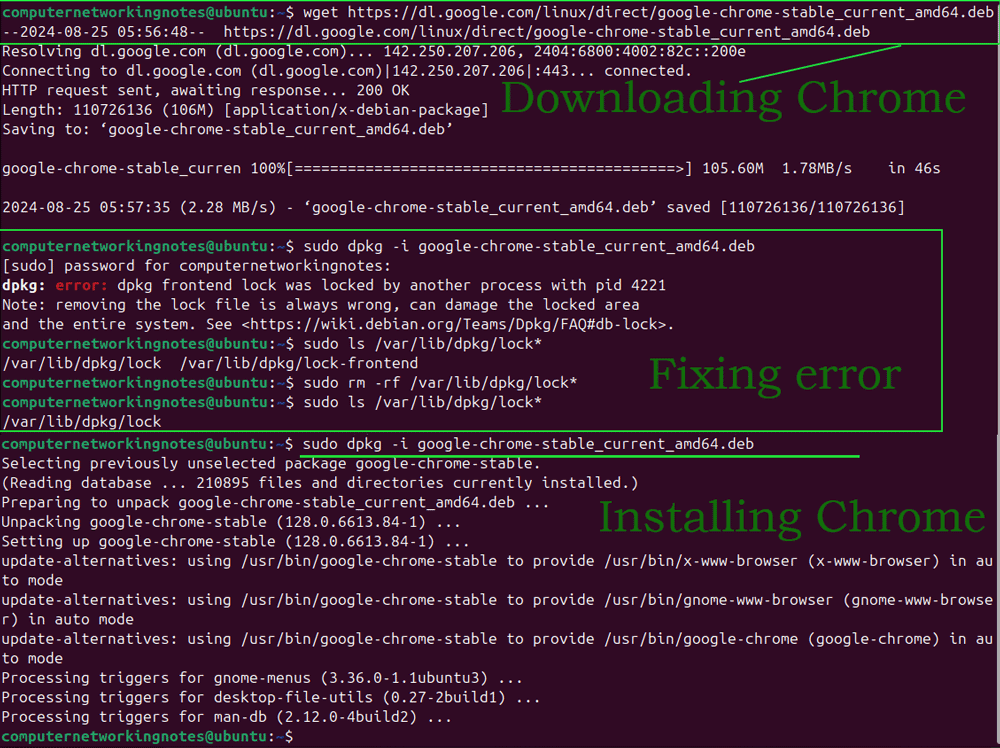
The following command downloads the package of the latest stable version of Chrome.
$ wget https://dl.google.com/linux/direct/google-chrome-stable_current_amd64.deb
The following command installs the downloaded package.
$ sudo dpkg -i google-chrome-stable_current_amd64.deb
Fixing common error
The above command may return the following error.
dpkg: error: dpkg fronted lock was locked by another process with pid.
This error indicates another installation process is running. You have three options to fix this issue.
- Let the other process complete
- Restart the system
- Remove the lock file
The following command lists the lock file.
$sudo ls /var/lib/dpkg/lock*
The following command removes the lock file.
$sudo rm -rf /var/lib/dpkg/lock*
Remove the lock file only when other options do not work. It terminates the running installation process.
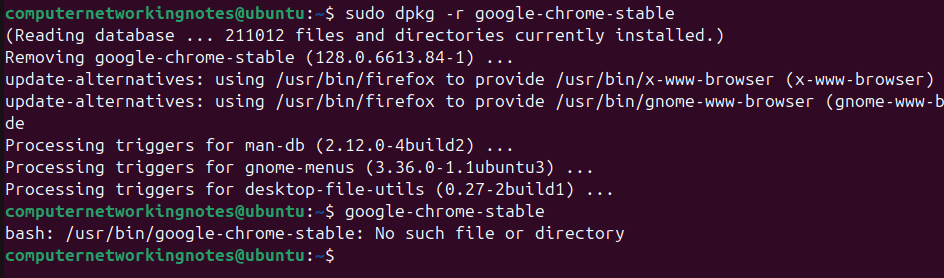
Deleting Chrome
The following command deletes the Chrome package.
$sudo dpkg -r google-chrome-stable
The GDebi command
GDebi is another popular open-source package manager. The main advantages of using it over the default dpkg are the following.
- It can resolve essential dependencies.
- It provides a GUI tool to manage packages.
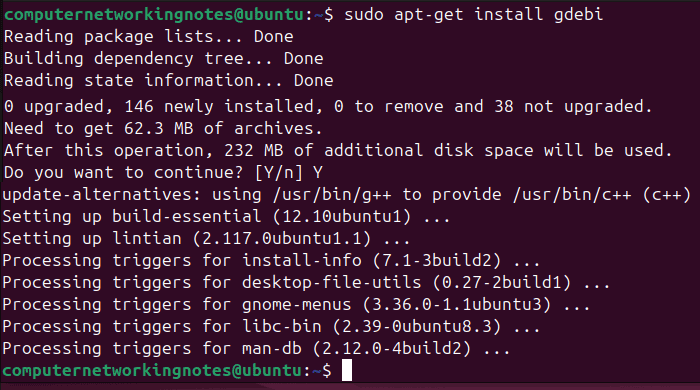
It is not a part of the default installation. If you want to use it, you must install it first.
The following command installs the GDebi package manager.
$sudo apt-get install gdebi
After installing the GDebi package manager, you can use the following command to install a package.
$sudo gdebi [package path]
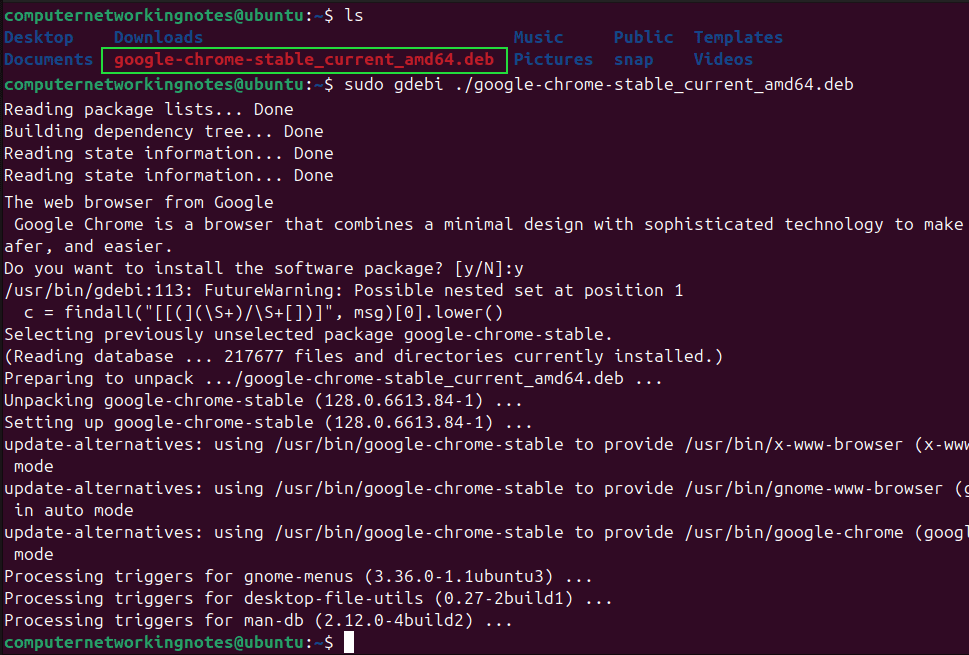
To install a package from the current directory, use ./ before the package file name. To install it from any other directory, specify the full file path. Download the Chrome package and run the following command to install Chrome from the current directory.
$sudo gdebi ./google-chrome-stable_current_amd64.deb
The GDebi GUI tool
The GDebi package manager also offers a GUI tool to install and remove packages. You can use it to perform a GUI-based installation of Chrome. The following command starts it.$sudo gdebi-gtk
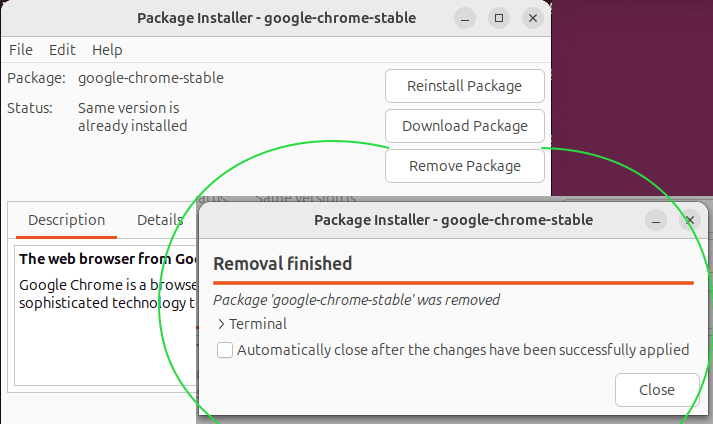
Open the package file and click Install Package to install Chrome on GUI.

The Remove button allows you to uninstall Chrome.
The Software Center
Software Center was part of the default installation in earlier versions. In recent versions, Ubuntu replaced it with the App Center. Software Center lets you install any package file directly from the right-click menu.
Download the Chrome Package file from the following webpage.
https://www.google.com/chrome/?platform=linux
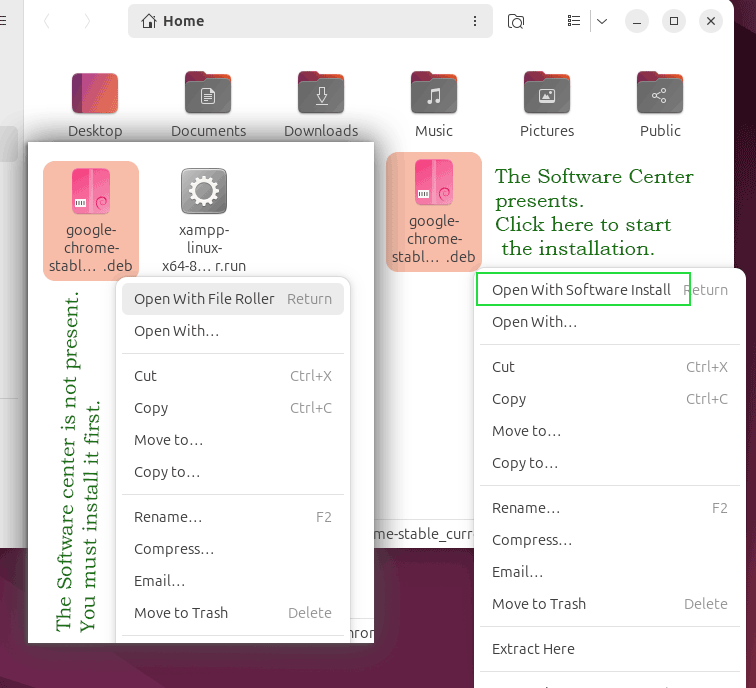
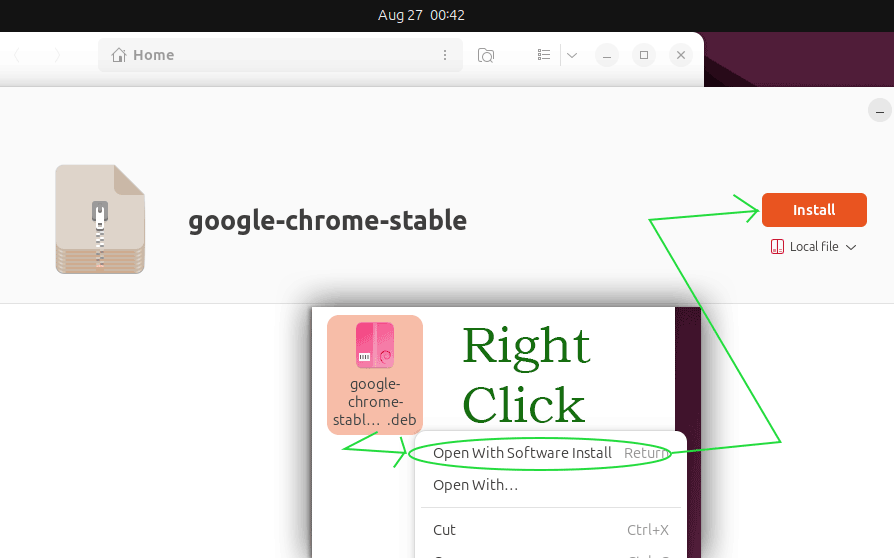
After downloading the package file, right-click it. If the right-click context menu displays the Open With Software Install or Install option, click it. If not, install the Software Center first.
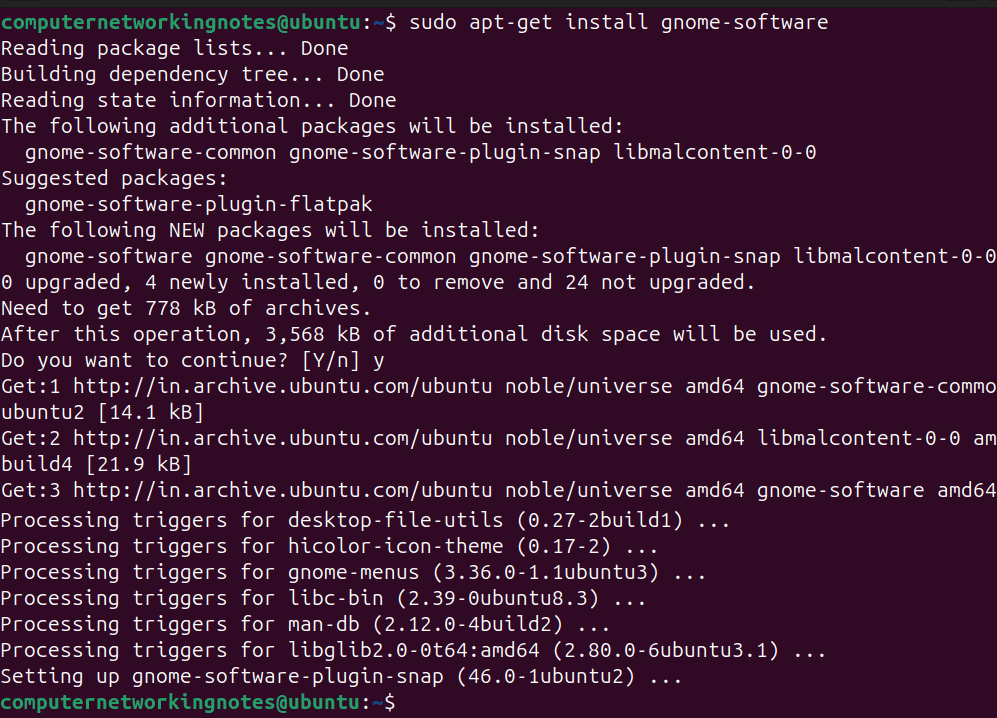
The gnome-software package provides the Software Center. The following command installs it.
$sudo apt-get install gnome-software
After installing the gnome-software package, right-click the Chrome package and click Open With Software Install. It opens Software Center. Click the Install button to install Chrome.
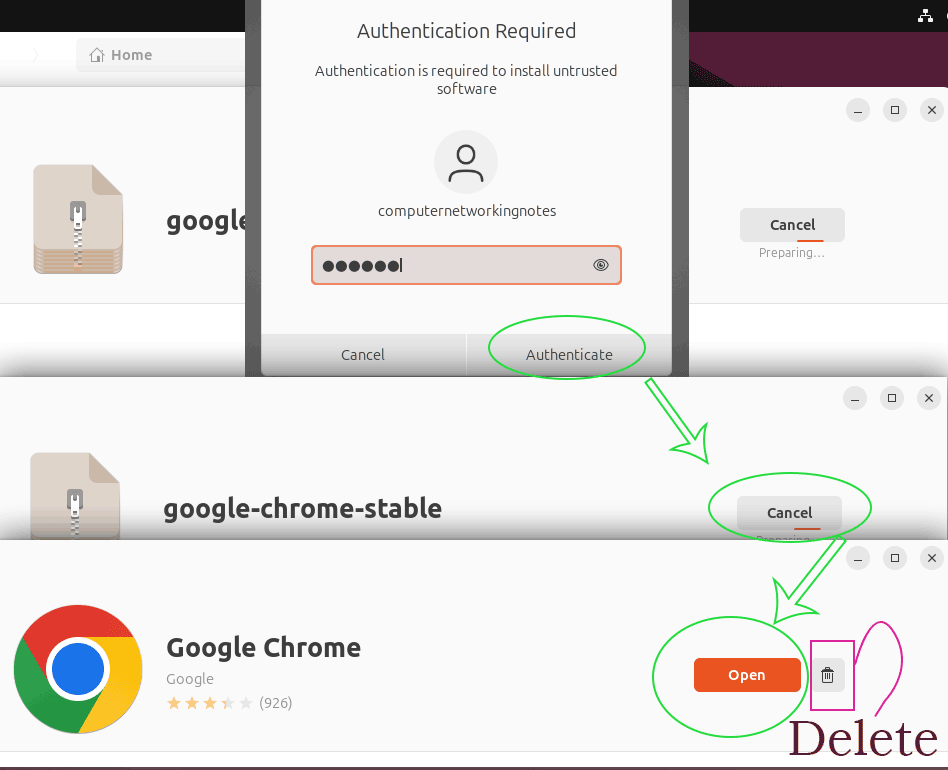
Type your login password to authenticate the installation.
The installation process takes a few seconds. After installing Chrome, the Software Center allows you to open it directly from its main screen to verify the installation. It also presents a Trash icon. You can use it to delete Chrome.
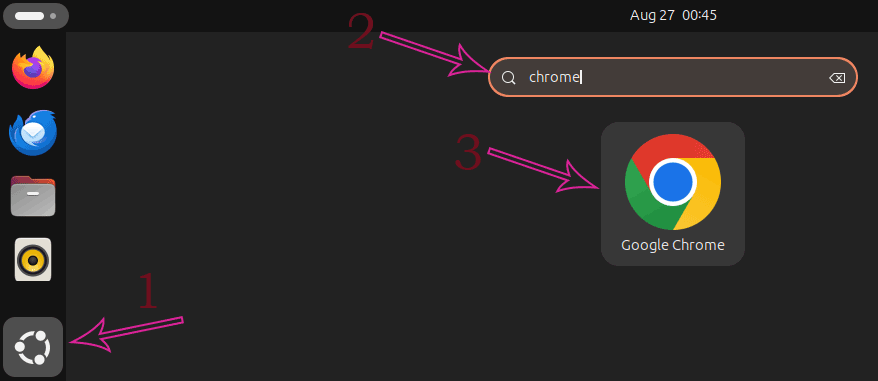
Starting/Running Chrome on GUI
Click Dash, search Chrome, and click the Chrome icon.
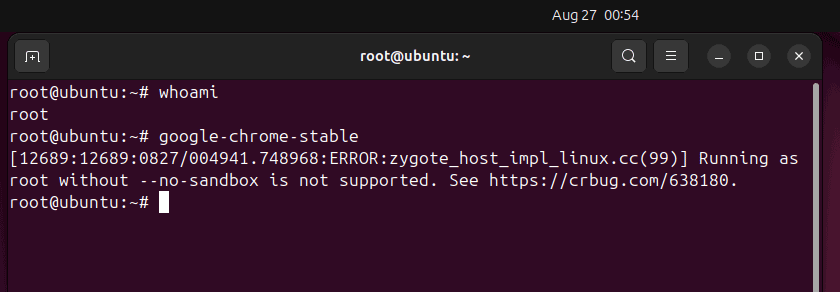
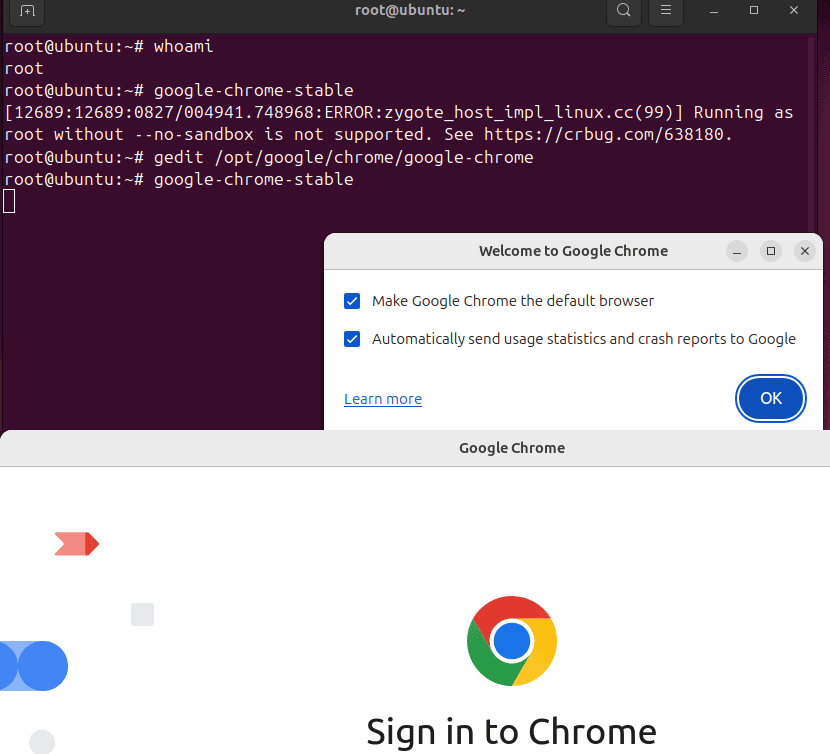
Running Chrome under the root account
By default, Chrome does not start under the root account. If you log in from the root account and start Chrome, it will return the following error.
ERROR:zygote_host_impl_linux.cc(89) Running as root without --no-sandbox is not supported. See https://crbug.com/638180.
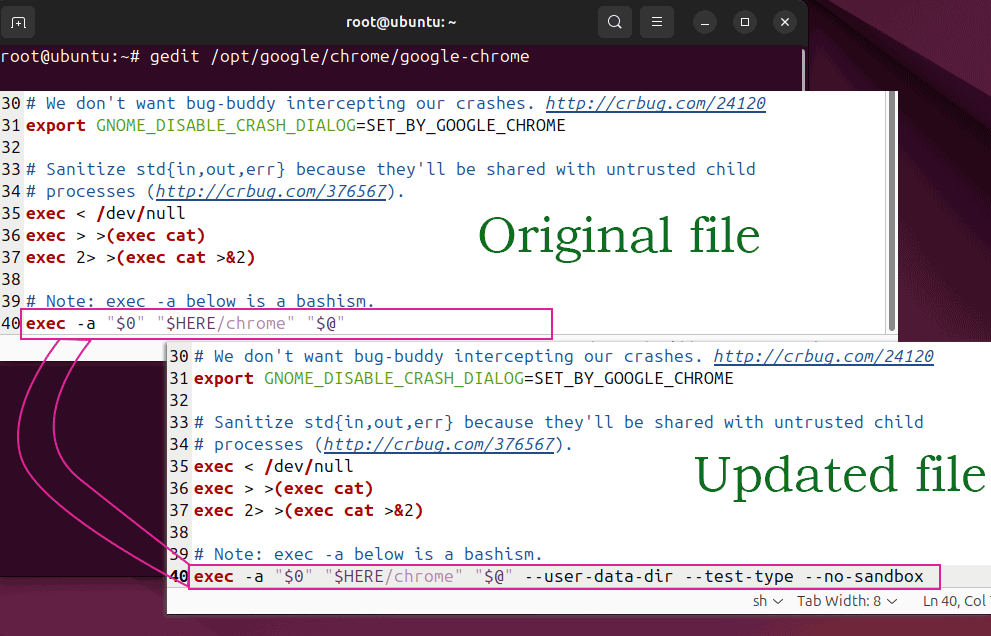
To fix this error, open the /opt/google/chrome/google-chrome file and locate the following configuration directive. By default, it is available at the end of the file.
exec -a "$0" "$HERE/chrome" "$@"
Append the above directive with the following configuration value and save the file.
--user-data-dir --test-type --no-sandbox
Start Chrome again to verify the fix.
Conclusion
Chrome is by far the most popular web browser. This tutorial explained how to install it on Ubuntu. It also explained the common errors you may face during the Chrome installation along with their best possible solutions.
Author Laxmi Goswami Updated on 2026-05-13