How to Configure Dynamic NAT on Cisco Routers
This tutorial provides a detailed explanation of Dynamic NAT configuration, including creating an access list for IP addresses requiring translation, establishing a pool of available IP addresses, mapping the access list to the pool, and defining the inside and outside interfaces.
Lab setup
Set up a practice lab as shown in the following image. You can use any network simulator software of your choice or real Cisco devices to set up this lab. The commands and configuration steps for creating, testing, and managing Dynamic NAT are the same on all platforms. This tutorial uses Packet Tracer and provides download links for the created lab with and without configurations.
Dynamic NAT Practice Lab with the initial IP configuration

This lab is optional and required only if you want to practice this topic. If you want to learn only commands and configuration steps, you can skip this section and go directly to the configuration section.
Initial IP configurations
The following table lists initial IP configurations for devices.
| Device / Interface | IP Address | Connected With |
| Laotop0 | 10.0.0.10/8 | Fa0/0 of R0 |
| Laptop1 | 10.0.0.20/8 | Fa0/0 of R0 |
| Laptop2 | 10.0.0.30/8 | Fa0/0 of R0 |
| Server0 | 192.168.1.10/24 | Fa0/0 of R1 |
| Serial 0/0/0 of R1 | 100.0.0.1/8 | Serial 0/0/0 of R2 |
| Serial 0/0/0 of R2 | 100.0.0.2/8 | Serial 0/0/0 of R2 |
Assigning IP addresses to end devices
Assigning IP addresses to end devices is straightforward on Packet Tracer. Click an end device in the first network, click Desktop, click IP configuration, select the Static option, and set the IP address as listed in the above table.

Follow the same steps to assign the IP address to the end device in the second network.

Assigning IP addresses to routers’ interfaces
Access the CLI prompt of the first router (R1).

Run the following commands to assign IP addresses and set the hostname.
Router>enable
Router#configure terminal
Router(config)#
Router(config)#hostname R1
R1(config)#interface FastEthernet0/0
R1(config-if)#ip address 10.0.0.1 255.0.0.0
R1(config-if)#no shutdown
R1(config-if)#exit
R1(config)#interface Serial0/0/0
R1(config-if)#ip address 100.0.0.1 255.0.0.0
R1(config-if)#clock rate 64000
R1(config-if)#bandwidth 64
R1(config-if)#no shutdown
R1(config-if)#exit
R1(config)#
Similarly, assign IP addresses and set the hostname on R2.
Router>enable
Router#configure terminal
Router(config)#hostname R2
R2(config)#interface FastEthernet0/0
R2(config-if)#ip address 192.168.1.1 255.255.255.0
R2(config-if)#no shutdown
R2(config-if)#exit
R2(config)#interface Serial0/0/0
R2(config-if)#ip address 100.0.0.2 255.0.0.0
R2(config-if)#no shutdown
R2(config-if)#exit
R2(config)#
The lab available at the above download link includes the IP configurations listed above. You need to assign these IP addresses only if you are setting up your own custom lab.
Dynamic NAT configuration
Dynamic NAT configuration requires four steps: -
- Creating an access list of IP addresses that need translation
- Creating a pool of all IP addresses that are available for translation
- Mapping the access list with the pool
- Defining inside and outside interfaces
Creating an access list of IP addresses that need translation
Create a standard access list that defines which inside local addresses are permitted to map with inside global addresses. The following global configuration mode command creates a standard numbered ACL.
Router(config)# access-list ACL_Identifier_number permit/deny matching-parameters
Router(config)#
It is the command prompt in Global configuration mode.
access-list
It is the command that creates access lists.
ACL_Identifier_number
It is a parameter. It specifies the type of access list. There are two types of access lists: standard and extended. Both lists have their own unique identifier numbers. Standard ACL uses a number range 1 to 99 and 1300 to 1999. You can pick any number from this range to give your ACL a unique identity. Routers use this number to group the conditions under a single ACL.
permit/deny
An ACL condition has two actions: permit and deny. If you use the permit keyword, ACL will allow all packets from the source address specified in the next parameter. If you use the deny keyword, ACL will drop all packets from the source address specified in the next parameter.
matching-parameters
This parameter allows you to specify the contents of the packet you want to match. In a standard ACL condition. It could be a single source address or a range of addresses. You have three options to specify the source address.
- Any
- host
- A.B.C.D
Any
The Any keyword matches all sources. Every packet compared against this condition would be matched.
Host
The Host keyword matches a specific host. To match a specific host, type the keyword host, then specify its IP address.
A.B.C.D
It matches a single address or a range of addresses. To match a single address, specify its address. To match a range of addresses, use the wildcard mask.
Wildcard mask
A wildcard mask is the inverse of the subnet mask. Similar to a subnet mask, a wildcard mask also creates boundaries in the IP address. A subnet mask separates the network address from the host address. A wildcard mask distinguishes the matching portion from the rest.
This lab contains three hosts in the first network. Create a standard ACL that allows two hosts and denies the remaining host.
R1(config)#access-list 1 permit 10.0.0.10 0.0.0.0
R1(config)#access-list 1 permit 10.0.0.20 0.0.0.0
R1(config)#access-list 1 deny any
Creating a pool of all IP addresses that are available for translation
The following command defines a pool of inside global addresses available for translation.
Router(config)#ip nat pool [Pool Name] [Start IP address] [End IP address] netmask [Subnet mask]
The above command accepts four options: pool name, start IP address, end IP address, and Subnet mask.
Pool Name:- This is the name of the pool. You can choose any descriptive name.
Start IP Address:- First IP address from the IP range that is available for translation.
End IP Address:- Last IP address from the IP range that is available for translation.
There is no minimum or maximum criteria for the IP range. For example, you can specify a single IP address or the entire range of IP addresses in a subnet.
Subnet Mask:- Subnet mask for the IP range.
The following command creates a pool named ccna that defines a range of two IP addresses: 50.0.0.1 and 50.0.0.2 .
R1(config)#ip nat pool ccna 50.0.0.1 50.0.0.2 netmask 255.0.0.0
Mapping the access list with the pool
The following command maps the access list with the pool and configures the dynamic NAT.
Router(config)#ip nat inside source list [access list name or number] pool [pool name]
This command accepts two options.
Access list name or number:- Name or number of the access list you created in the first step.
Pool Name:- Name of the pool you created in the second step.
In the first step, you created a standard access list with number 1. In the second step, you created a pool named ccna. To configure a dynamic NAT with these options, use the following command.
R1(config)#ip nat inside source list 1 pool ccna
Defining inside and outside interfaces
Define which interface is connected to the local network and which interface is connected to the global network.
The following command defines an inside local network.
Router(config-if)#ip nat inside
The following command defines an inside global network.
Router(config-if)#ip nat outside

Let’s implement all these commands together and configure the dynamic NAT.
Dynamic NAT configuration on R1
R1#configure terminal
R1(config)#access-list 1 permit 10.0.0.10 0.0.0.0
R1(config)#access-list 1 permit 10.0.0.20 0.0.0.0
R1(config)#access-list 1 deny any
R1(config)#ip nat pool ccna 50.0.0.1 50.0.0.2 netmask 255.0.0.0
R1(config)#ip nat inside source list 1 pool ccna
R1(config)#interface FastEthernet 0/0
R1(config-if)#ip nat inside
R1(config-if)#exit
R1(config)#interface Serial0/0/0
R1(config-if)#ip nat outside
R1(config-if)#exit
R1(config)#
For testing purposes, only two IP addresses are added to the Dynamic NAT access list. You can use the remaining address to verify that only addresses in the Dynamic NAT access list are translated.
Static NAT configuration on R2
If only one address is being translated, use Static NAT instead of Dynamic NAT. Static NAT configuration is explained in the previous part of this tutorial. It provides more consistent, faster translation than Dynamic NAT. The second router has only an address for translation. Use Static NAT on it.
R2#configure terminal
R2(config)#ip nat inside source static 192.168.1.10 200.0.0.10
R2(config)#interface Serial 0/0/0
R2(config-if)#ip nat outside
R2(config-if)#exit
R2(config)#interface FastEthernet 0/0
R2(config-if)#ip nat inside
R2(config-if)#exit
R2(config)#
This tutorial is part of the tutorial series "NAT (Network Address Translation) Concepts, Configurations, and Terminology Explained". Other parts of this series are the following.
Chapter 1 Basic Concepts of NAT Explained in Easy Language
Chapter 2 How to Configure Static NAT on Cisco Routers
Chapter 3 How to Configure Dynamic NAT on Cisco Routers
Chapter 4 Configure PAT on Cisco Routers with Examples
Configure routing
NAT only translates IP addresses. It does not provide routing. If networks are available on different routers, you must configure routing on all routers to enable communication between routers. The following command enables routing on R1.
R1(config)#ip route 200.0.0.0 255.255.255.0 100.0.0.2
The following command configures routing on R2.
R2(config)#ip route 50.0.0.0 255.0.0.0 100.0.0.1
Testing Dynamic NAT configuration
This lab has a Dynamic NAT configuration on R1 for 10.0.0.10 and 10.0.0.20, and a Static NAT configuration on R1 for 192.168.1.10.
| Device | Inside Local IP Address | Inside Global IP Address |
| Laptop0 | 10.0.0.10 | 50.0.0.1 |
| Laptop1 | 10.0.0.20 | 50.0.0.2 |
| Server | 192.168.1.10 | 200.0.0.10 |
To test this setup, click Laptop0 and Desktop and click Command Prompt.
- Run the ipconfig command.
- Run the ping 200.0.0.10 command.
- Run the ping 192.168.1.10 command.

The first command displays the host device's IP configuration.
The second command tests connectivity between the host and remote devices. It uses the remote device's translated IP address. Successful reply messages confirm that the remote device is accessible at the translated IP address.
The third command also tests connectivity between the host and remote devices. However, it uses the remote device's actual IP address. Error messages verify that the remote device is not accessible at the original IP address.
You can also extend this testing by accessing a service running on the remote host. In this network, the remote host is a server. A server on Packet Tracer has many enabled services. You can access any of these services for testing.
Open the web browser and access the web service running on the remote host. Use the translated IP address (200.0.0.10) for testing.

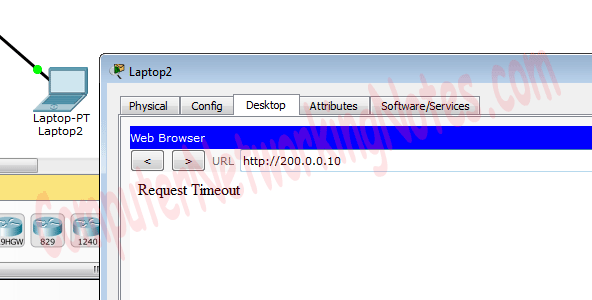
In the above configuration, you skipped the IP address of one end device from the translation. This host cannot access the remote host on the translated IP address. You can verify this by testing connectivity and accessing the web service from this end device.

Access the web server from this host.
The following link provides this with the above configuration.
Practice LAB with Dynamic NAT configuration
Viewing NAT translation on Routers
The show ip nat translation command displays NAT translation on the router.

The above command shows only translated IP addresses. If an IP address is filtered before translation, it will not appear in the output. To view filtered IP addresses, use the show ip access-lists command.
R1#show ip access-lists 1

The following image shows NAT translation on R2.

Conclusion
Dynamic NAT provides a flexible method for translating multiple private IP addresses to a pool of public addresses, making it ideal for networks where the number of private devices exceeds the available public IP addresses. By configuring access lists, address pools, and interface roles, you gain granular control over which devices are translated and how they are translated. This tutorial demonstrated how to set up and verify Dynamic NAT, test connectivity, and monitor NAT translations. Mastering these concepts will help ensure efficient and secure network address management in real-world scenarios.
Author Laxmi Goswami Updated on 2026-04-09